Cut crease ➕Red lips 💋❤️ [ESP-ENG]
Hola Hivers! Bienvenidos. / Hello Hivers! Welcome.
Holaaa chicos, feliz fin de semana. Espero hayan tenido una excelente semana y se encuentren muy bien hoy sábado. El día de hoy les traigo esta propuesta sencilla de cut crease abierto acompañado de un lindo tono rojo en los labios. ¿Qué tal?
Hello guys, happy weekend. I hope you had a great week and you are feeling great today, Saturday. Today I bring you this simple proposal of open cut crease with a nice red tone on the lips. How about it?

PASOS
STEPS
Paso 1 📌
Prepararemos el parpado aplicando corrector y difuminandolo muy bien con una brochita plana.
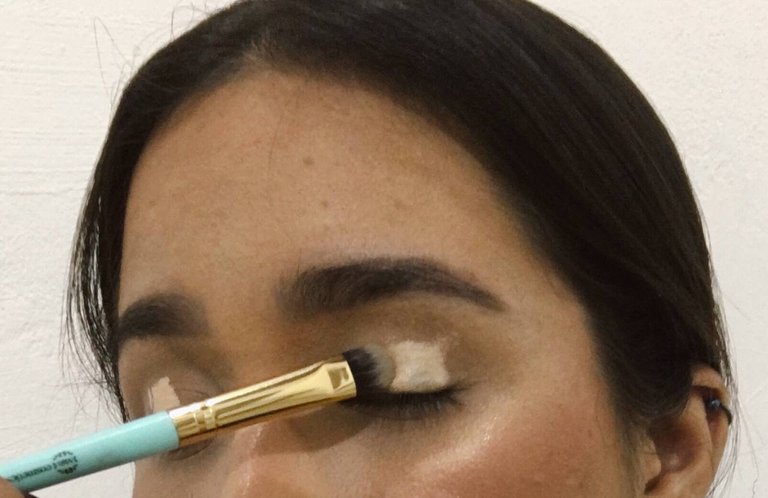
Step 1 📌
Prepare the eyelid by applying concealer and blending it well with a flat brush.
Paso 2 📌
Con una brochita pequeña aplicaremos un tono marrón oscuro sobre la línea del pliegue realizando una línea fina y buscando la forma curva, el trazo debe terminar en dirección hacía la ceja.
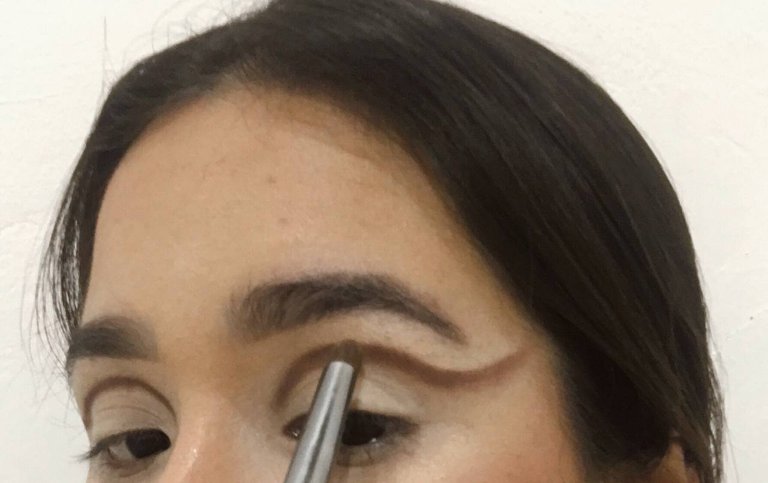
Step 2 📌 With a small brush we will apply a dark brown tone on the crease line making a thin line and looking for the curved shape, the line should end in the direction of the eyebrow.
Paso 3 📌
Luego, difuminaremos esta línea con la misma brochita pequeña de difuminar y usando un tono marrón más claro.
Step 3 📌
Next, we will blend this line with the same small blending brush using a lighter shade of brown.
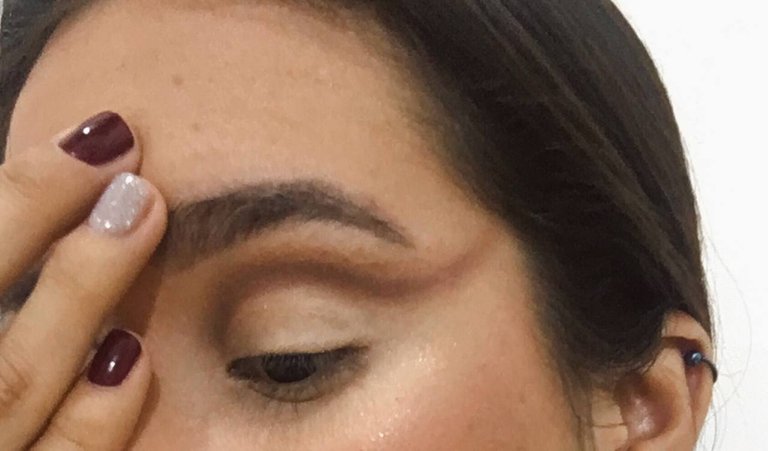
Paso 4 📌
Con hisopo, limpiaremos el exceso de sombra y dejaremos la zona limpia para luego realizar el corte. (Un truco que les puedo dar es que aprovechen que la zona esta libre de corrector y si desean marcar más la línea curva pueden aplicar el mismo tono marrón oscuro)
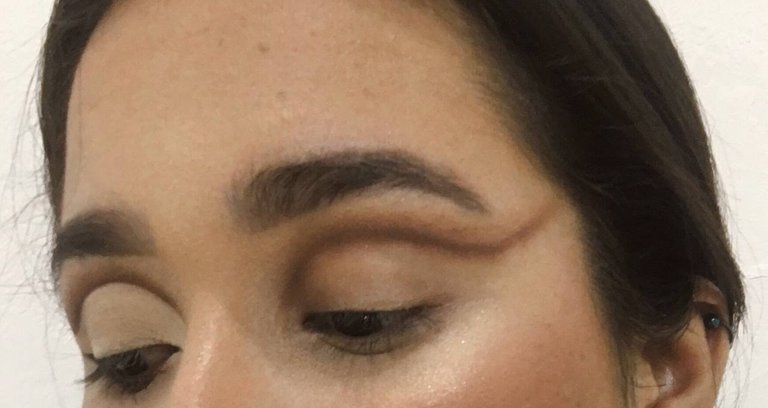
Step 4 📌 With a cotton swab, we will clean the excess shadow and leave the area clean and then make the cut. (A trick I can give you is to take advantage that the area is free of concealer and if you want to mark more curved line can apply the same dark brown tone).
Paso 5 📌
Con corrector y una brochita plana haremos el corte y daremos forma a nuestro cut crease. Difuminamos muy bien y procedemos a aplicar una sombra en tono beige.
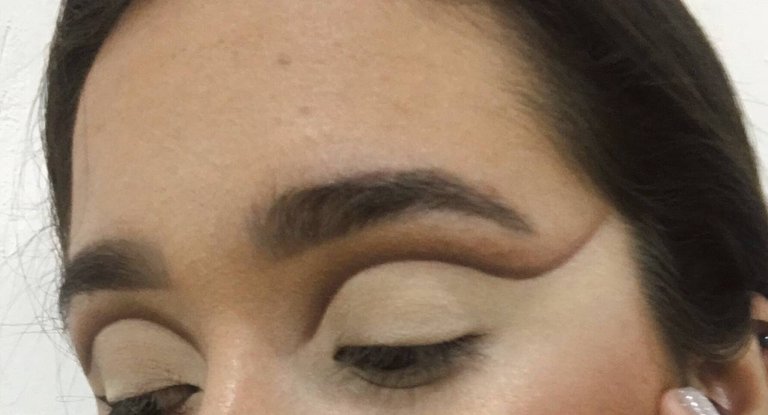
Step 5 📌
With concealer and a flat brush we will make the cut and shape our cut crease. Blend very well and proceed to apply a beige shadow.
Paso 6 📌
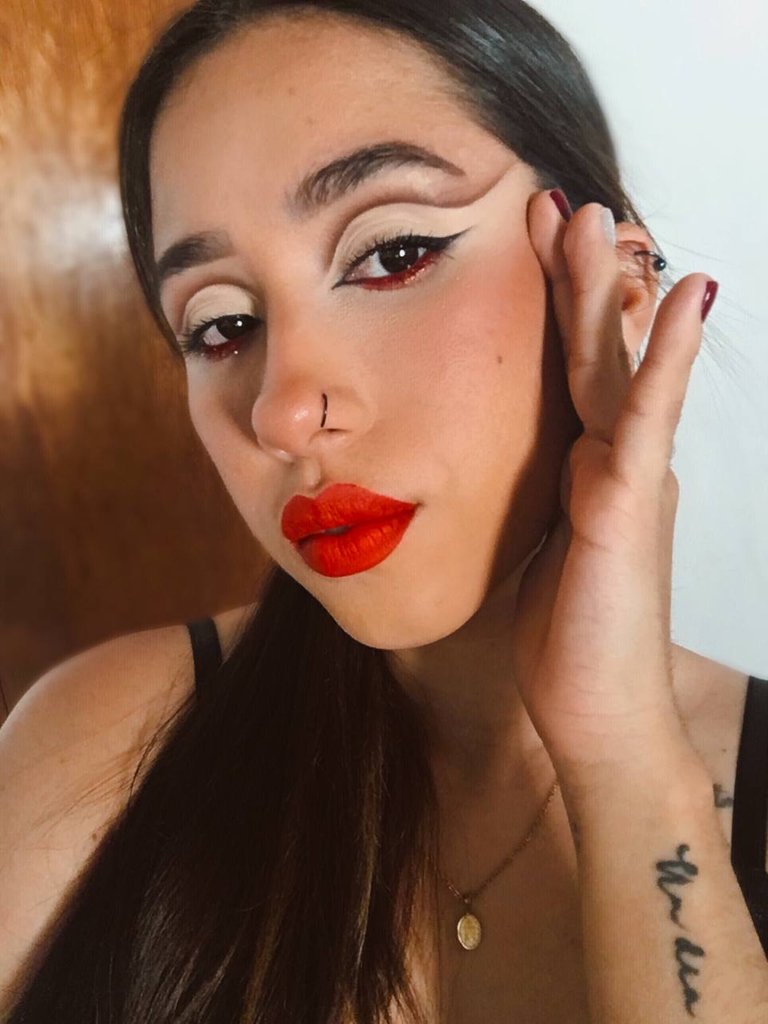
Con un delineador de punta fina haremos nuestro delineado foxy empezando desde la parte externa del parpado inferior y difuminamos con una sombra en tono negro. Aplicamos labial liquido rojo en el parpado inferior y sellamos con una sombra roja con glitter. Aplicamos pestañina y LISTO!
Step 6 📌 With a fine tip eyeliner we will make our foxy eyeliner starting from the outer part of the lower eyelid and blend with a black shadow. Apply red liquid lipstick on the lower eyelid and seal with a red glitter shadow. Apply eyelashes and that's it!
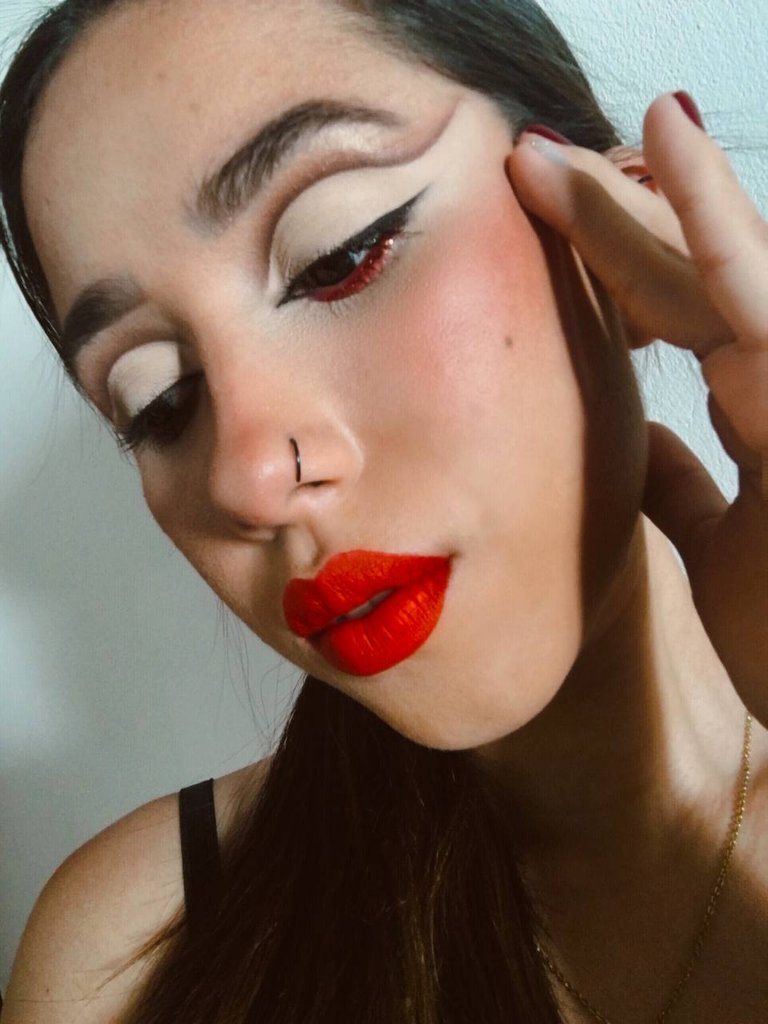
No olvides acompañar este sencillo y hermoso maquillaje con unos labios rojos ¿te animas?. Si eres más del team tonos suaves puedes lucirlo con un labial nude.
Don't forget to pair this simple and beautiful make-up with red lips, are you up for it? If you are more of a soft tone team you can wear it with a nude lipstick.
Este es el resultado de nuestro maquillaje. Estoy segura que hubiese quedado mil veces más lindo con pestañas postizas, pero lastimosamente en el momento no contaba con unas. Si estas ubicad@ en la Isla de margarita y sabes de un lugar donde pueda conseguir unas buenas pestañas te agradecería el dato 📝❤️ Gracias por llegar hasta aquí chicos, espero les haya gustado y se animen a realizarlo. Buenas vibras para todos. Un abrazo gigante!!!
This is the result of our makeup. I'm sure it would have been a thousand times prettier with false eyelashes, but unfortunately at the time I didn't have any. If you are located on the island of Margarita and you know of a place where I can get some good eyelashes I would appreciate the information 📝❤️ Thanks for coming here guys, I hope you liked it and are encouraged to do it. Good vibes to everyone. A giant hug!!!
Separador de texto | Text separator: Separadores de texto para blog
Texto traducido en | Text translated in: Deepl
Imagenes tomadas por mi | Images taken by me
Congratulations @bluevibes! You have completed the following achievement on the Hive blockchain and have been rewarded with new badge(s):
Your next payout target is 50 HP.
The unit is Hive Power equivalent because post and comment rewards can be split into HP and HBD
You can view your badges on your board and compare yourself to others in the Ranking
If you no longer want to receive notifications, reply to this comment with the word
STOPTo support your work, I also upvoted your post!
Check out the last post from @hivebuzz:
Support the HiveBuzz project. Vote for our proposal!