[ESP-ENG] Elaborando un porta toallas sanitarias. | Making a sanitary napkin holder.
Good evening Hive family, this time I am going to show you how to make a sanitary towel holder, for us ladies this towel holder is very useful, we can place it in the room or in the bathroom and thus have your sanitary towels organized when it's time to use them. Here I leave the elaboration, it is very simple to make.
Español:
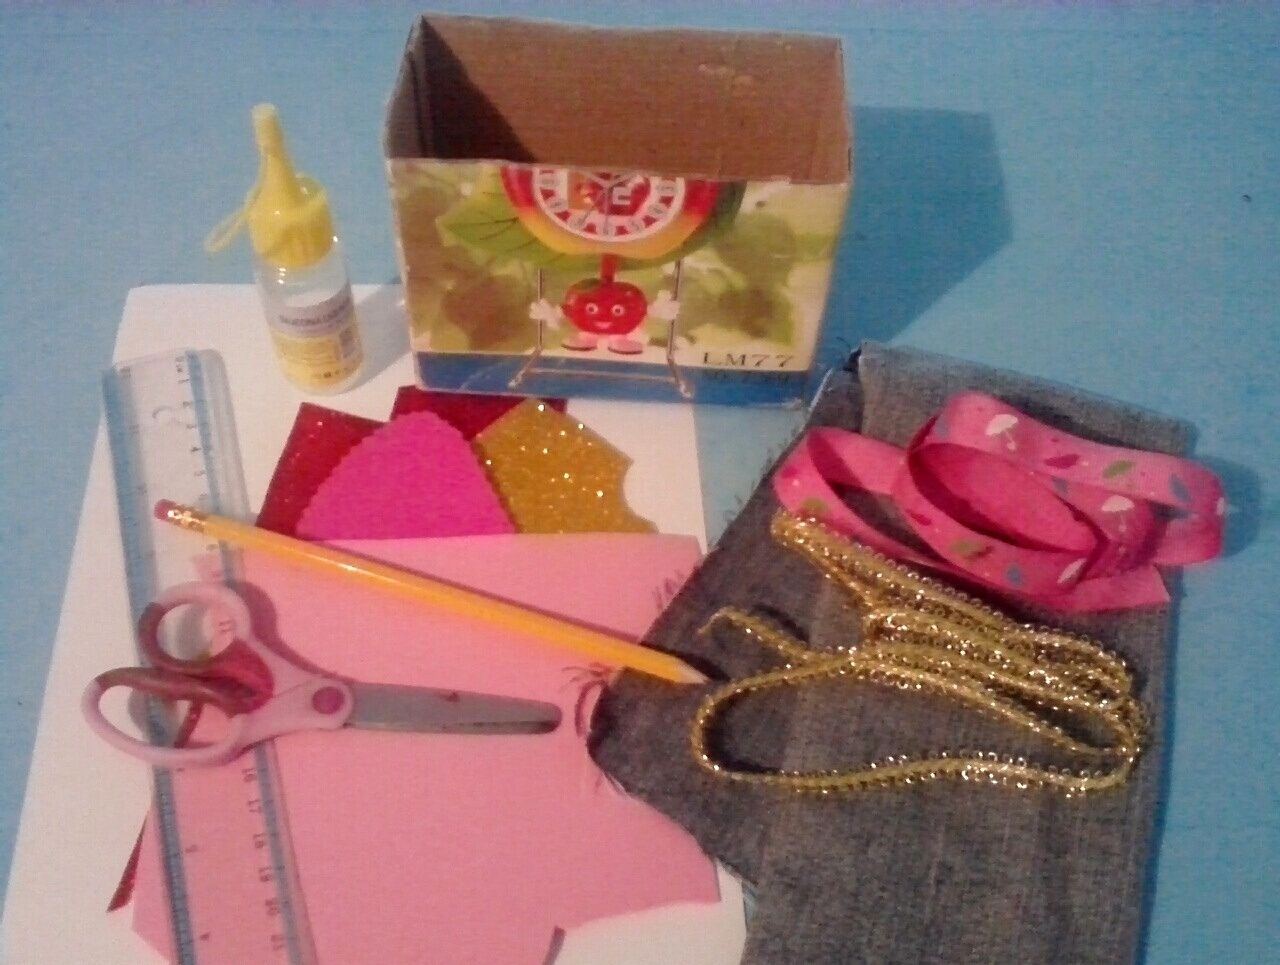
Materiales:
- (1) caja de cartón pequeña de 10 cm de altura.
- (1) retazo de tela de jean.
- (1) cinta estampada de color rosado.
- (1) cinta decorativa dorada.
- Foami rojo, amarillo, rosado y fucsia.
- (1) cartulina blanca.
- Silicon.
- Regla.
- Tijera.
- Lápiz.
English:
Materials:
- (1) small cardboard box 10 cm high.
- (1) piece of denim fabric.
- (1) pink printed ribbon.
- (1) gold decorative ribbon.
- Red, yellow, pink and fuchsia foami.
- (1) white cardboard.
- Silicon.
- Ruler.
- Scissors.
- Pencil.

Español:
Paso: 1
- Marcamos y recortamos el retazo de tela, teniendo en cuenta el tamaño de la caja, luego procedemos a pegar la tela por todo el alrededor de la caja con el silicon, dejando 2 cm en la parte superior y 3 cm en la parte inferior de la caja, para después hacerle un dobles y pegarla hacia dentro.
English:
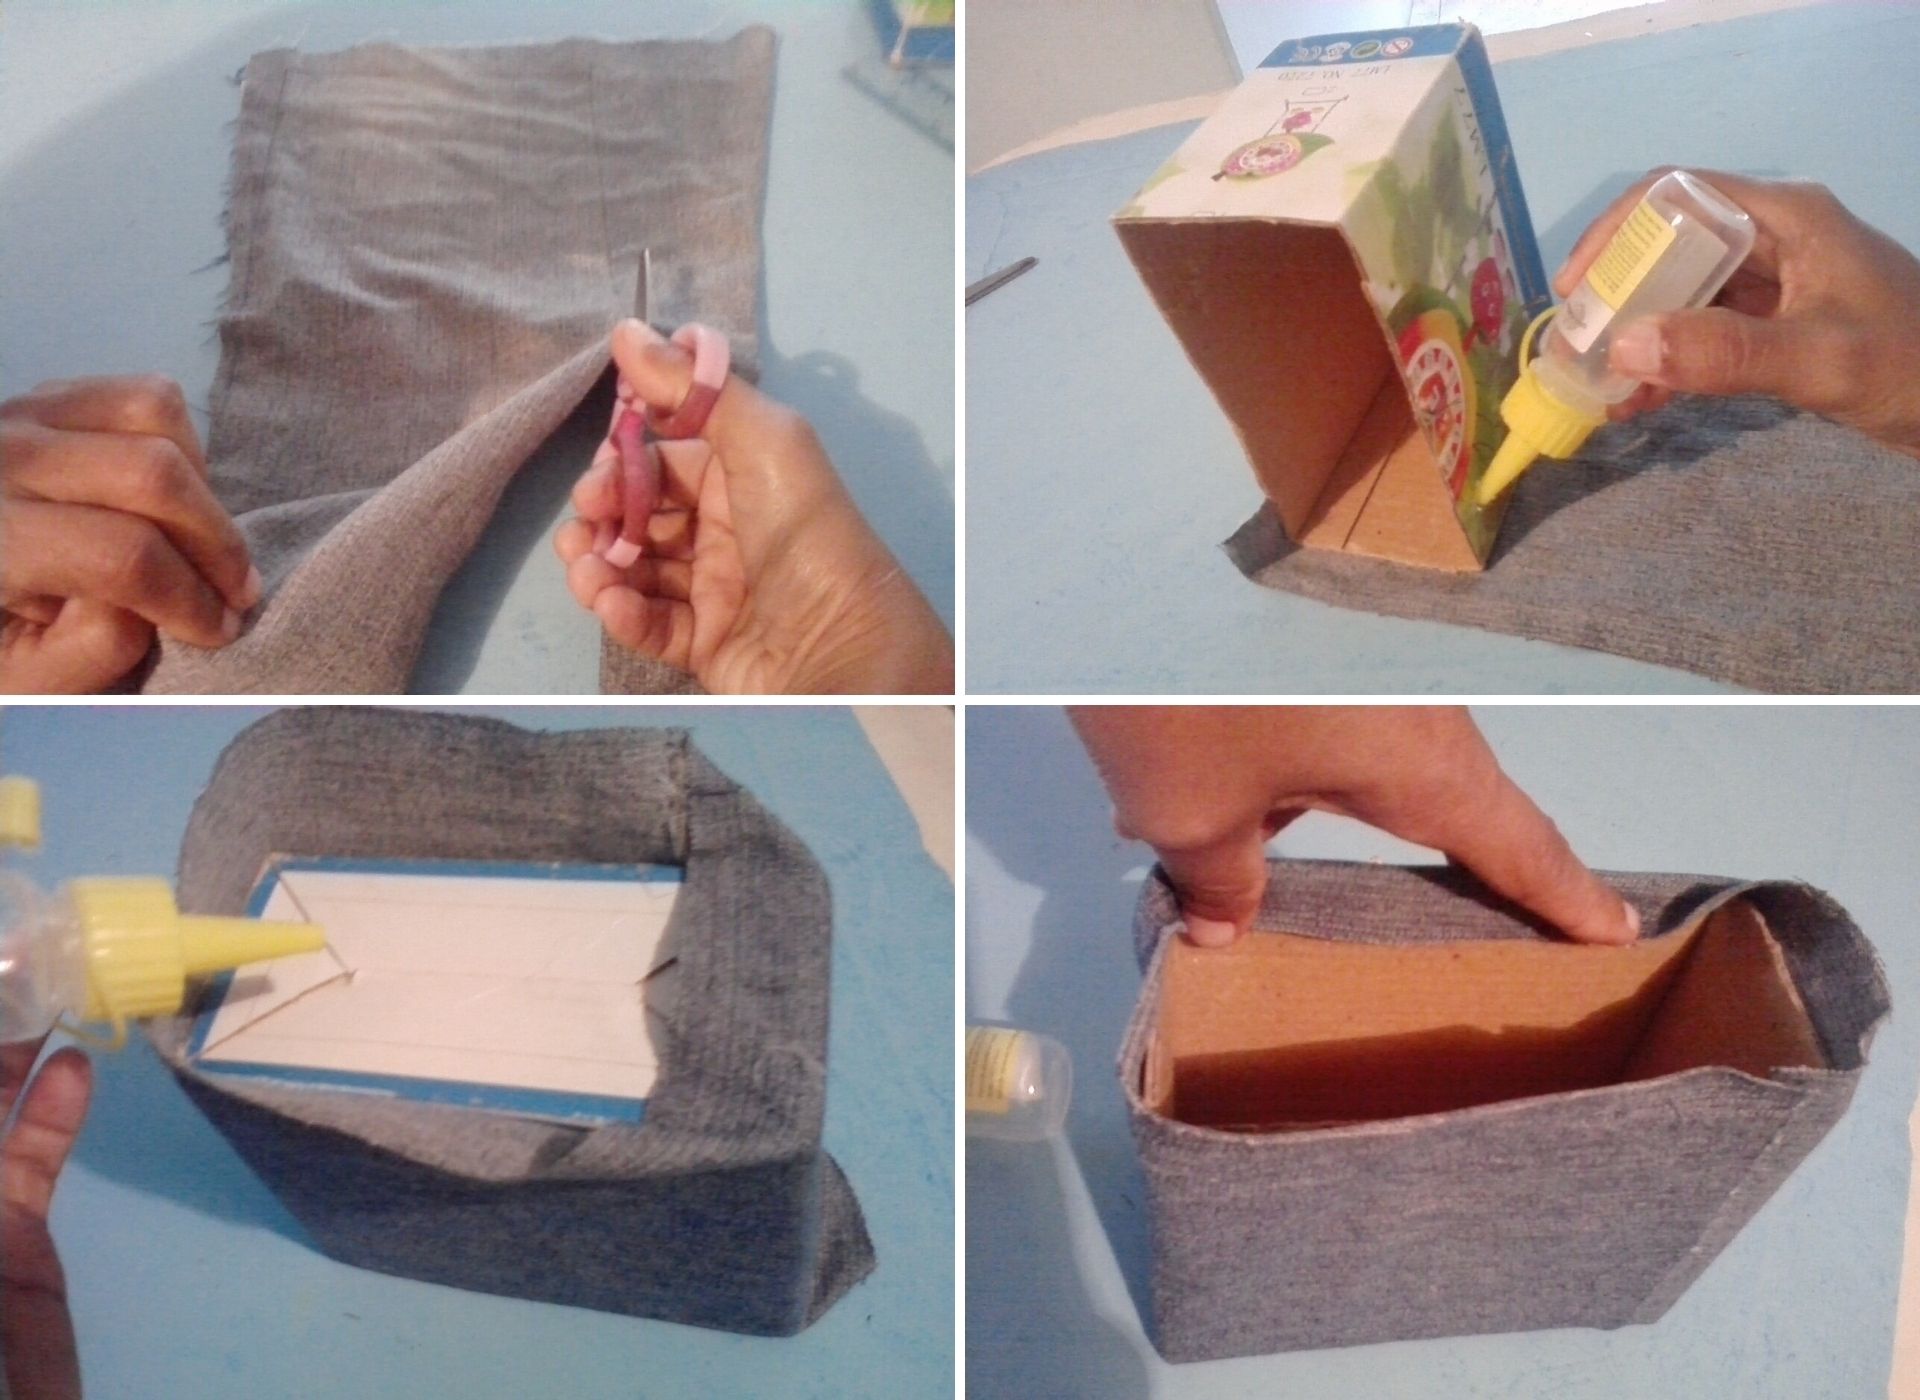
Step: 1
- We mark and cut the piece of fabric, taking into account the size of the box, then we proceed to glue the fabric all around the box with the silicone, leaving 2 cm at the top and 3 cm at the bottom of the box, and then make a double and glue it inside.
Español:
Paso: 2
- Seguidamente marcamos y recortamos la cartulina, para forrar la caja por dentro, después dibujamos en el foami varios corazones y flores para decorar nuestra caja.
English:
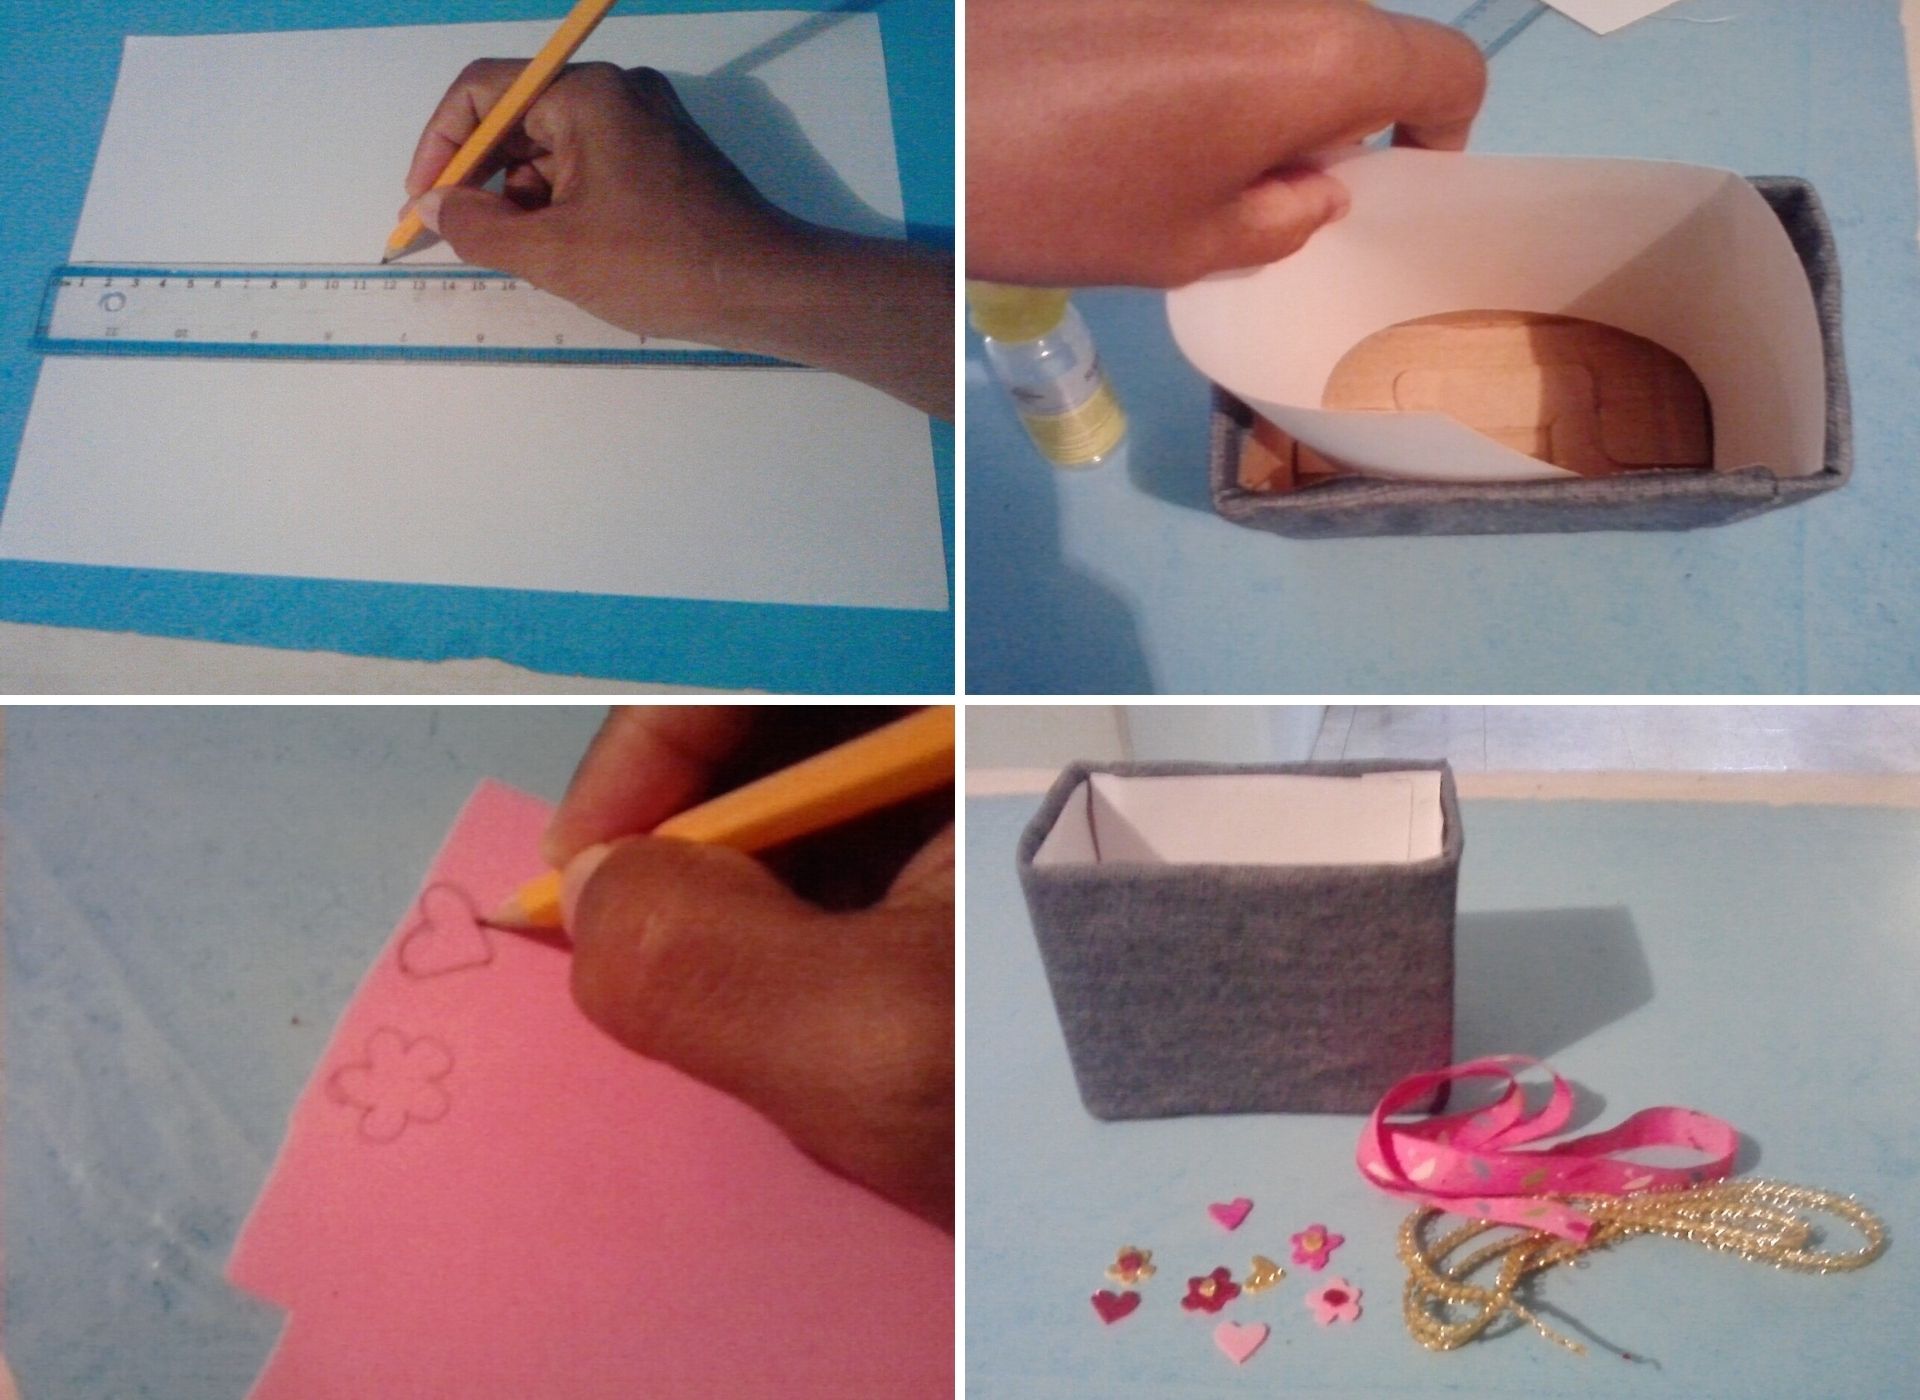
Step: 2
- Then we mark and cut out the cardboard to line the inside of the box, then we draw on the foami several hearts and flowers to decorate our box.
Español:
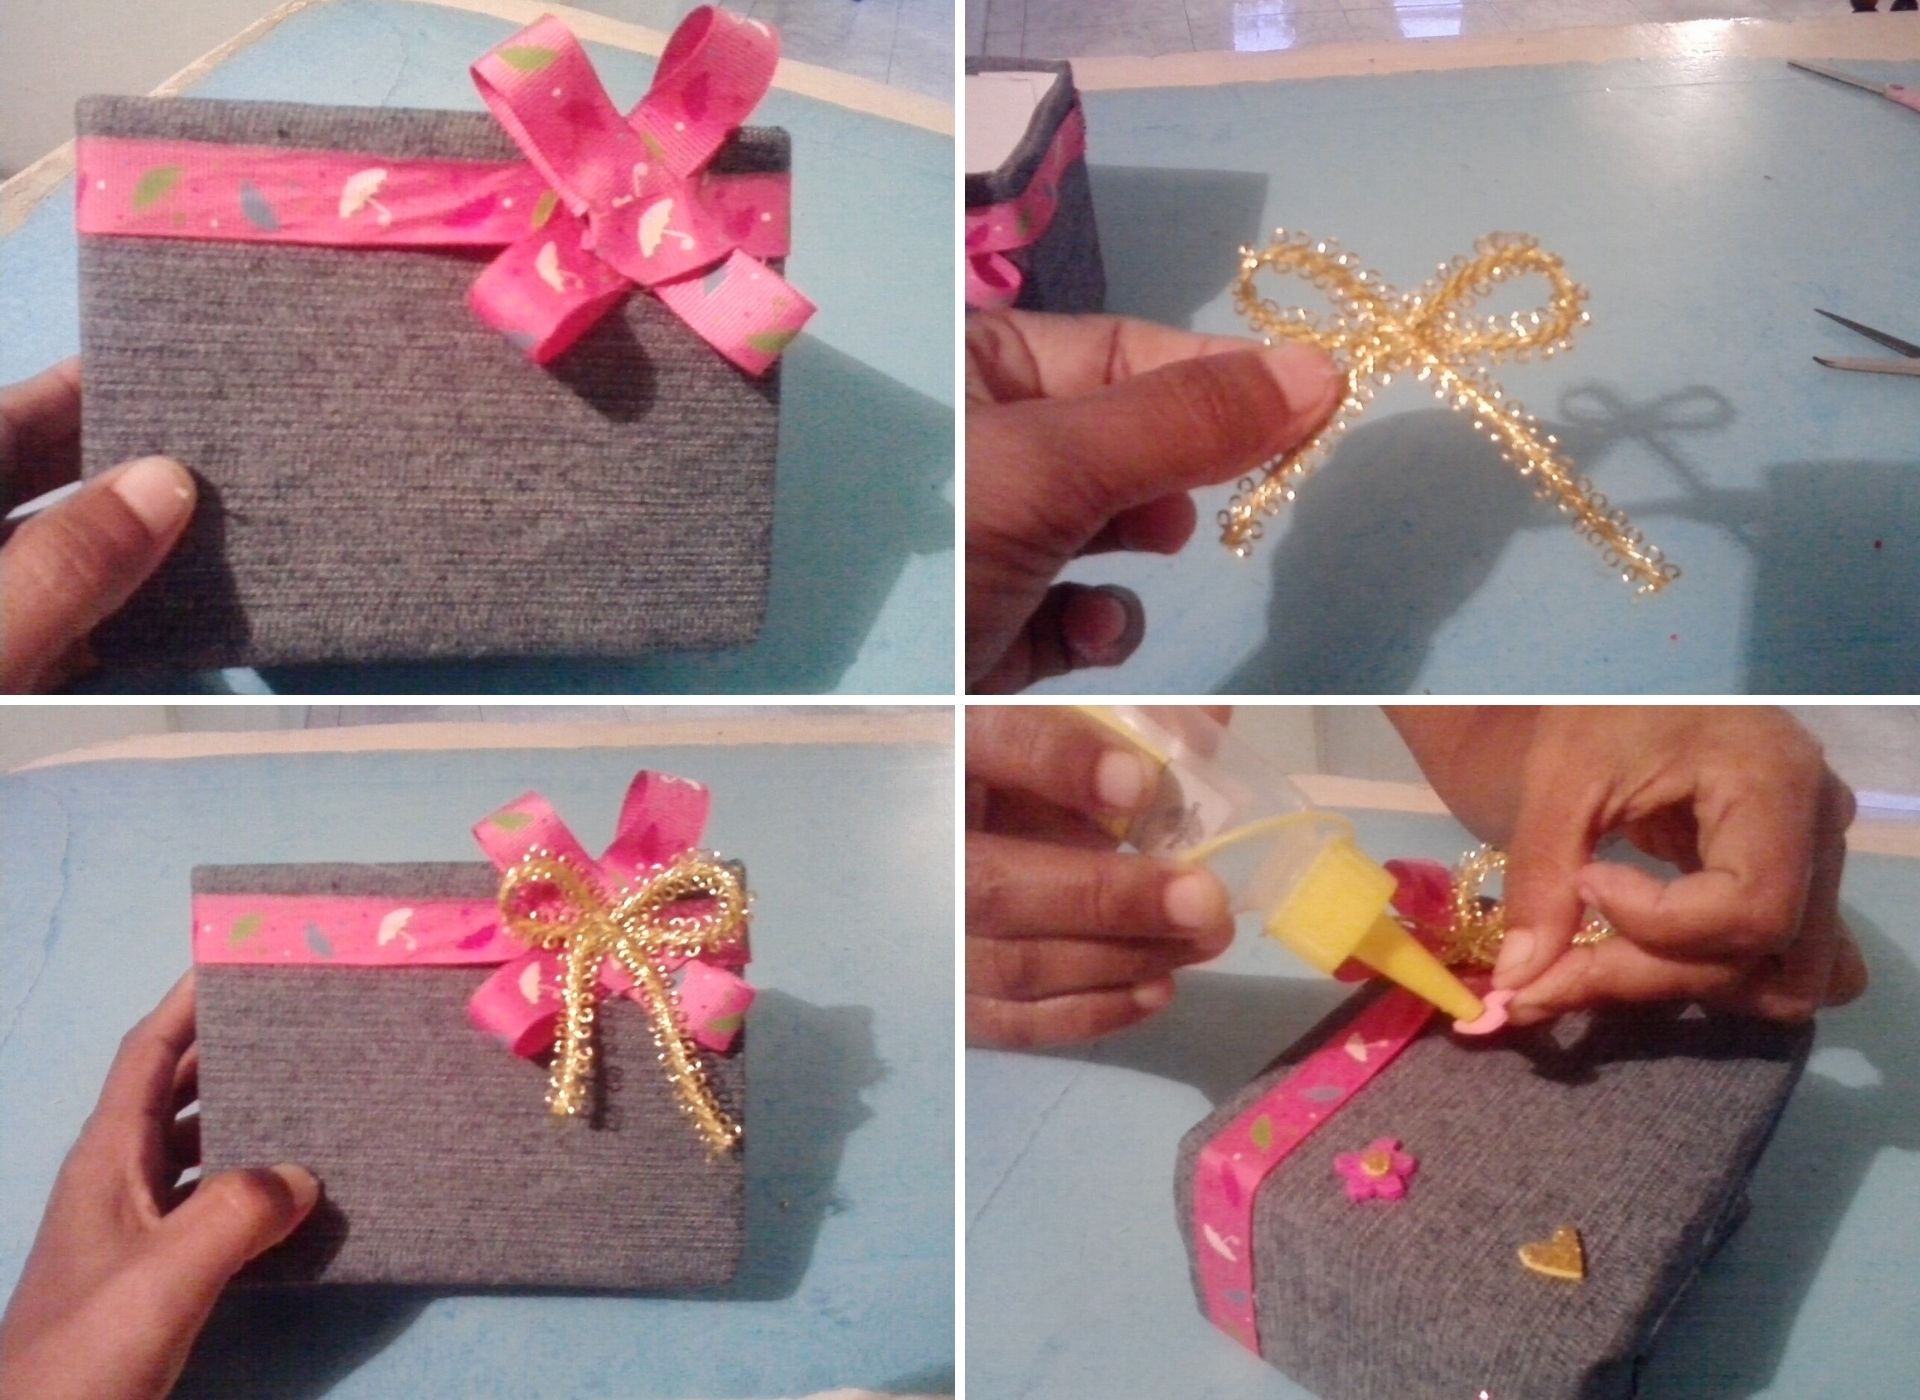
Paso: 3
- Ahora continuamos con la decoración, pegamos la cinta rosada, por el borde de la caja haciéndole un lazo, después con la cinta dorada se hace un lazo mas pequeño y se pega encima del lazo rosado, y terminamos pegando las flores y los corazones.
English:
Step: 3
- Now we continue with the decoration, we glue the pink ribbon around the edge of the box making a bow, then with the golden ribbon we make a smaller bow and glue it on top of the pink ribbon, and we finish by gluing the flowers and the hearts.
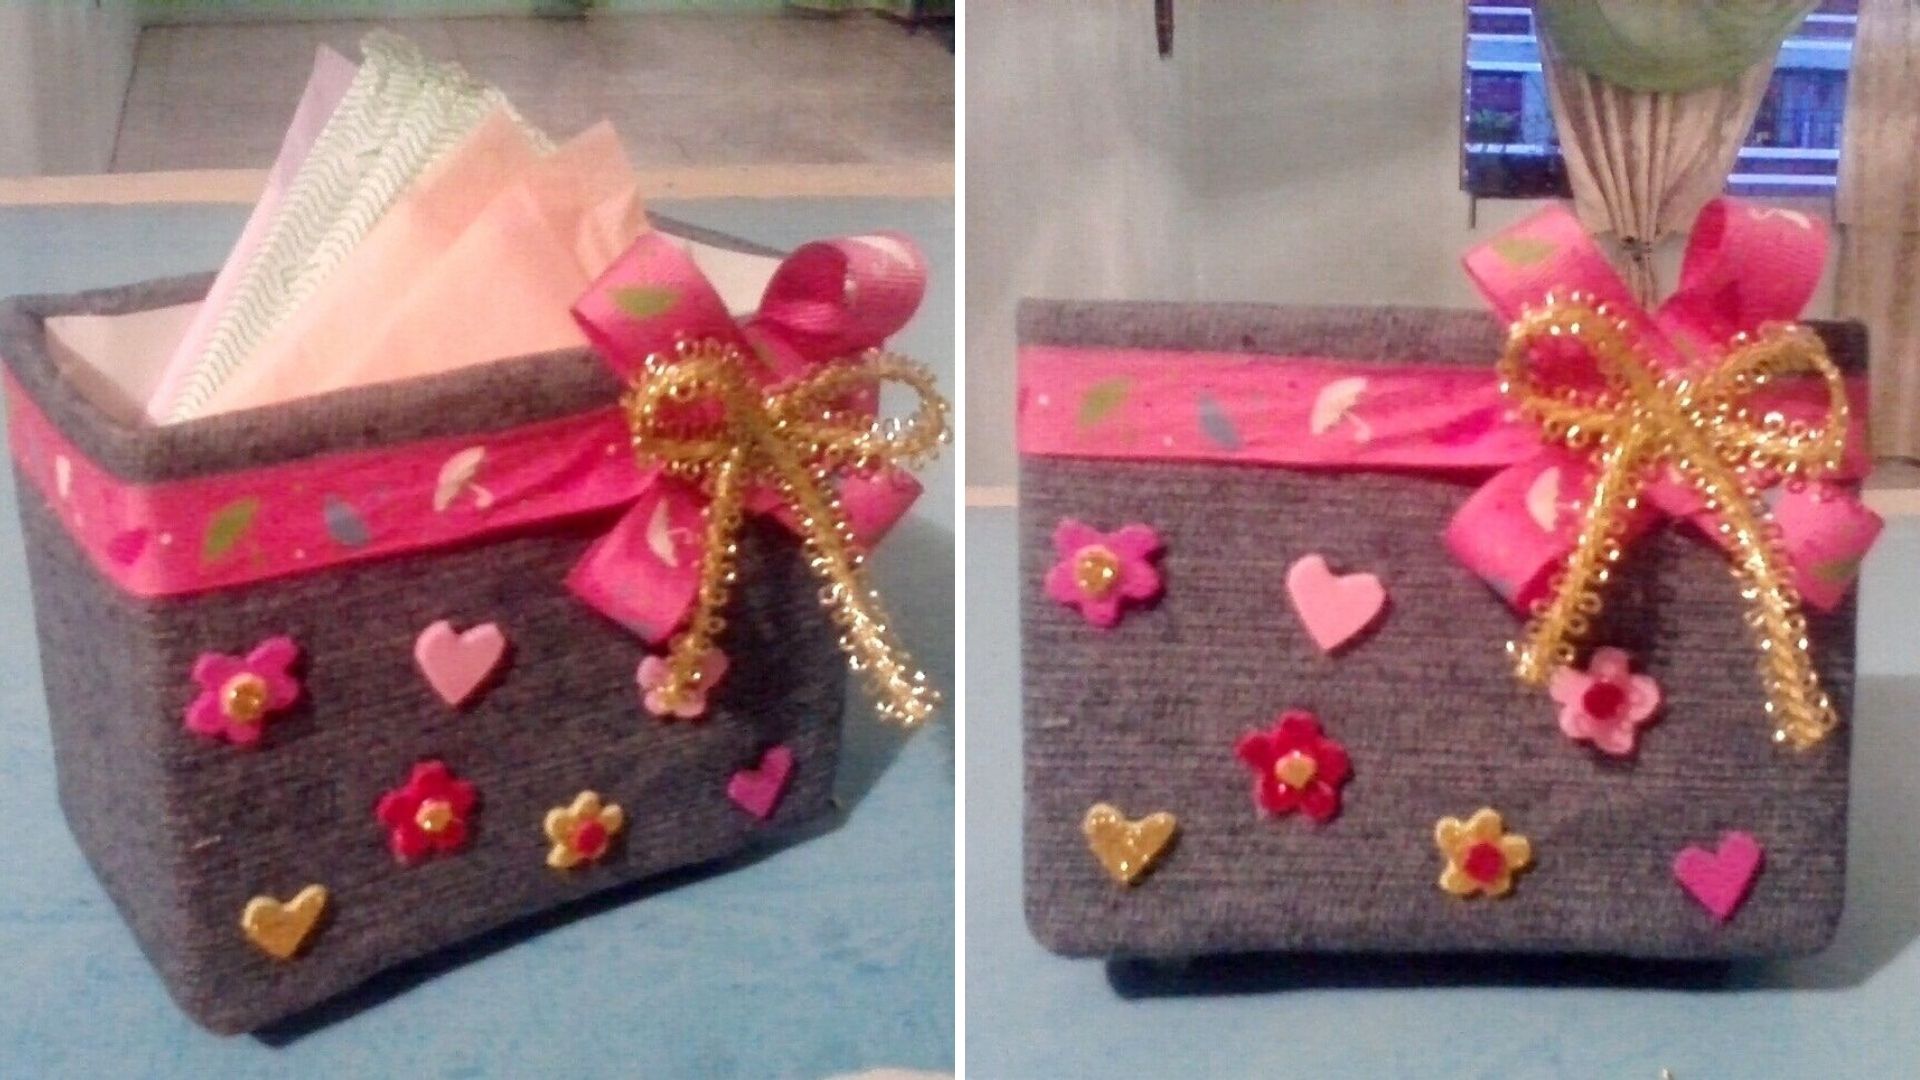
Este es el resultado final.
This is the final result.
.jpg)
.jpg)
.jpg)
.jpg)
.jpg)
Todas las fotos son de mi autoria y editadas con Canva.
All photos are my own and edited with Canva.

All photos are my own and edited with Canva.
0
0
0.000
Congratulations @coromoto20! You have completed the following achievement on the Hive blockchain and have been rewarded with new badge(s) :
Your next target is to reach 300 upvotes.
You can view your badges on your board and compare yourself to others in the Ranking
If you no longer want to receive notifications, reply to this comment with the word
STOPTienes buenas y lindas ideas. Te felicito por tu blog.
Que tengas un bello día ☕️
Un abrazo virtual ♥
Gracias por tu buen comentario, saludos y bendiciones.