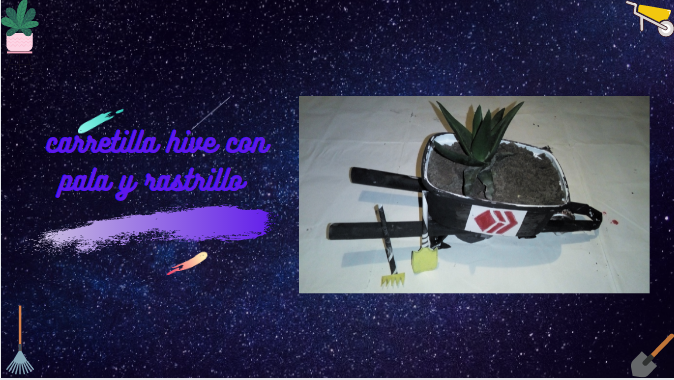
[ESP-ENG] Mi Carretilla Hive - My Hive Trolley
A cordial greeting to my dear Hive family, today I present my Hive matero made with recyclable materials, remember that recycling is caring for the environment, I hope you like it.

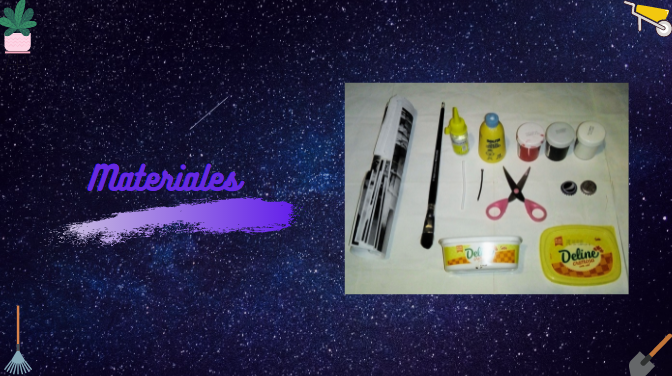
Materiales:
-Revista vieja
-Pincel
-Pega blanca
-Silicon
-Tijeras
-Clavo
-2 Chapas de gaseosas
-Embace de mantequilla con su tapa
-Palo de chupeta
-Pintura al frio roja, blanca y negra
Materials:
-Old magazine
-Brush
-White glue
-Silicon
-Scissors
-Nail
-2 Soda pop caps
-Butter container with lid
-Lollipop stick
Red, white and black cold paint -Red, white and black paint
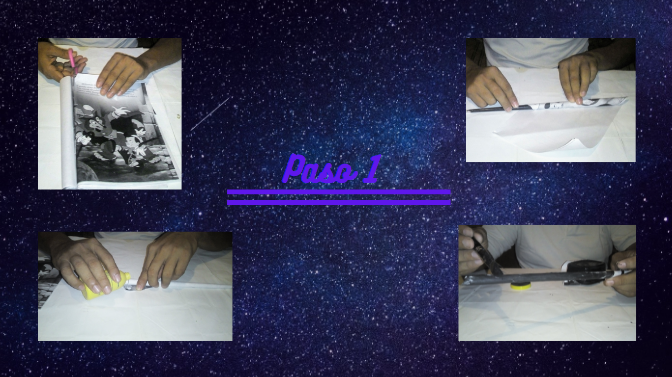
Paso 1: cortamos 3 hojas de revista, luego con la ayuda del pincel enrollamos la hoja de revista hasta lograr la forma de un tubo, luego pegamos la punta de la hoja para que no se desarme, luego procedemos a pintarla de color negro.
Step 1: we cut 3 magazine sheets, then with the help of the brush we roll the magazine sheet until we get the shape of a tube, then we glue the tip of the sheet so that it does not fall apart, then we proceed to paint it black.
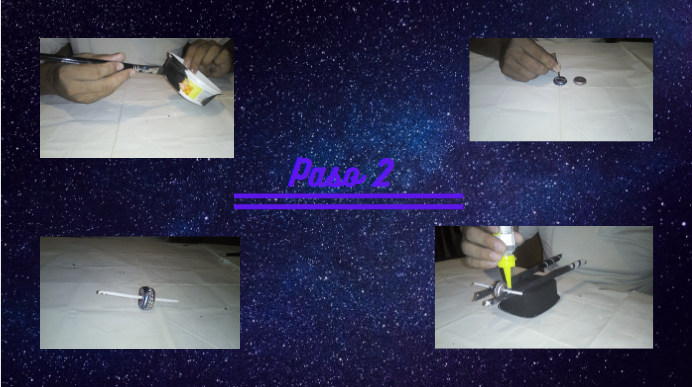
Paso 2: Pintamos el embace de mantequilla, luego perforamos las 2 chapas, luego procedemos a pegar las 2 chapas y introducimos el palo de chupeta, luego pegamos los tubos de papel en el embace de mantequilla y luego la rueda.
Step 2: We paint the butter pack, then we perforate the 2 plates, then we glue the 2 plates We proceed to glue the 2 plates and insert the lollipop stick, then we glue the paper tubes on the butter package and then the wheel.
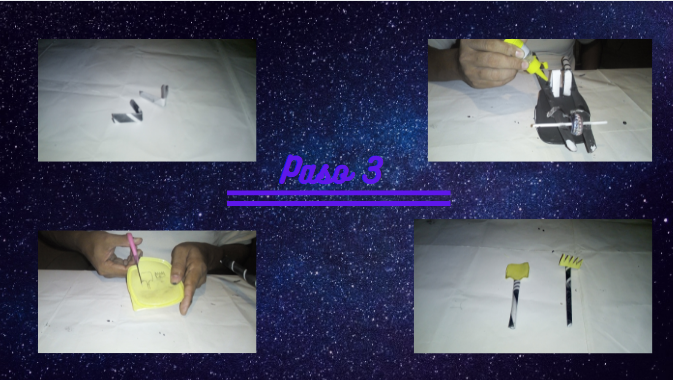
Paso 3: Se corta el tubo de papel en 2 pedazos para hacer las patas, luego pegamos las patas, luego diseñamos la pala y el rastrillo, luego pegamos los 2 tubos de papel en la pala y el rastrillo.
Step 3: Cut the paper tube into 2 pieces to make the legs, then glue the legs, then design the shovel and rake, then glue the 2 paper tubes on the shovel and rake.
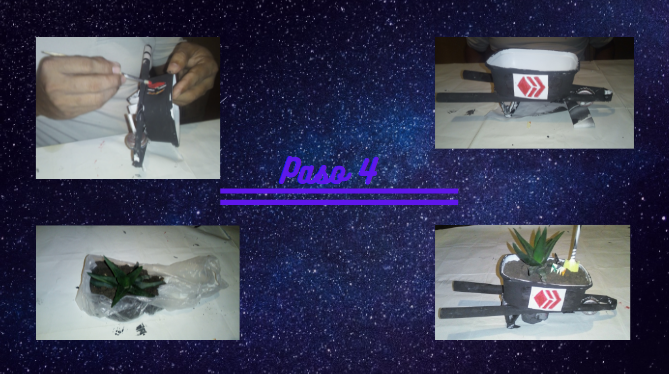
Paso 4: Pintamos y pegamos el logo Hive, luego pintamos las patas de la carretilla y luego colocamos la tierra, la planta, la pala y el rastrillo dentro de la carretilla.
Step 4: We painted and glued the Hive logo, then painted the legs of the wheelbarrow and then placed the soil, plant, shovel and rake inside the wheelbarrow.
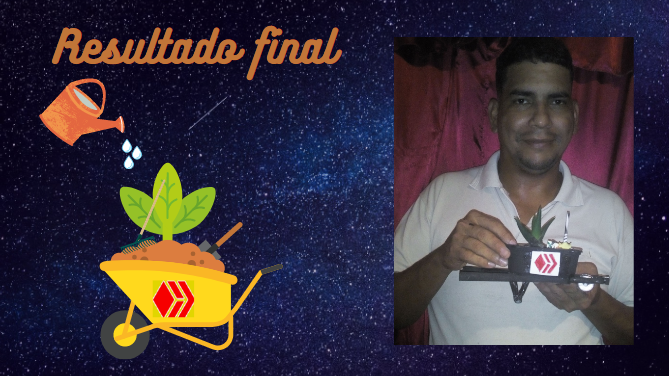
This is my final result, I hope you liked it.