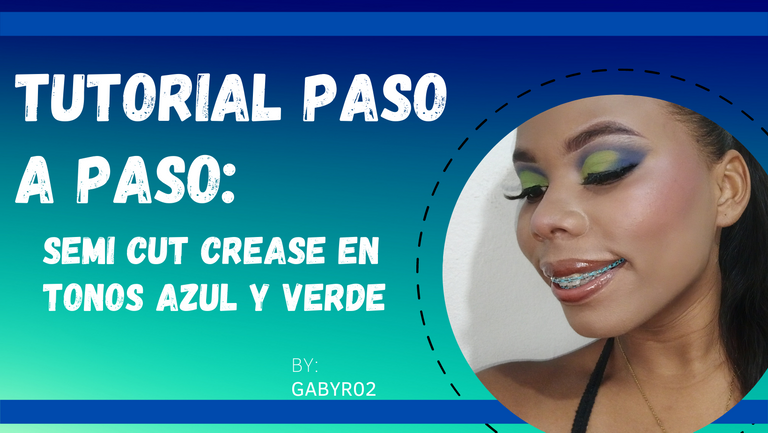
Step by step tutorial: Semi cut crease in blue and green tones
(Edited)
💞HOLA MI LINDA COMUNIDAD💞
💞HELLO MY BEAUTIFUL COMMUNITY💞
Cómo les comenté en uno de mis post anteriores, decidí hace un tiempo retarme un poco más a misma, haciendo mis maquillajes en tonos más coloridos o usando diferentes técnicas, por lo que el día de hoy decidí usar una técnica que manejo bien, pero usando tonos que nunca creí combinar en un maquillaje. Por lo que el hoy les traigo mi propuesta para un semi cut crease usando azul y verde. Manos a la obra:
As I told you in one of my previous posts, I decided some time ago to challenge myself a little more, doing my makeup in more colorful tones or using different techniques, so today I decided to use a technique that I handle well, but using tones that I never thought to combine in a makeup. So today I bring you my proposal for a semi cut crease using blue and green. Let's get to work:
Paso a paso | Step by step
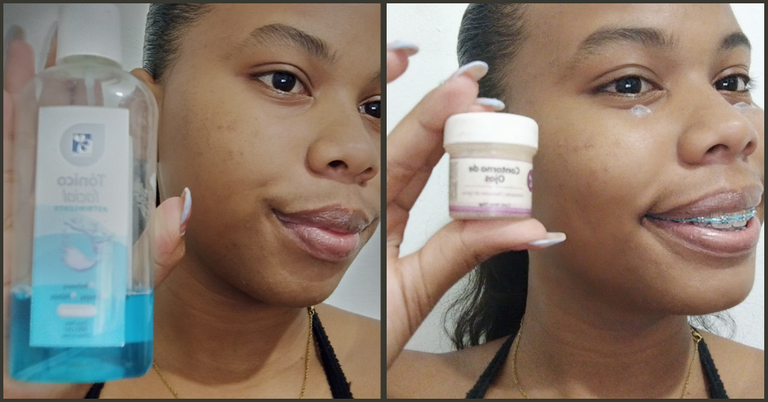
El día de hoy decir iniciar tutorial con algo súper importante y que pocas veces muestro en cámara: La preparación de la piel. En mi caso inicio mi preparación de piel con un tónico astringente de las fórmulas magistrales de farmatodo, junto con un contorno de ojos de la misma marca, luego aplico y crema hidratante Pond's. Si tienes primer también es buen momento para aplicarlo
Today I want to start the tutorial with something very important and that I rarely show on camera: The skin preparation. In my case I start my skin preparation with an astringent tonic from farmatodo master formulas, along with an eye contour of the same brand, then I apply and Pond's moisturizer. If you have primer it is also a good time to apply it.
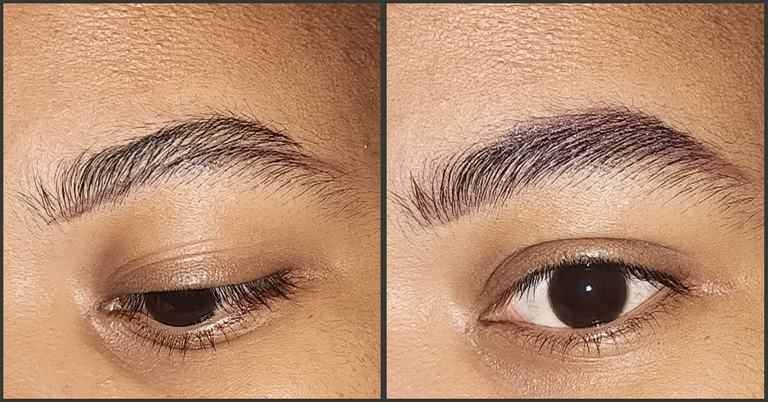
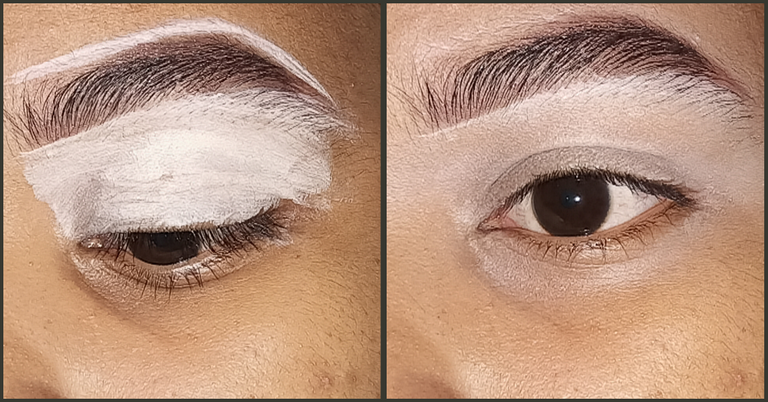
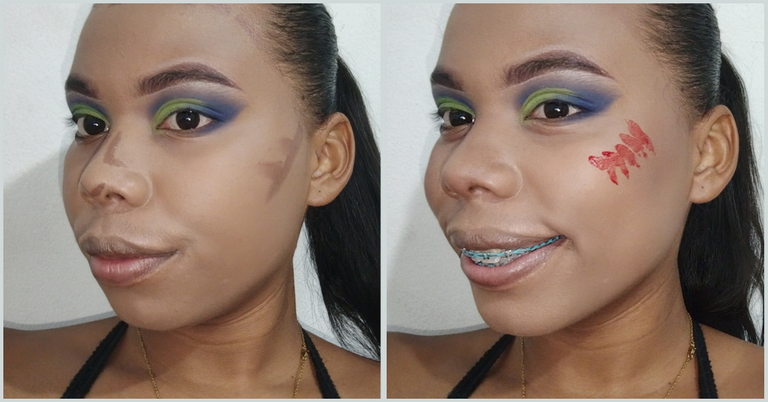
Ahora que nuestro rostro está preparado debemos iniciar con nuestras cejas a las cuales daremos forma con ayuda de una pomada de cejas o sombra si es de tu gusto luego de eso las corregiremos y este mismo corrector lo extenderemos por todo nuestro párpado recuerda que también debes difuminar todo este corrector para poder iniciar con nuestro maquillaje como tal
Now that our face is prepared we must start with our eyebrows to which we will give shape with the help of an eyebrow pomade or shadow if it is to your liking after that we will correct them and this same concealer we will extend it all over our eyelid remember that you must also blur all this concealer to be able to start with our makeup as such.
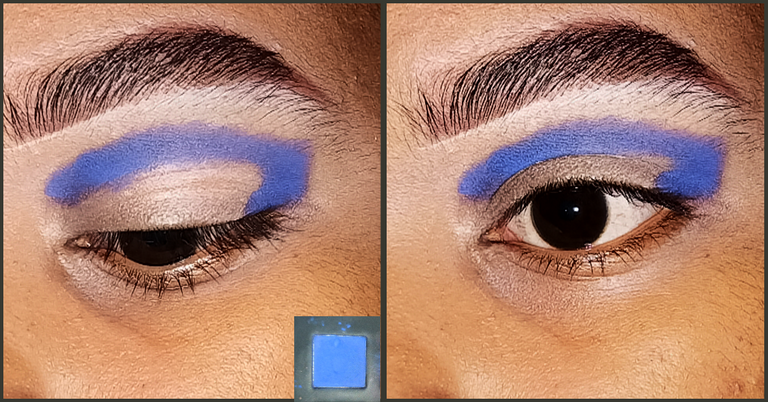
Ahora que tenemos listo nuestro párpado comenzamos a aplicar una sombra azul oscuro, el cual vamos saturar aplicandolo con una brocha pequeña y dando pequeños toques. Este color hará una pequeña J acostada, por toda nuestra cuenca hasta la esquina externa de nuestro ojo (acá abajo te dejo fotos para que entiendas un poco mejor mi explicación). Ahora con una brocha de difuminar limpia y un poco del mismo tono azul trataré de difuminar mi J, mi consejo es que uses movimientos circulares y no presiones la brocha sobre tu párpado, y obviamente ten paciencia.
Now that we have our eyelid ready we begin to apply a dark blue shadow, which we will saturate by applying it with a small brush and giving small touches. This color will make a small J lying down, throughout our basin to the outer corner of our eye (here below I leave photos for you to understand a little better my explanation). Now with a clean smudger brush and a little bit of the same blue shade I will try to smudge my J, my advice is to use circular movements and don't press the brush on your eyelid, and obviously be patient.
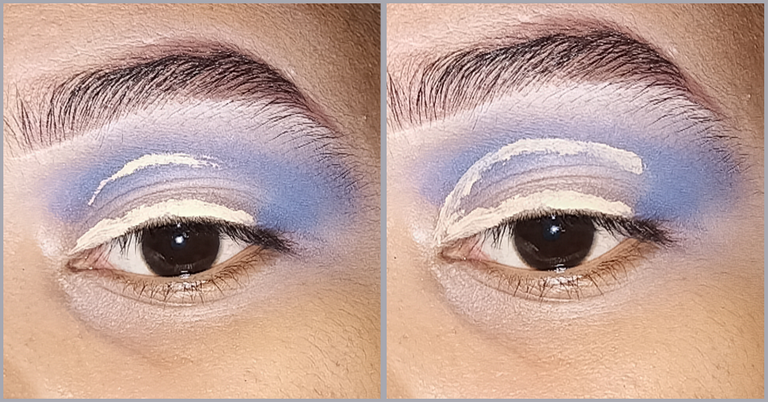
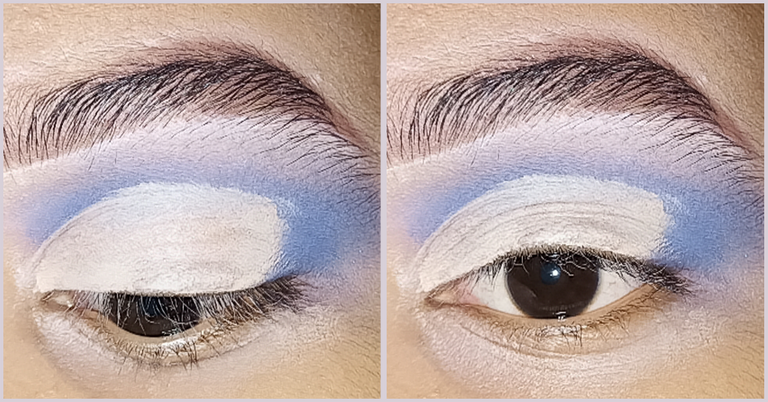
Cuando estés conforme con el resultado del azul, llegó el momento de hacer el corte cuenca. Lo primero es hacer un pequeño delineado con corrector líquido, luego miraré hacia arriba para que se hagan los puntos que necesito unir y rellenar con el mismo correcto y una brocha plana. Acá te dejaré las fotos de cómo yo hice el mío.
When you are happy with the result of the blue, it's time to do the basin cut. The first thing is to make a small outline with liquid concealer, then I will look up to make the points that I need to join and fill in with the same correct and a flat brush. Here I will leave you the pictures of how I did mine.
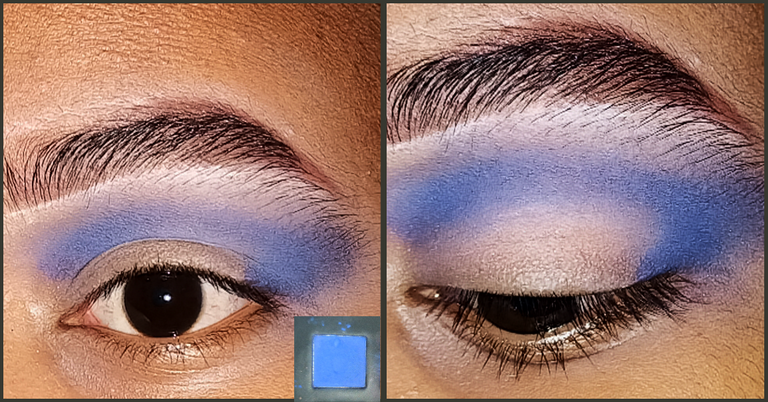
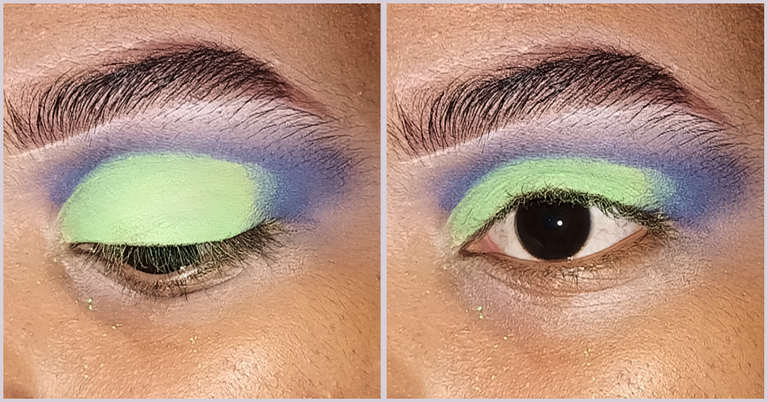
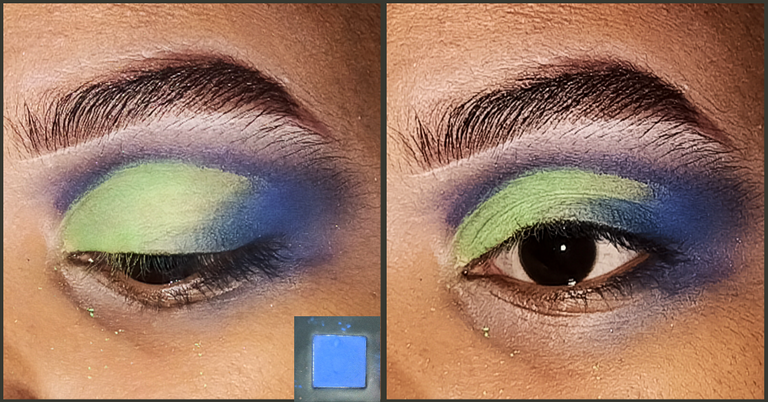
Ahora comienzo aplicar encima de mi corrector, un color verde claro, el cual llevaré desde el inicio hasta el final de mi corte de cuenca, luego de esto llegó el momento de darle uno de los toques finales a los ojos, para ello necesitamos difuminar muy bien la línea existente entre los tonos verde y azul, por lo que tomaremos más azul y haremos movimientos de zig zag entre ambos colores, estoy ayudará a tener un maquillaje mas homogéneo.
Now I start applying on top of my concealer, a light green color, which I will take from the beginning to the end of my watershed cut, after this it was time to give one of the final touches to the eyes, for this we need to blur very well the existing line between the green and blue tones, so we will take more blue and make zig zag movements between both colors, I am will help to have a more homogeneous makeup.
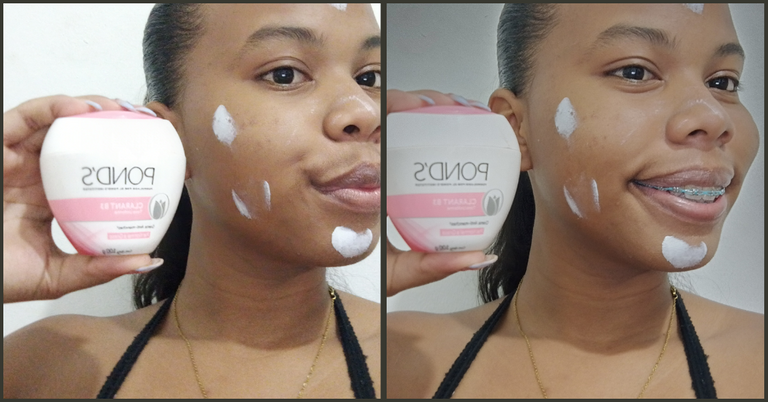
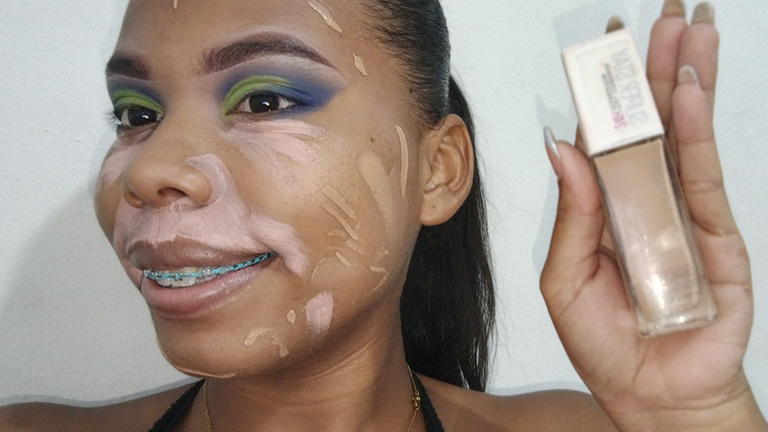
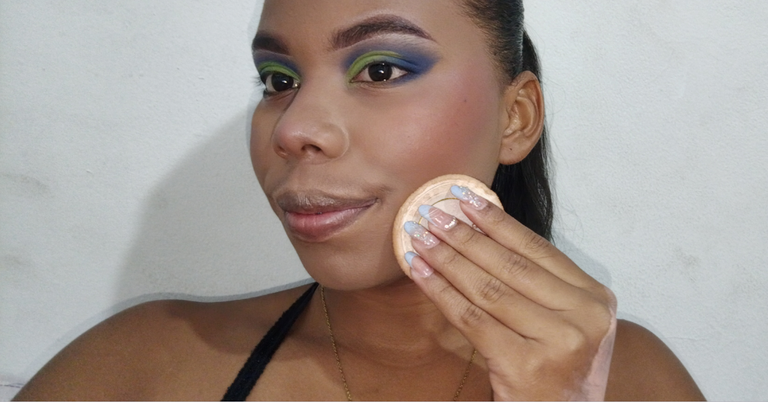
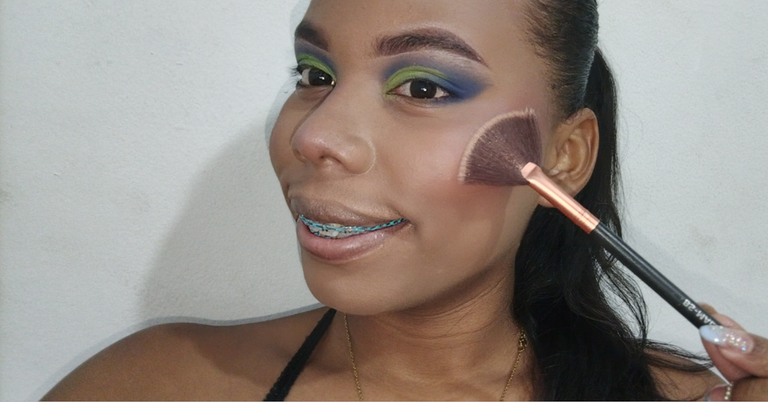
Ahora solo queda hacer nuestra piel. Para lo que me aplicó con corrector naranja en mis imperfecciones, base en el resto de mi rostro. Y realizo los contornos que necesito (nariz, mejillas y frente). Luego aplico mi rubor liquido.
Now it only remains to do our skin. For what I apply with orange concealer on my imperfections, foundation on the rest of my face. And I do the contouring I need (nose, cheeks and forehead). Then I apply my liquid blush.
Por último con nuestra piel, sello algunos lugares con mi polvo compacto y aplico iluminador en mejillas, nariz y en el arco de mi cejas🤭
Lastly with our skin, I seal some places with my pressed powder and apply highlighter on cheeks, nose and on the arch of my eyebrows🤭
Y listo, por último puse pestañas y pinté mis labios con un gloss marrón.
And ready, lastly I put lashes and painted my lips with a brown gloss.
Fotos finales | Final photos
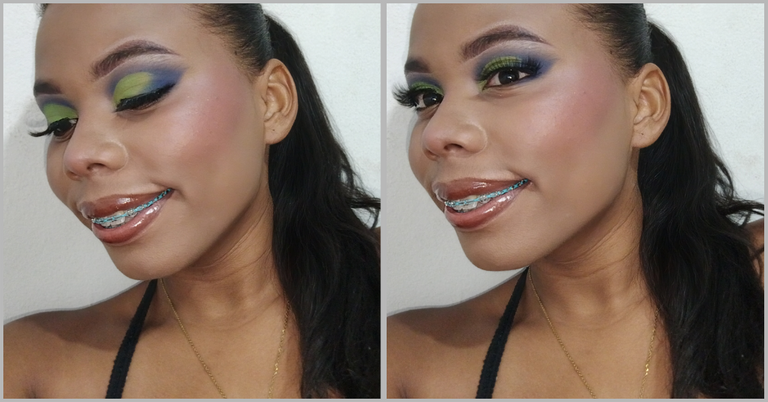
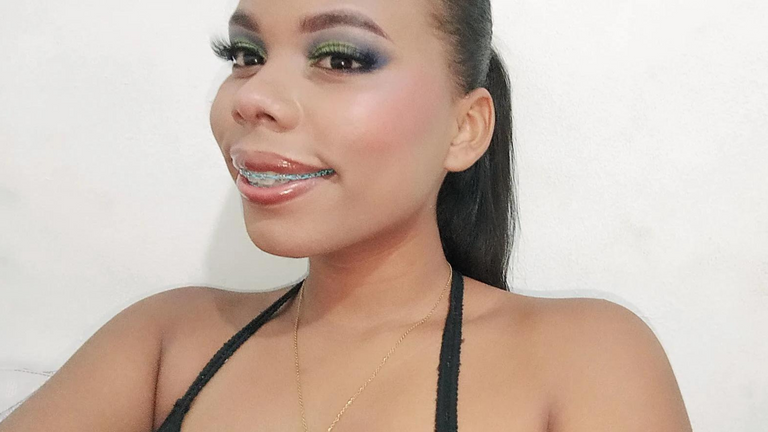
Sin más que agregar, está fue mi propuesta de un semi cut crease usando azul y verde claro, espero que les haya gustado el resultado. Besitos a todos. Si llegaste hasta aquí:
Without more to add, this was my proposal for a semi cut crease using blue and light green, I hope you liked the result. Kisses to all. If you made it this far:
Gracias por leerme y hasta un próximo post
Thanks for reading and see you in a future post
Traducción: Deepl. // Traslation: Deepl.
0
0
0.000
Your content has been voted as a part of Encouragement program. Keep up the good work!
Use Ecency daily to boost your growth on platform!
Support Ecency
Vote for new Proposal
Delegate HP and earn more
Woow, excellent post!
Hi @championsacademy! Thank you for reading and for your comment