Splinterlands Weekly Challenge Battle! Crystal Jaguar

Every week there is a Splinterlands challenge to share a battle using a specific cardand on this week's post it is the Crystal Jaguar card. I also encourage Splinterlands players to partake in the challenge because you get to try different strategies and earn some crypto in the process.
Featured Monster: Crystal Jaguar
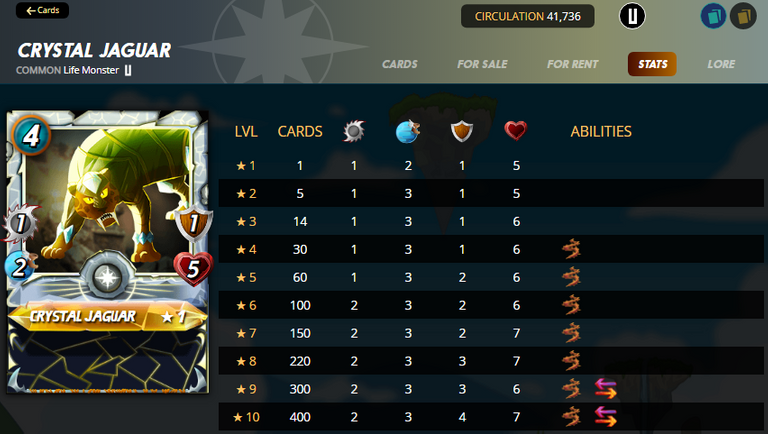
Crystal Jaguar is a light splinter card. It doesn't have any skills when at level 1 but it does learn thorns at level 4. When it reaches level 9, it learns retaliate. With a mana cost of 4, it is a great low mana front line tank card to use. It definitely is a good counter to melee monsters. It doesn't have much attack but it has decent health and some shield available to take an extra hit.
I use this card quite a bit when the match has low total mana available. I still prefer Shield Bearer for the most part as my tank but this is my secondary choice. I have a gold foil level 4 crystal jaguar because it has thorns but if I did not have thorns ability, I probably would not use it much. Thorns deals two damage to melee monsters that attack this monster or one damage if the opponent has a shield ability.
Rule set, Battle and Plan

The rule set this time is no legendary cards and 14 mana available. We are allowed to use fire, light, death and dragon splinter. With such a low mana cost, I like to use thorns monster in the off chance my opponent uses melee monsters.
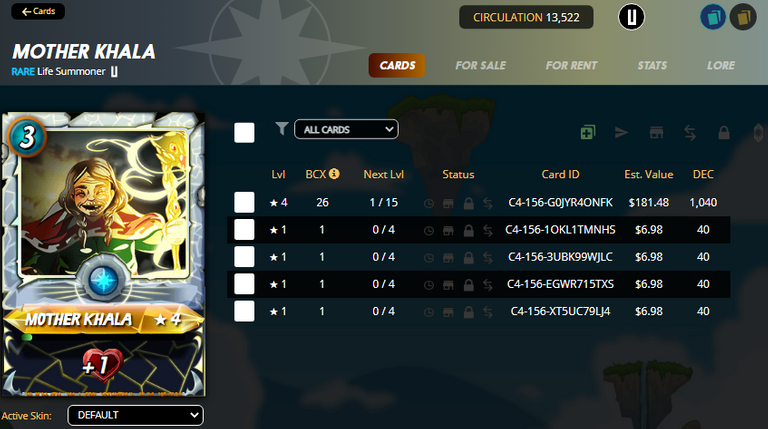
The summoner I choose to use this time is Mother Khala. My current summoner is level 4 so this means that my crystal jaguar card can have it's full level 4 stats. This summoner adds one health to each monster so it makes my line up tanky. It isn't the best buff but it's my strongest light summoner.
My plan would be to use crystal jaguar in front with damage dealers behind it. By doing so, I might be relying on a physical build on my opponent's side. Since I was doing my no neutral quest, I decided to not use a chicken.
Round 1
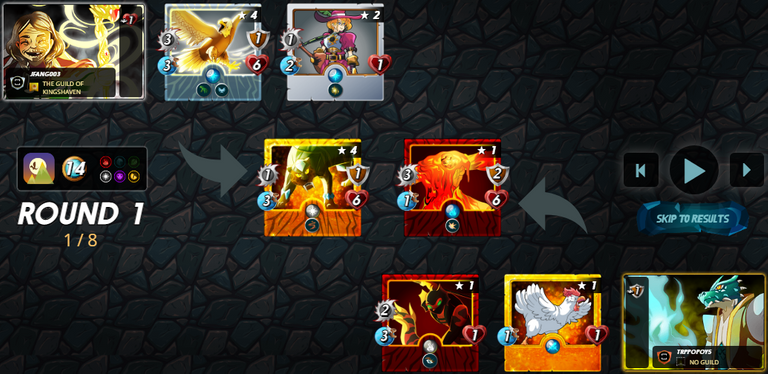
My strategy is already paying off as my opponent is using an all melee setup. The +1 shield from the summoner and Living Lava makes me think that this match will be close.
Round 2
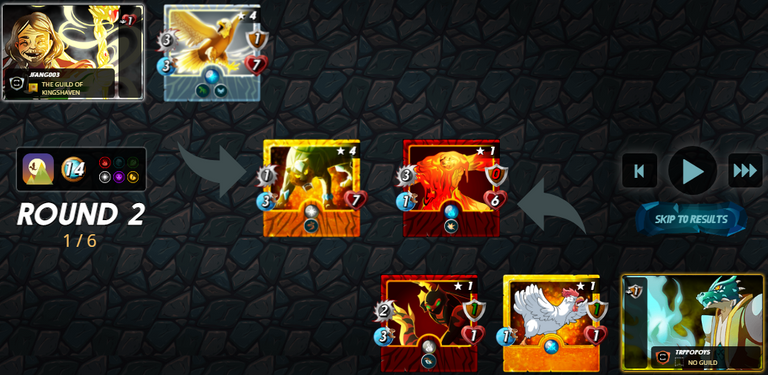
I have lost a card but I have managed to remove the shield on Living Lava. However his serpentine spy will now be targeting my crystal jaguar so I may be able to damage it using thorns.
Round 3
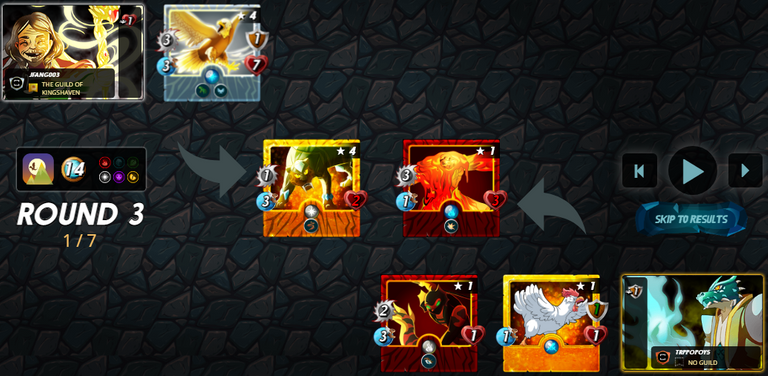
My opponent's Living Lava is half dead but my Crystal Jaguar is almost dead. However it looks like my opponent's serptine spy will be dead after the next round due to thorns. Once that dies, my Luminous Eagle should have no problems killing the Living Lava.
Round 4
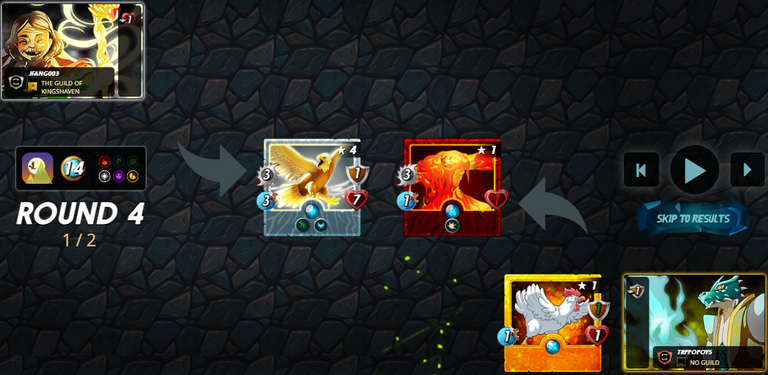
So it played out as I expected where my eagle is untouched and Living Lava is almost dead. Unless I miss 4 attacks, I have won this match so I will fast forward to the end.
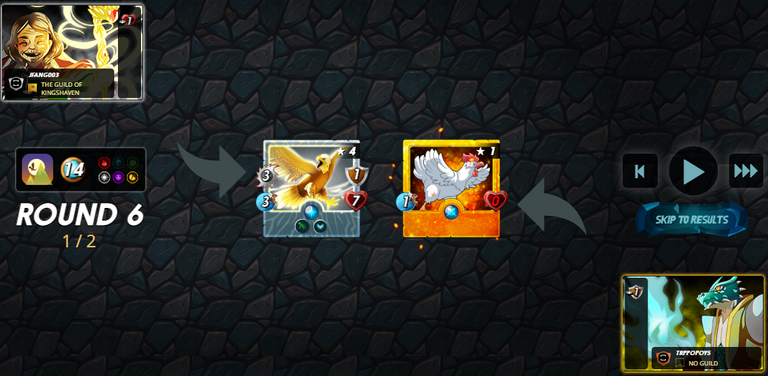
It seems like I didn't miss so the match is over and my Eagle is untouched. I was a bit worried at the start but it seems like there were no issues.
Conclusion
The battle this time around went exactly like I expected. As my opponent used a full melee setup and it took out the most dangerous card on my opponent's side. I am glad I used the Luminous Eagle as my damage dealer because it had the same health as my jaguar. The Silvershield Bard was placed there to take a hit and it definitely served it's job as well.
I feel that my opponent's lineup was fine. If I was using a fire team, I would of probably chosen something similar. The only thing my opponent didn't expect was my Jaguar since the thorns countered the Serpentine Spy.
You can see my entire match here.
What did you think of my match? Was there anything you would of done differently? I think it is quite interesting to see how different players use the same card.
Very nice . Good brief
Thanks for sharing! - @alokkumar121

great post