Splinterlands Share Your Battle Weekly Challenge - Stone Golem

Introduction
Hi again everyone, it has been a busy couple of weeks for me. In fact, I wasn't able to participate in the last two weekly challenges because of my work load. Good thing that I have some playtime again, which enabled me to participate in this latest Splinterlands SHARE YOUR BATTLE Weekly Challenge. During this week, the focus is one of those rare cards which is you will find useful in various rulesets... The STONE GOLEM.
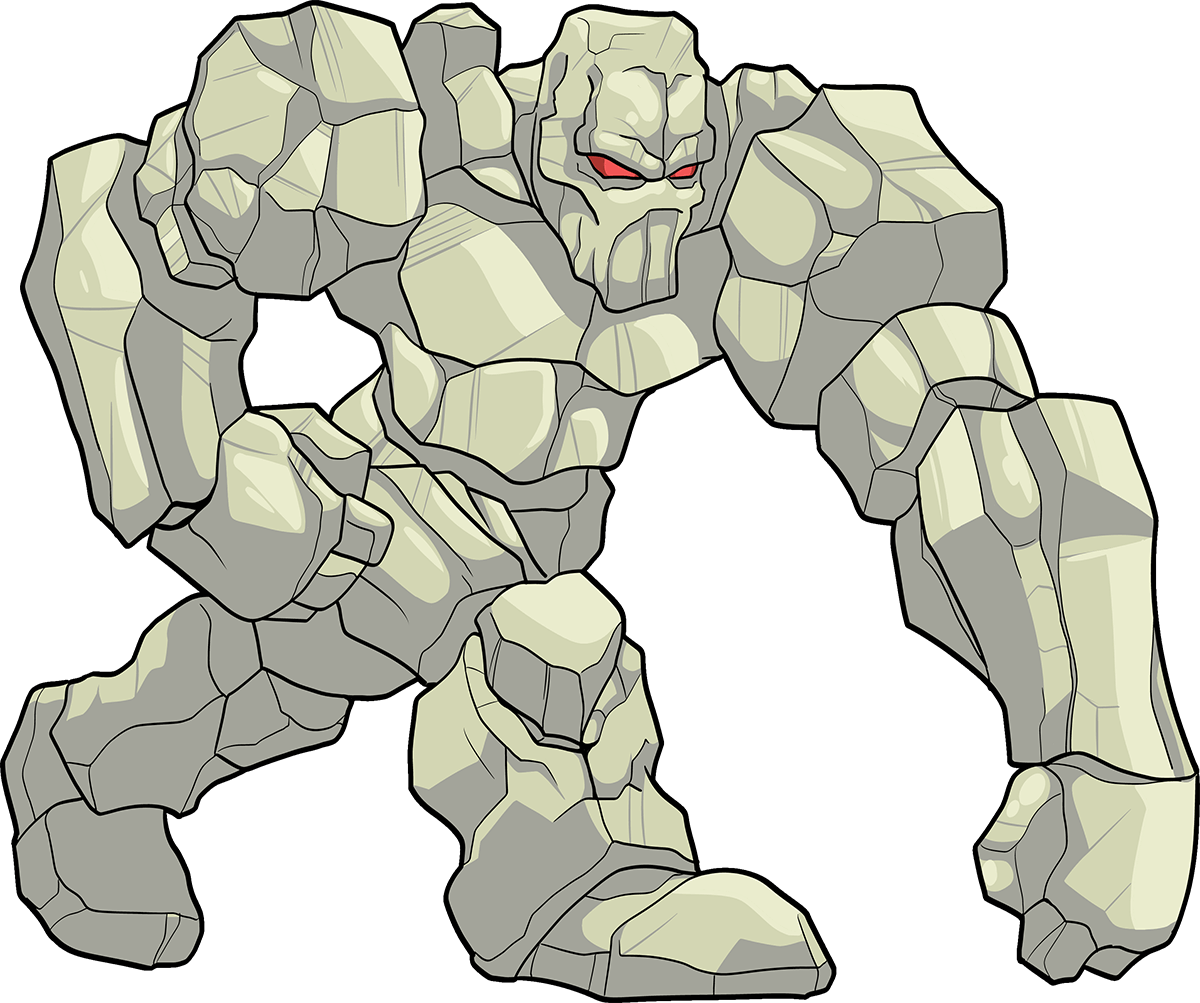
The Card
Stone Golem is a rare Earth card from the Alpha/Beta editions. It has the Sneak ability and at level 10, it has a health of 5 and a speed of 6.
Pros and Cons
Personally, I rarely use Stone Golem in my battles, primarily because my go-to monsters will always be Unicorn Mustang and Nectar Queen. However, I must admit, this monster has a fairly decent mana price of five for a monster with SHIELD ability, 6 health and 2 shield. No wonder why it is a rare card.
It benefits on some specific rulesets like MELEE MAYHEM, SUPER SNEAK, and LOST MAGIC. Its reduced damaged from Melee and Ranged attacks makes it a good part of the team in the LOST MAGIC ruleset. Further, the SHIELD ability will also be useful in the EARTHQUAKE ruleset.
One major weakness of this monster is its low speed, because it only has 1. Though in the REVERSE SPEED ruleset, it can be an advantage. But generally, in most battles, it will probably be attacked first before it can start attacking its enemies. Also, having no other abilities that enables it to attack from the back position (except for rulesets allowing it to, like MELEE MAYHEM, this monster will usually be a tank monster.
General Strategy
Based on my pros and cons, Stone Golem may be useful in specific rulesets, or if there are no rules at all, it can be combined with complementing cards that will help it in attacking enemies first given its low speed. With this in mind, I plan to use SNIPE and SNEAK monsters, and probably add Wood Nymph to the mix for some additional health through its TANK HEAL ability.
The Line Up
Summoner - Wizard of Eastwood
- Slot 1 - Stone Golem
- Slot 2 - Screeching Vulture
- Slot 3 - Centauri Mage
- Slot 4 - Gargoya Devil
- Slot 5 - Venari Seedsmith
- Slot 6 - Furious Chicken
Explanation of the lineup
For this match, the ruleset that I got is the EARTHQUAKE ruleset, which I think is advantageous to using Stone Golem because of its SHIELD ability. When choosing a summoner, I picked Wizard of Eastwood over Lyanna Natura for obvious reasons. Wizard's ability to reduce opposing monsters' shield by 2 makes it a perfect recipe in the EARTHQUAKE ruleset.
For my main lineup, I used my Stone Golem as my tank monster. Then the Screeching Vulture will provide attacks from the back with its OPPORTUNITY ability and at the same time, its FLYING ability will spare it from the EARTHQUAKE damage. Next in my list is Centauri Mage. Its 9 health will make it last for a few rounds should it be attacked, which are most likely by SNIPE monsters, which will make it to retaliate because of its RETURN FIRE ability. I put on another flying monster, the Gargoya Devil. Being spared from the EARTHQUAKE damage, its CLOSE RANGE ability will enable it to attack in the tank position, should my first other monsters die first.
Then my favorite, the Venari Seedsmith. Its SCAVENGE ability will be useful in getting additional health for all the dead creatures, especially with the Earthquake ruleset. From experience, as long as it survived the first round from enemy attacks, chances are, it will survive the next several rounds. Last but not the least, my last monster is the Furious Chicken. While it can be a quick sacrificial lamb just in case there are monsters in the opposing team with OPPORTUNITY or SNEAK ability, its death will give additional health to the Venari Seedsmith.
The Match Up
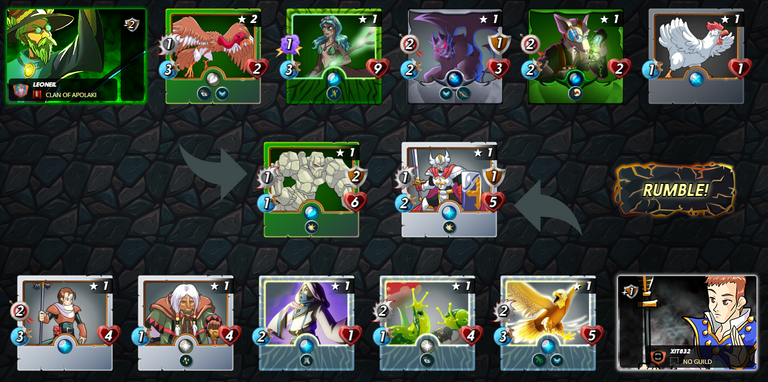
Even before the battle started, I already knew I am more on the winning side. Luminous Eagle is the only monster there with the flying ability and even with Divine Healer on the team, it won't be able to match the damage brought by the EARTHQUAKE at the end of each round.
Check the battle below and see how it panned out.
Watch The Battle
Thank you for reading. Please feel free to comment and leave your feedback.
Previous challenges that I participated in:
Notes: All trademarks and images are properties of their respective owners.
Please feel free to follow my account if you like my post.


Your content has been voted as a part of Encouragement program. Keep up the good work!
Use Ecency daily to boost your growth on platform!
Support Ecency
Vote for Proposal
Delegate HP and earn more
Nice one!
Thanks for sharing! - @alokkumar121
