Cute angel to decorate at Christmas- Tutorial - ESP-ENG
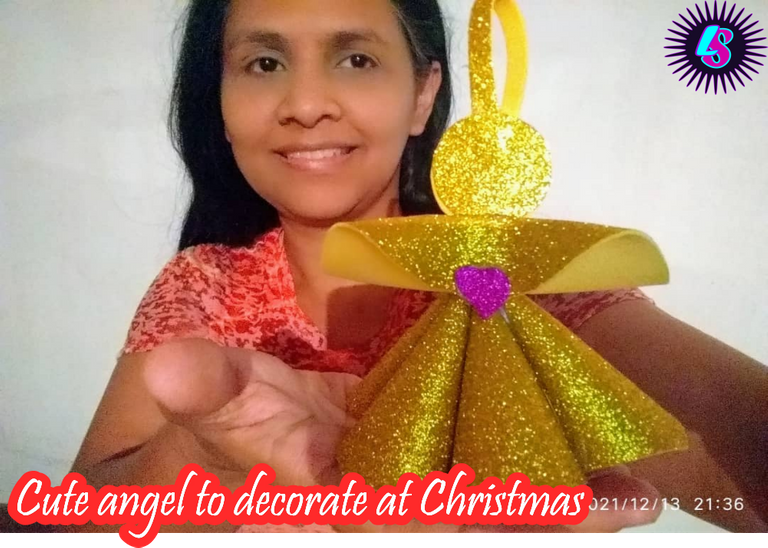
Greetings friends of the #gems and hive community, today I bring you a tutorial to make a cute Angel to decorate any space on these Christmas dates. This is a very beautiful date where colors and brilliants allow to decorate any home in a very beautiful way. Here I will show you the step by step of this cute Angel.
Materials
1 golden frosted foam
Scissor
Silicon
Pattern

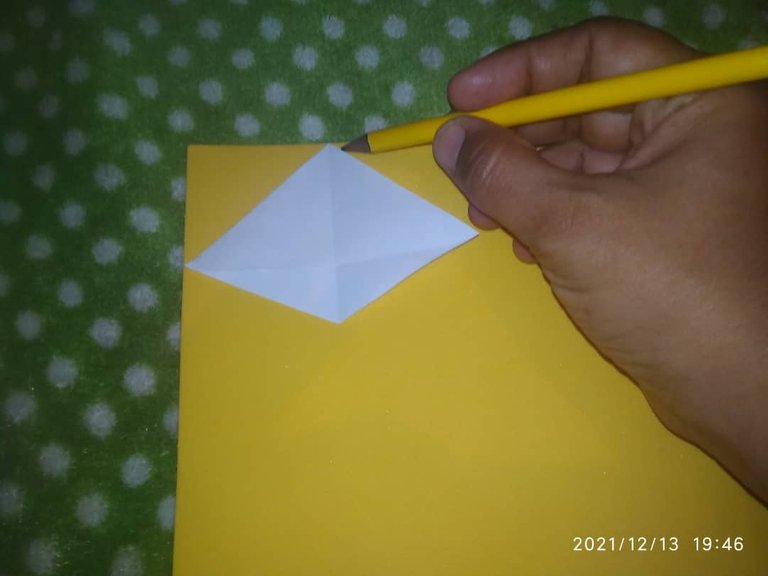
Step by Ste
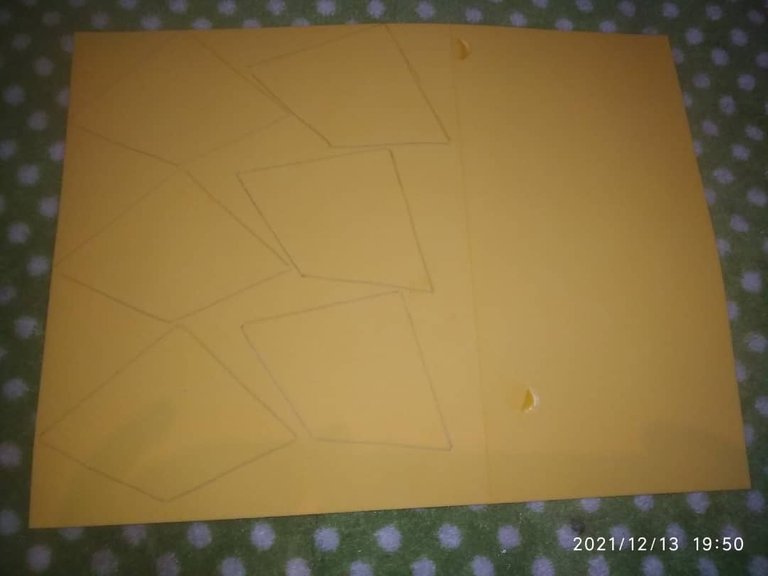
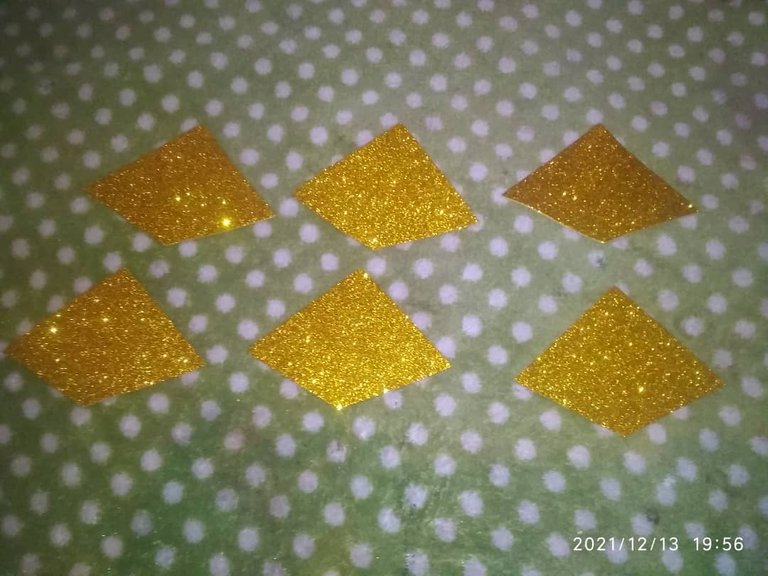
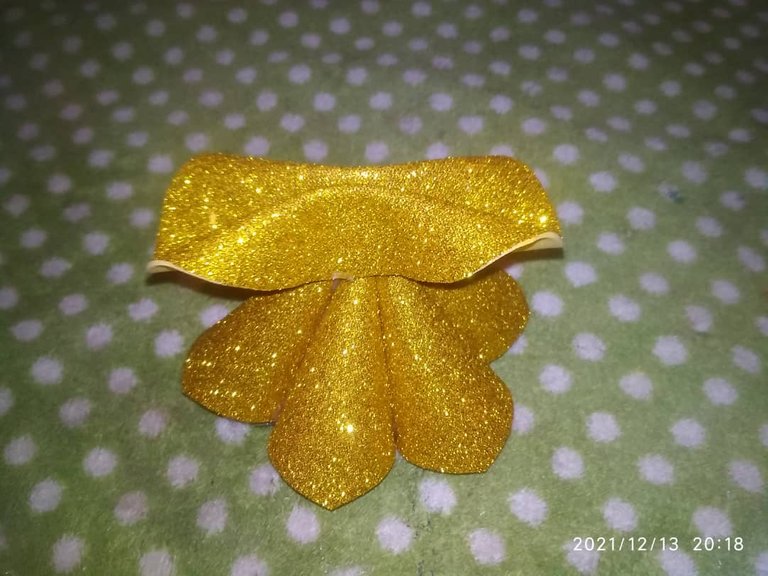
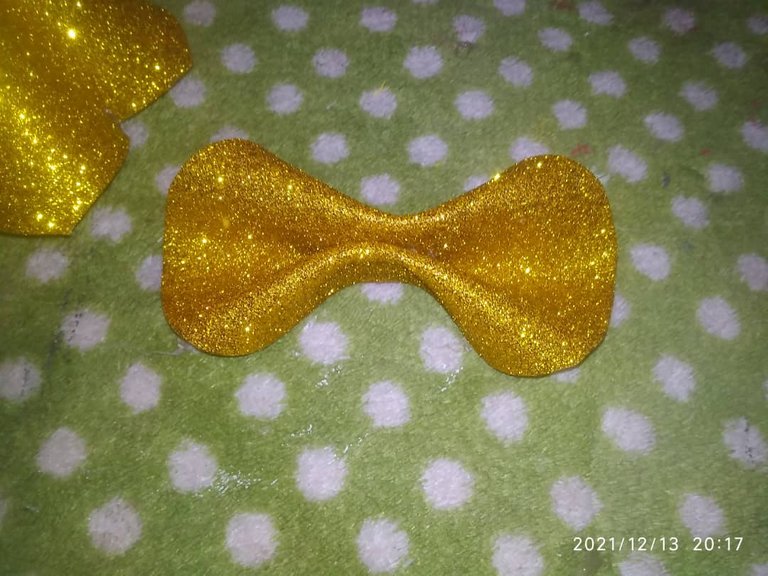
The first thing is to take the pattern which has the measurements 7.5 cm on the top sides and 5 cm on the bottom ones; He took it himself and traced over the frosted foami. It must be made six pieces
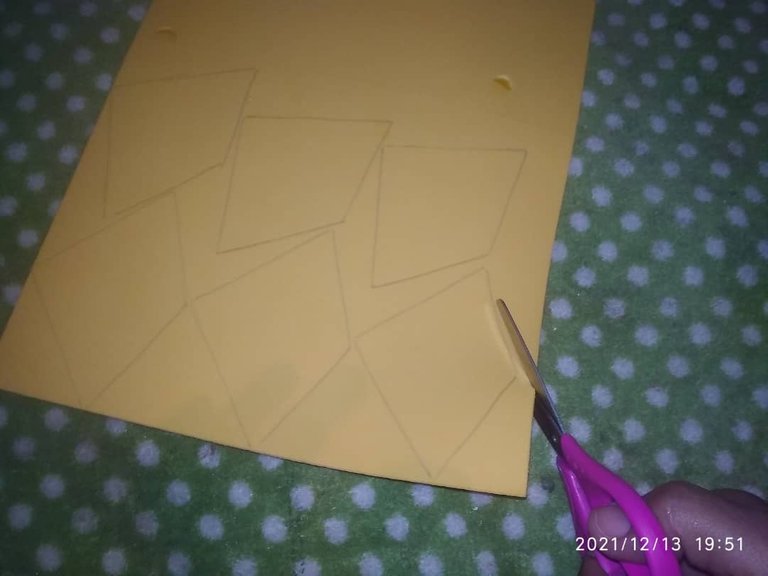
Later I cut out each of the pieces.
After having it ready, I began to paste, as you can see in the photograph.
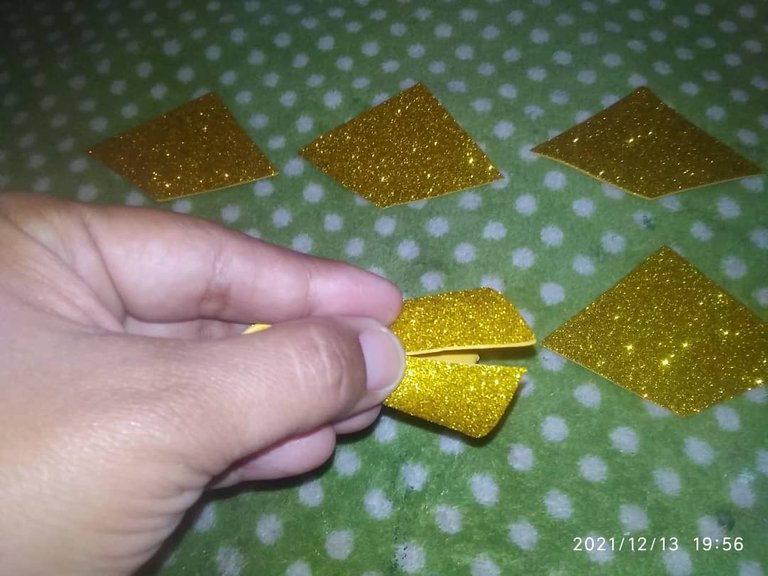
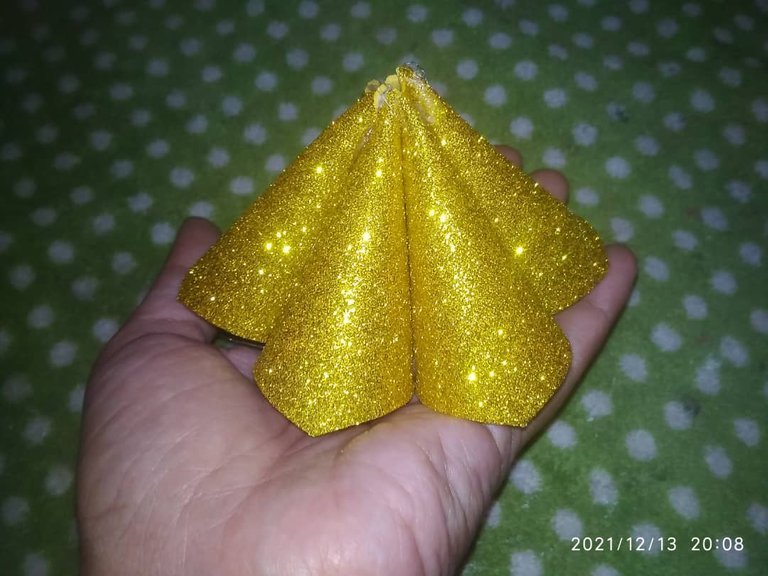
Each piece should be as you see it; and we must glue the remaining six pieces.

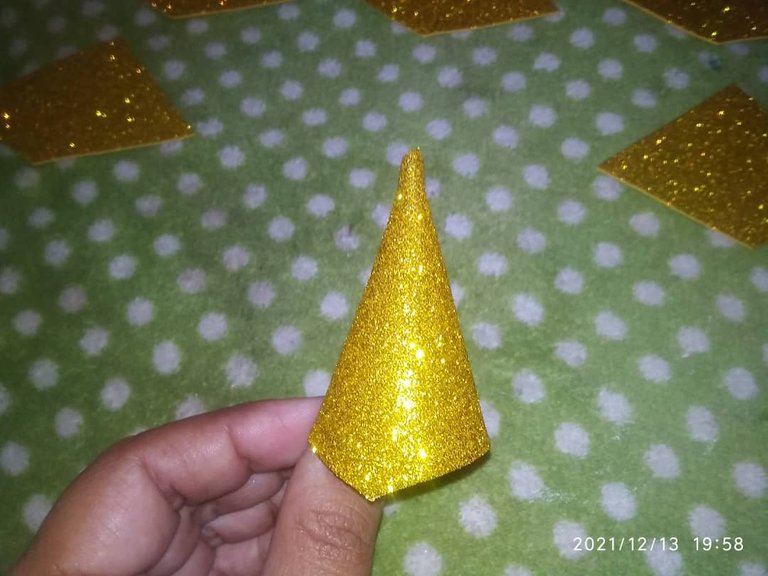
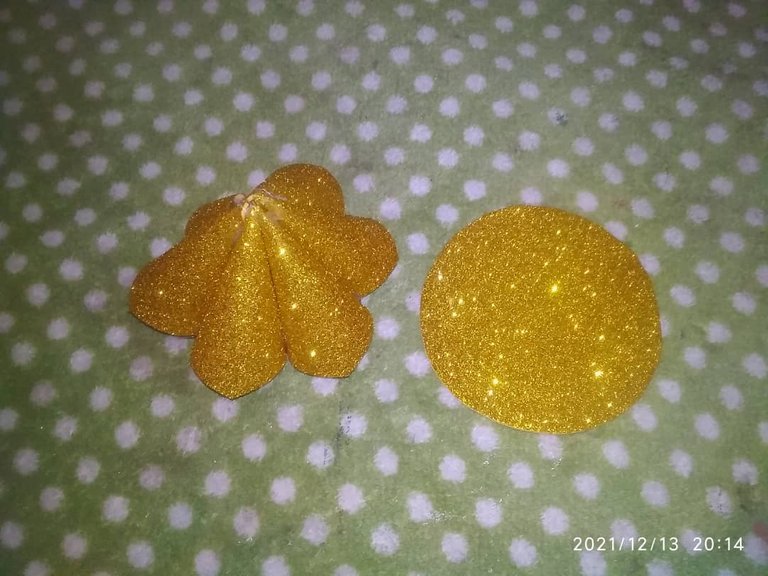
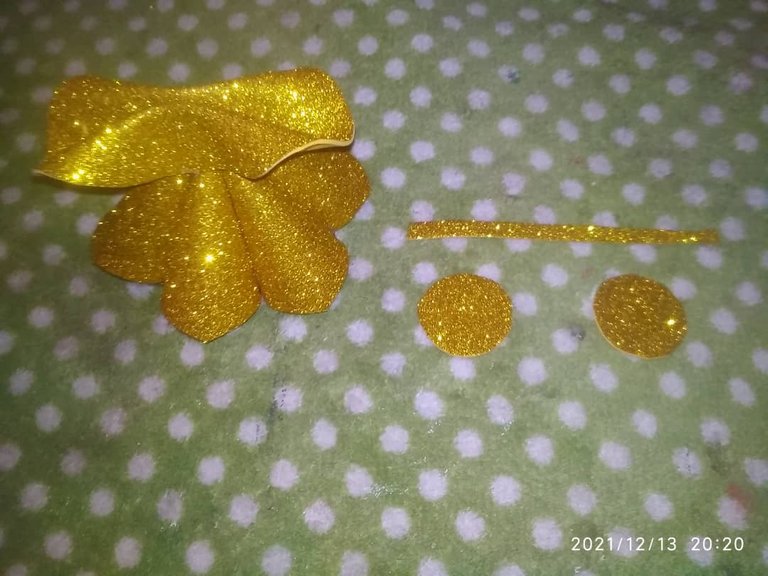
Now we begin to form the body of the Angel, gluing each of the pieces to form the part of what will be the dress.
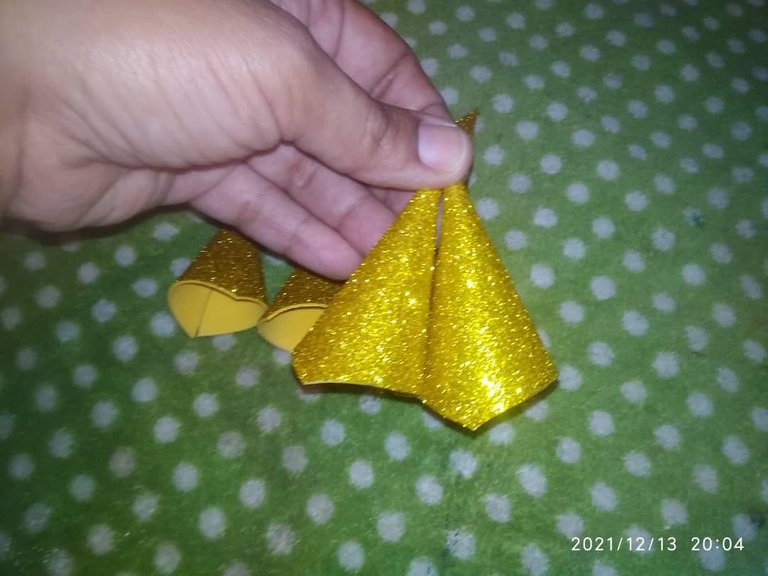
Now make a circumference to make the wings.
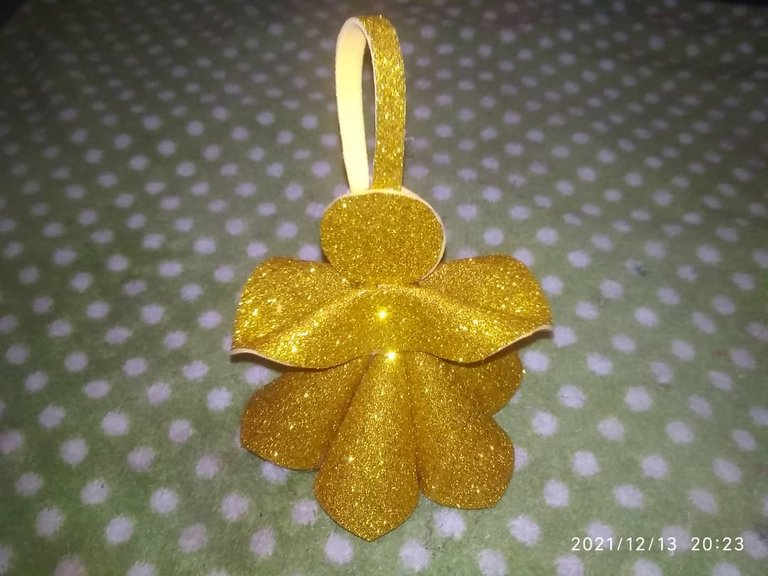
I take the circumference and paste in the middle.
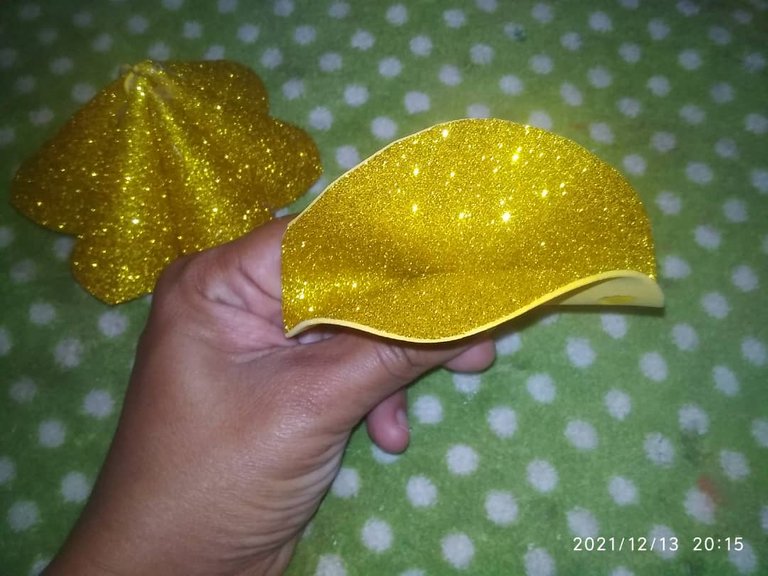
Then I lower the top and hit too. Staying as follows
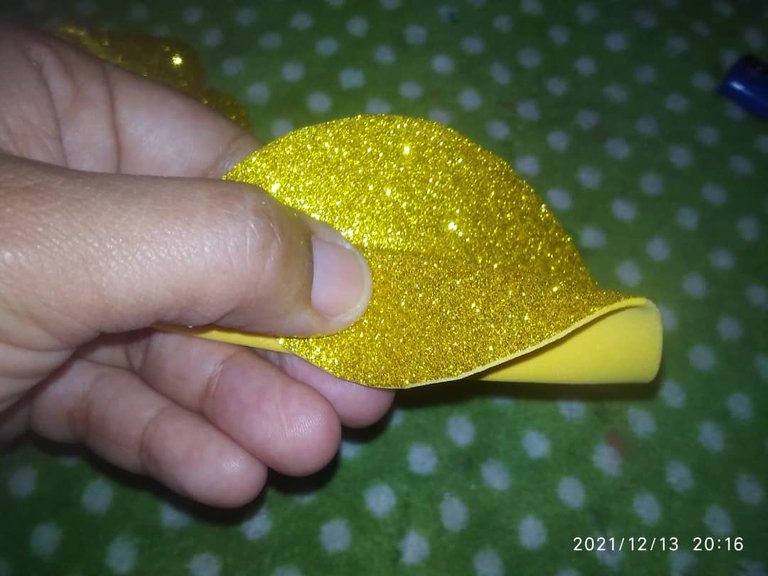

Now I stick on top of the dress or body of the Angel.
To make the head, he made two circles and his handle. I glue a circle with a handle and the other I place on top

Ready this I place on top of the Angel and in this way this beautiful Angel is ready to decorate at Christmas
I hope you like it
Photographs are my property
Thanks for reading me


Versión Español
Saludos amigos de la comunidad de #gems y hive, hoy les traigo un tutorial para realizar un lindo Ángel para decorar cualquier espacio en estas fechas decembrina. Esta es una fecha ,muy linda donde los colores y los brillantes permiten decorar de manera muy bella cualquier hogar. Aquí te mostrare el paso a paso de este lindo Ángel .
Materiales
1 Foami escarchado dorado
Tijera
Silicón
Patrón
Paso a paso
Lo primero es tomar el patrón el cual tiene las medidas 7.5 cm en los lados de arriba y 5cm en los de abajo; el mismo lo tomo y trazo encima del foami escarchado. Se debe realizar seis piezas
Posteriormente recorto cada una de las piezas.
Después de tener listo comencé a pegar, como lo ven en la fotografía.
Debe quedar cada pieza así como lo ven; y debemos pegar las seis piezas restantes.
Ahora empezamos a formar el cuerpo del Ángel, pegando cada una de las piezas hasta formara la parte de lo que será el vestido.
Ahora realice una circunferencia para realizar las alas.
Tomo la circunferencia y pego en el medio.
Después bajo la parte de arriba y pego también. Quedando de la siguiente manera
Ahora pego encima del vestido o cuerpo del Ángel.
Para realizar la cabeza realizó dos círculos y su agarradero. Pego un círculo con agarradero y el otro coloco encima
Ya listo esto coloco encima del Ángel y de esta manera ya está listo este bello Ángel para decorar en navidad
Espero les guste
Fotografías son de mi propiedad
Gracias por Leerme
Que hermoso queda, y lo mejor que es muy fácil de hacer amiga.
Si amiga es muy sencillo de realizar y el resultado es hermoso. Aunque me queme bastante pegando la parte del vestido. Pero me encanto el resultado. Gracias por la visita. Saludos amiga @tormenta
Saludos amiga.. Que tengas un hermoso día.
https://twitter.com/lisbeth6jas/status/1470705107281063936
The rewards earned on this comment will go directly to the person sharing the post on Twitter as long as they are registered with @poshtoken. Sign up at https://hiveposh.com.
Muy creativo e ingenioso diseño. Te quedo muy bonito ese angelito. Saludos
Gracias amigo @kadoshmenorah