Splinterlands Melee Opportunity Big Mana Showdown - Neutral Dominance!
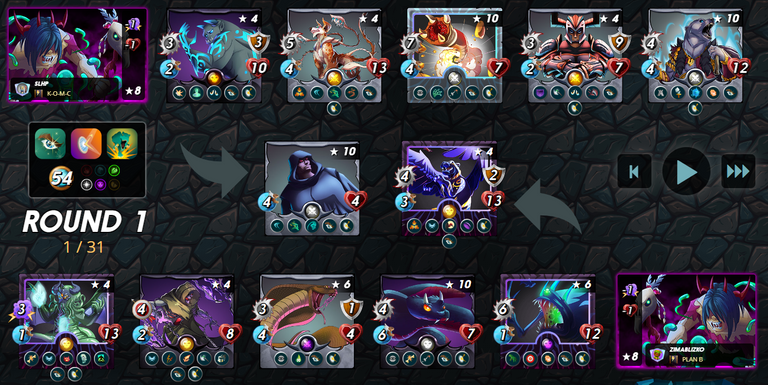
Battle Rules (DIAMOND LEAGUE, MODERN FORMAT):
- Equal Opportunity: all monsters gain Opportunity - attacks the monster with the lowest health
- Counterspell: all monsters gain Magic Reflect - returns magic damage
- Stampede: The Trample ability can trigger multiple times
- 54 Mana
- Splinters: Earth, Life, Death
Summoner: Thaddius Brood
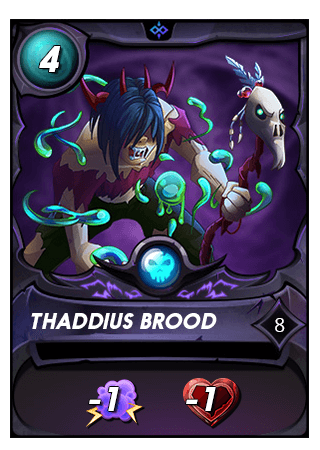
- Reduce enemy's Magic and Speed by 1
- I could choose other Splinters, but decided to go with this summoner to gain access to Demoralize from Harklaw
- Typically with this battle rulesets, people tend to use more melee, I know I do
Position #1: Tank - Chaos Agent
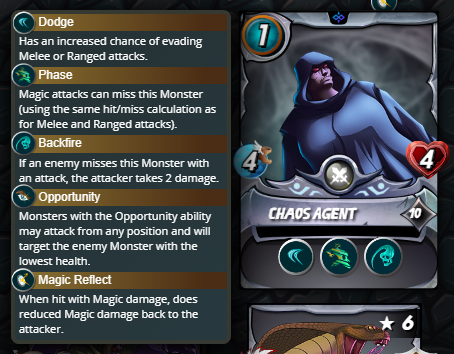
- This is one of the most useful card, 1 mana only and is excellent in the front with Dodge, Phase, and Backfire (to do 2 damages if the opponent misses), also as the rear tank against Sneak
Position #2: Harklaw
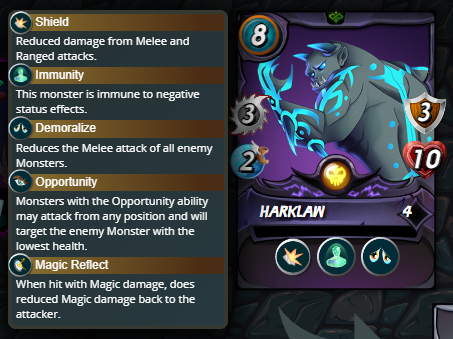
- With Opportunity battle rule, the main tank does not need to be in the first position
- Keeping him in the second position to keep the Demoralize skill up longer
- Shield is useful if and when Harklaw gets attacked after promoted to the first position
- With 10 health (third highest), and Coeurl Lurker taunting, he will not be touched until only 2 friendly monsters are left on the board
- Immunity would be very useful against poison to reduce damage per round
Position #3: Coeurl Lurker

- This is the superstar tank card that I like to use with Opportunity battle rule
- Taunt goes very well with Dodge, Phase, and Thorns, it should stay up for a while (unless getting unlucky hit by Giant Killer)
- Placing this in the middle to avoid damage from opponent's main tank, hope it will last an extra round
Position #4: Sand Worm

- The main attraction for this card is pure damage with Piercing
- Snare removes Flying ability from the target monster, makes it easy to hit by non-flying monsters
- Fingers crossed I don't encounter a tank with Forcefield (like the Mycelic Slipspawn), otherwise the damage potential will be reduced to 1
Position #5: Legionnaire Alvar
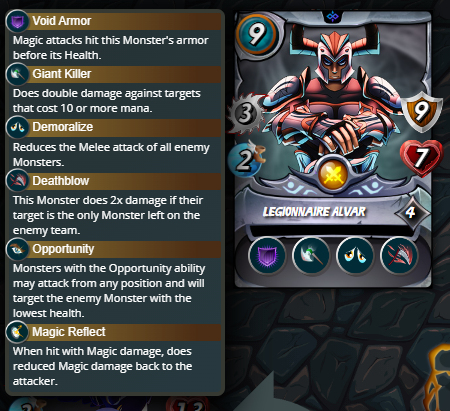
- After Coeurl Lurker, this is second of the three amazing neutral cards for this battle rulesets
- Void Armor protects it against magic attack
- Giant Killer does double the damage on targets with 10 or more mana, which is very likely when this battle goes up to 54 mana
- Demoralize is another amazing skill when I expect the enemy lineup to be melee heavy
- Death Blow does 2x damage on the last monster (I am still waiting to see if Death Blow and Giant Killer stack, not this game unfortunately)
Position #6: Arkemis The Bear
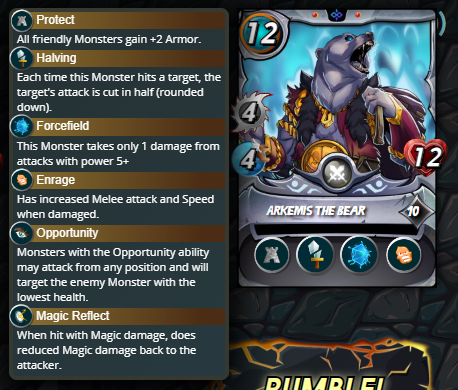
- I picked up this latest Promo card recently
- This is the third of the three amazing neutral cards I would almost always use for this battle rulesets
- Protect gives all friendly monsters +2 armor, which means my monsters could potentially survive an extra hit
- Halving reduces target's attack by 50% rounded down
- Forcefield reduces damage taken to 1 from attacks with power of 5 or more (example: Sand Worm), place this card in the last position to protect the rear!
- Enrage increases Attack and Speed by 50% as soon as it is damaged
Conclusion:
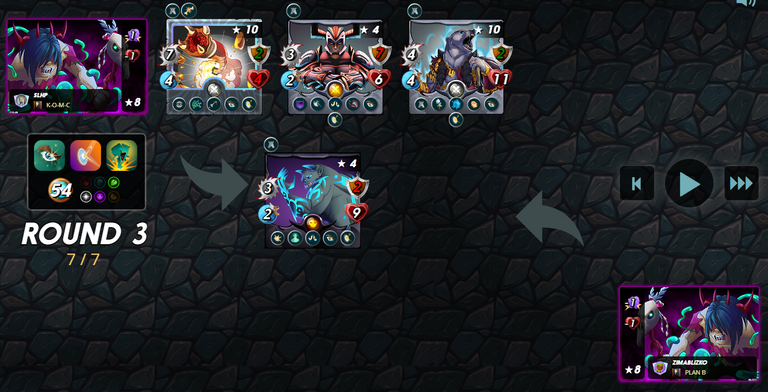
- Decisive victory!
- I have learned that Sand Worm's Sneak takes precedence over Opportunity, it took a big bite out of Cthulhu
- Chaos Agent's Backfire worked out beautifully and finished the main tank
- Coeurl Lurker took the hits like a champ, too bad it did not dodge at all in this battle. At least it did 2 damage back from Thorns!
Link to the video: Click here for the battle play back!
0
0
0.000
Nice battle! 😸
💪
Thanks for sharing! - Underlock#8573
