[ESP-ENG] Diy de mini rosas para decorar tus creaciones - Hazlo Fácil y Rápido 🌹♡🍥| Diy of mini roses to decorate your creations - Make it Easy and Fast💗🥀✨
Hello my beautiful people of HiveDiy! Second day of the week and here I am again with a small DIY practical and simple, you know how usual JAJAJS, as always I wish you to be super well and also have a wonderful week full of blessings for everyone
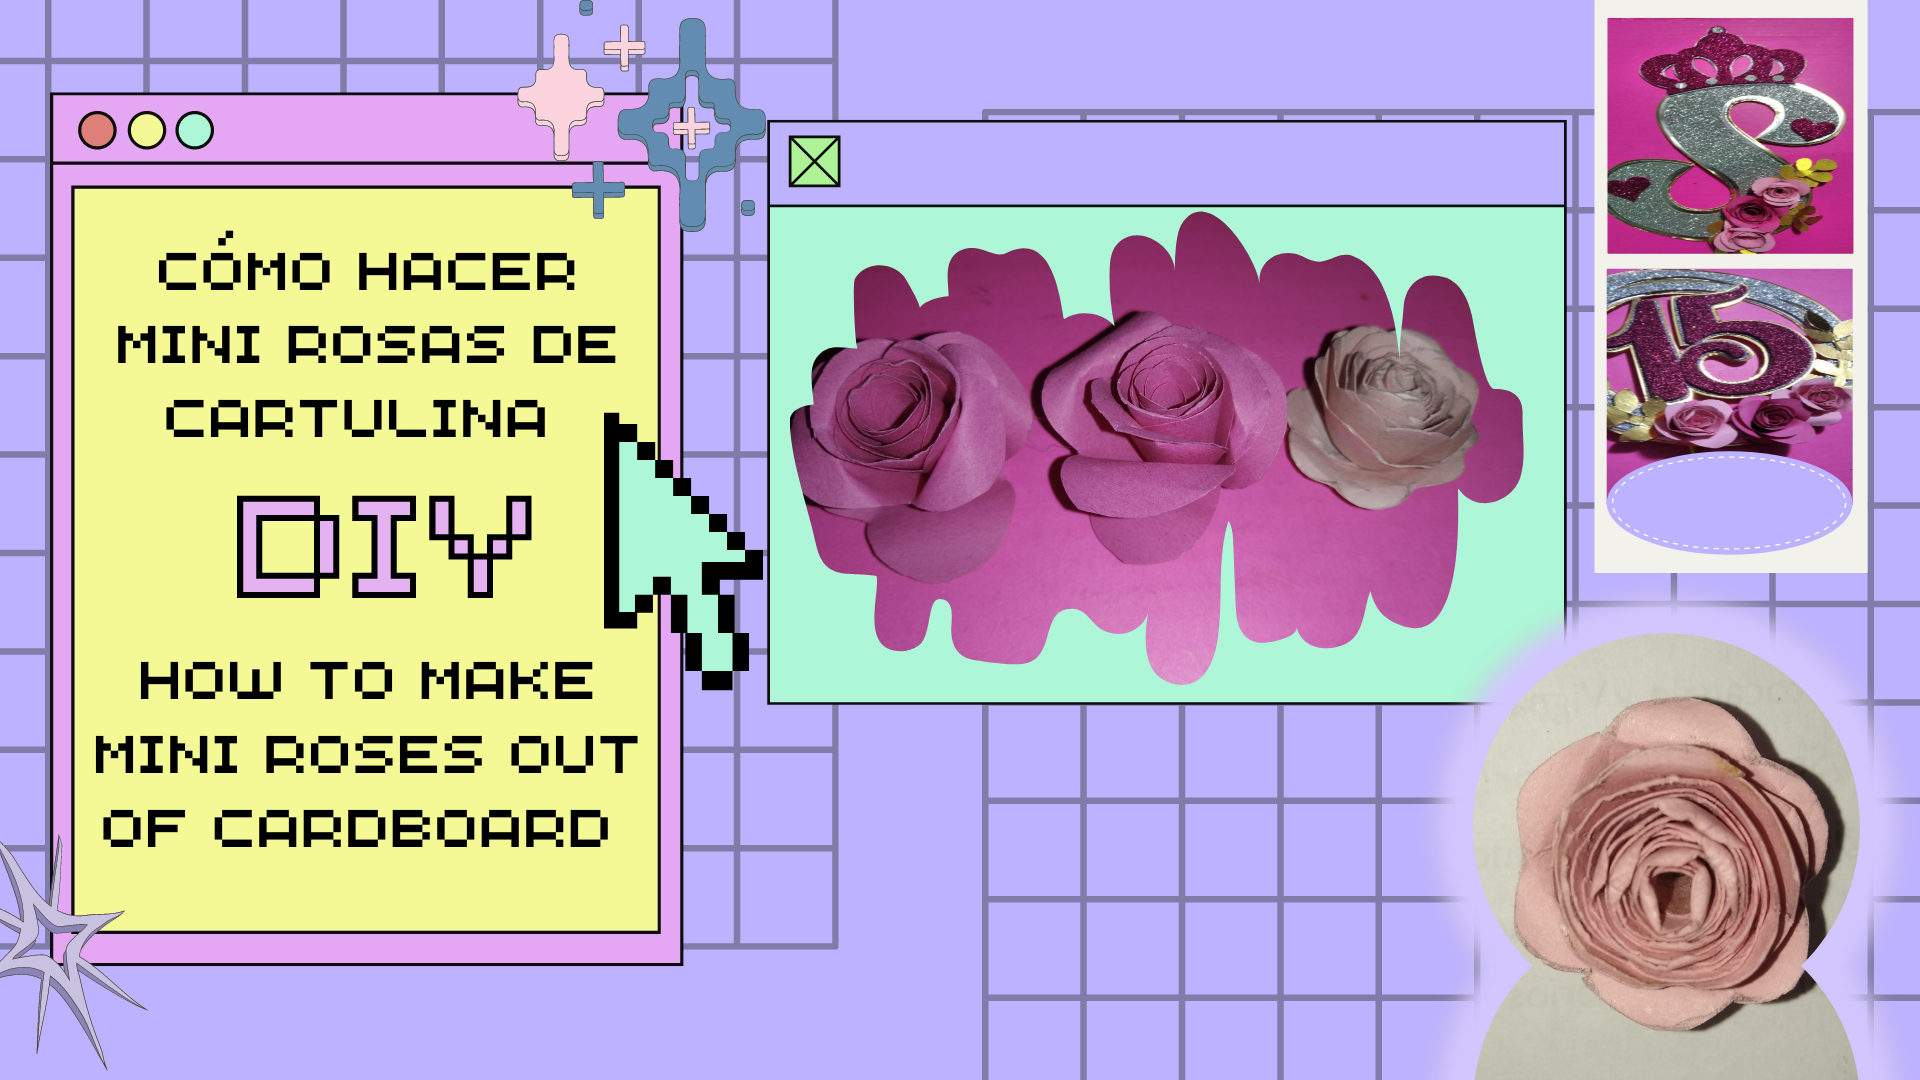
Hoy les quiero mostrar la manera en que realizó unas rosas pequeñas de cartulina, que me enseñó a hacer un señora ya hace un tiempo, están son hermosas y sirven para decorar diversas cosas, también les puedo decir que son muy fáciles de hacer y rápidas, por lo que no tiene mayor grado de dificultad, así que prácticamente cualquiera lo puede hacer y esa es la intención que les sirva y se motiven a intentarlo, porque me gusta enseñarles lo que aprendo, ahora bien, les dejo el paso a paso de esta linda manualidad.
Today I want to show you how I made some small cardboard roses, that a lady taught me to do some time ago, they are beautiful and are used to decorate various things, I can also tell you that they are very easy to make and fast, so it has no greater degree of difficulty, so almost anyone can do it and that is the intention that serves them and motivate them to try, because I like to teach them what I learn, now well, I leave the step by step of this cute craft.
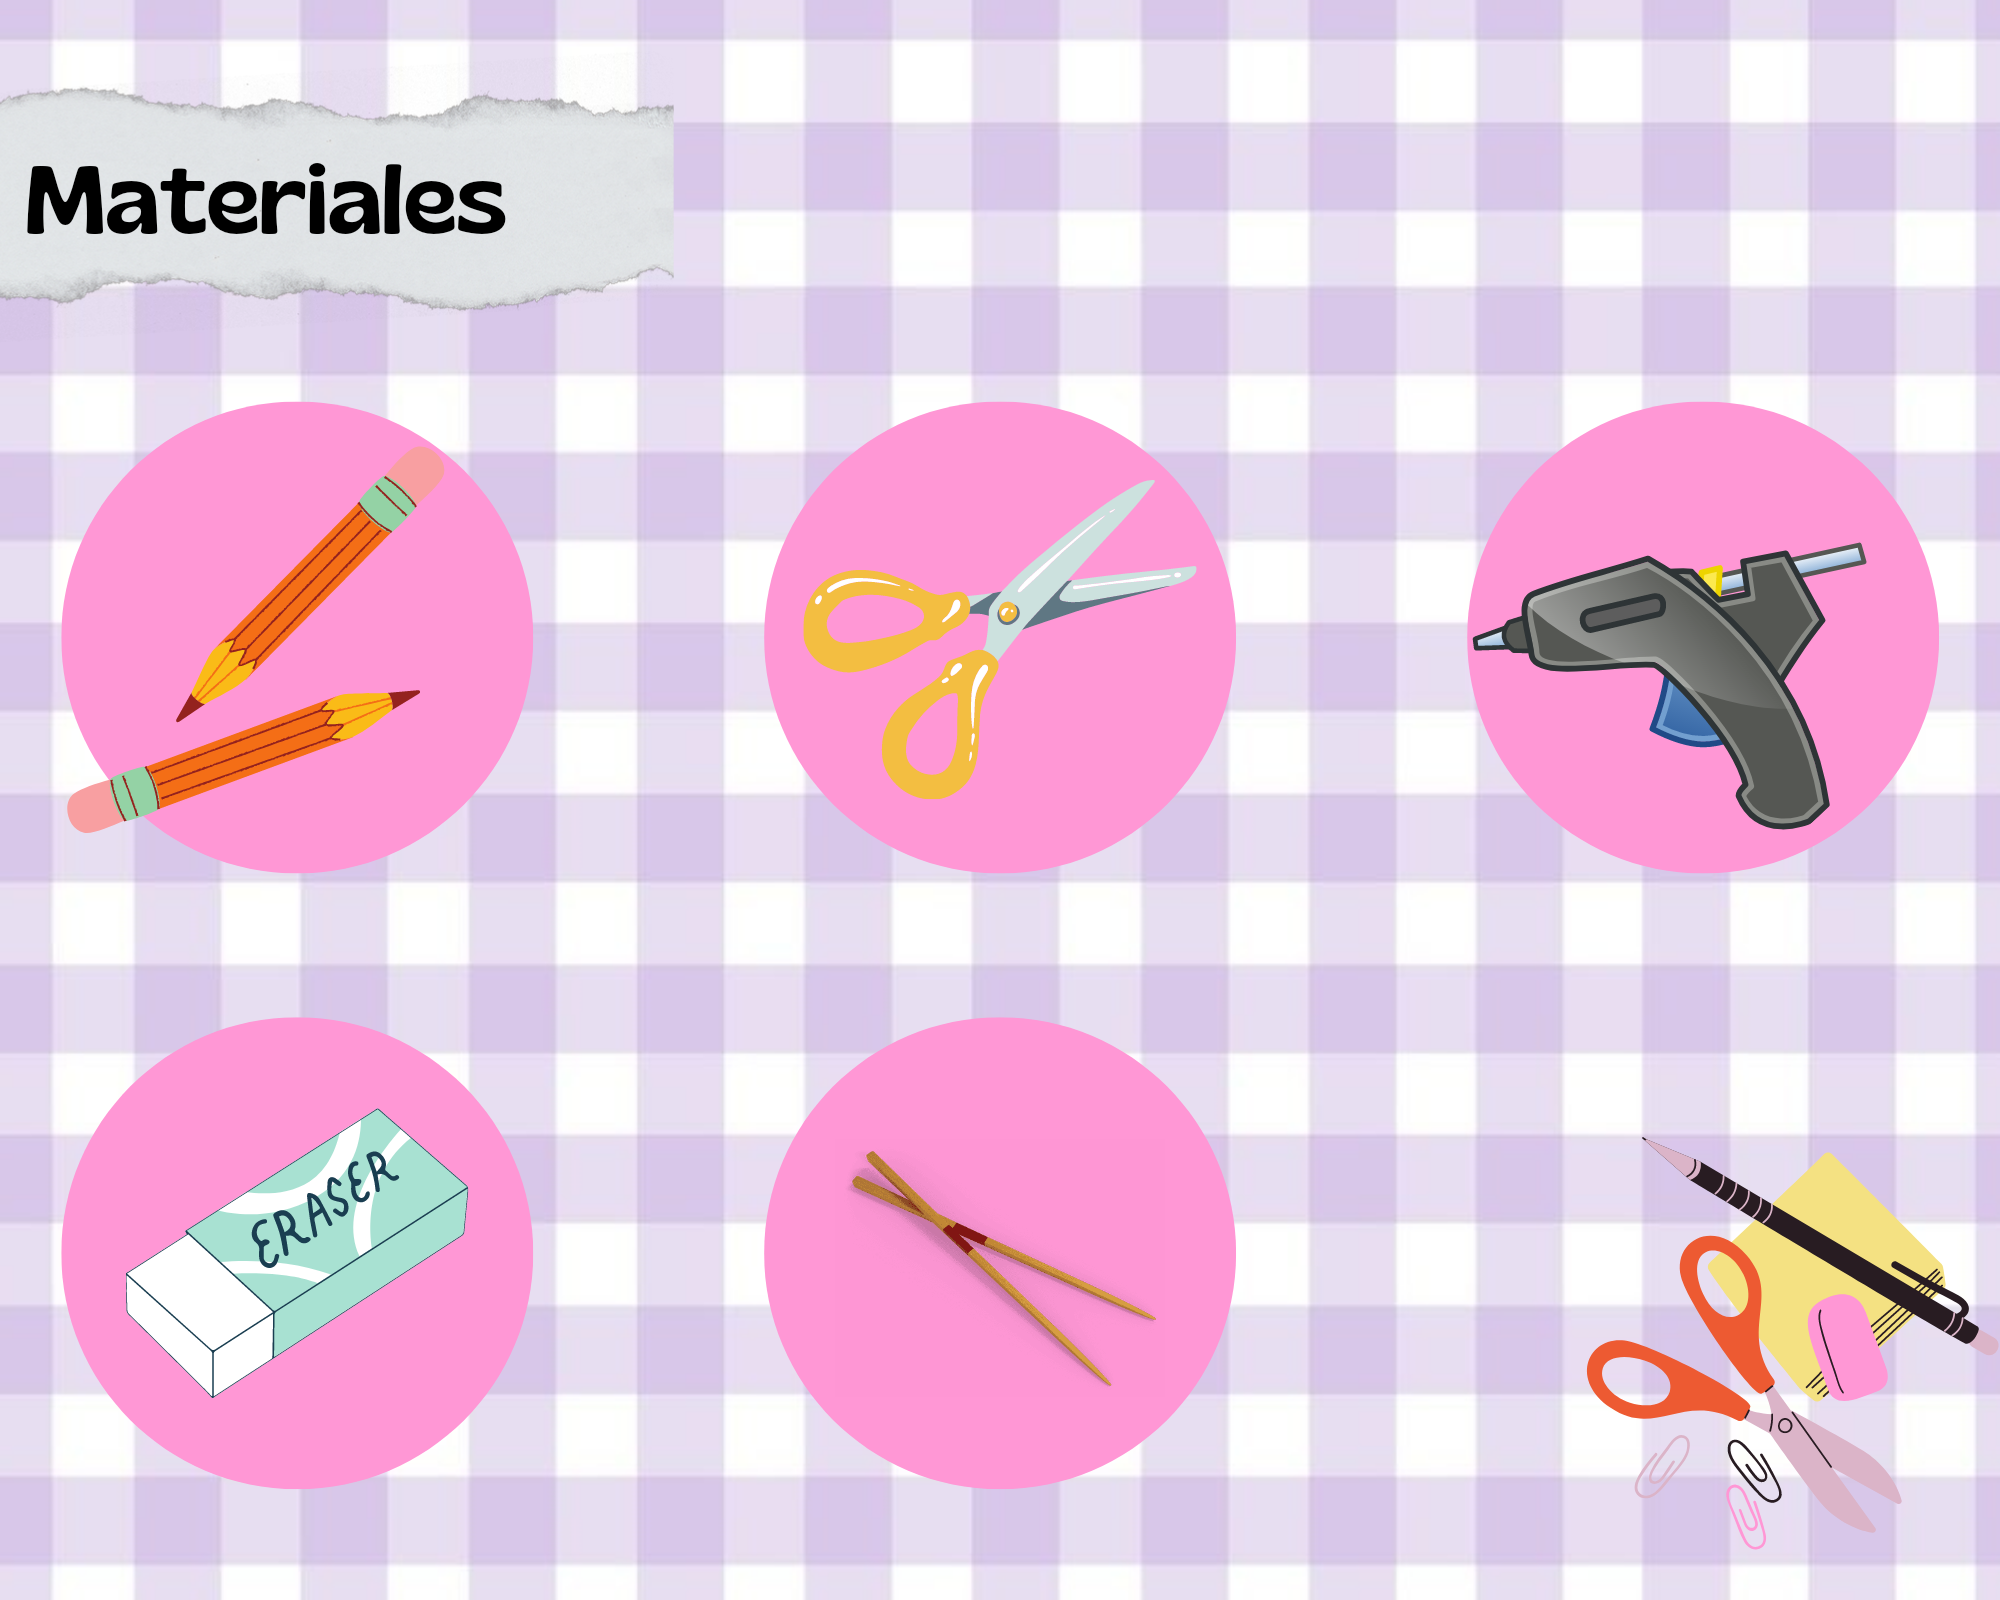
Los materiales que se necesitan son:
The materials needed are:
- Cartulina
- Lápiz
- Borrador
- Palito de altura
- Silicón
- Cardboard
- Pencil
- Eraser
- Height stick
- Silicone
A continuación les muestro el proceso:
Below I show you the process:
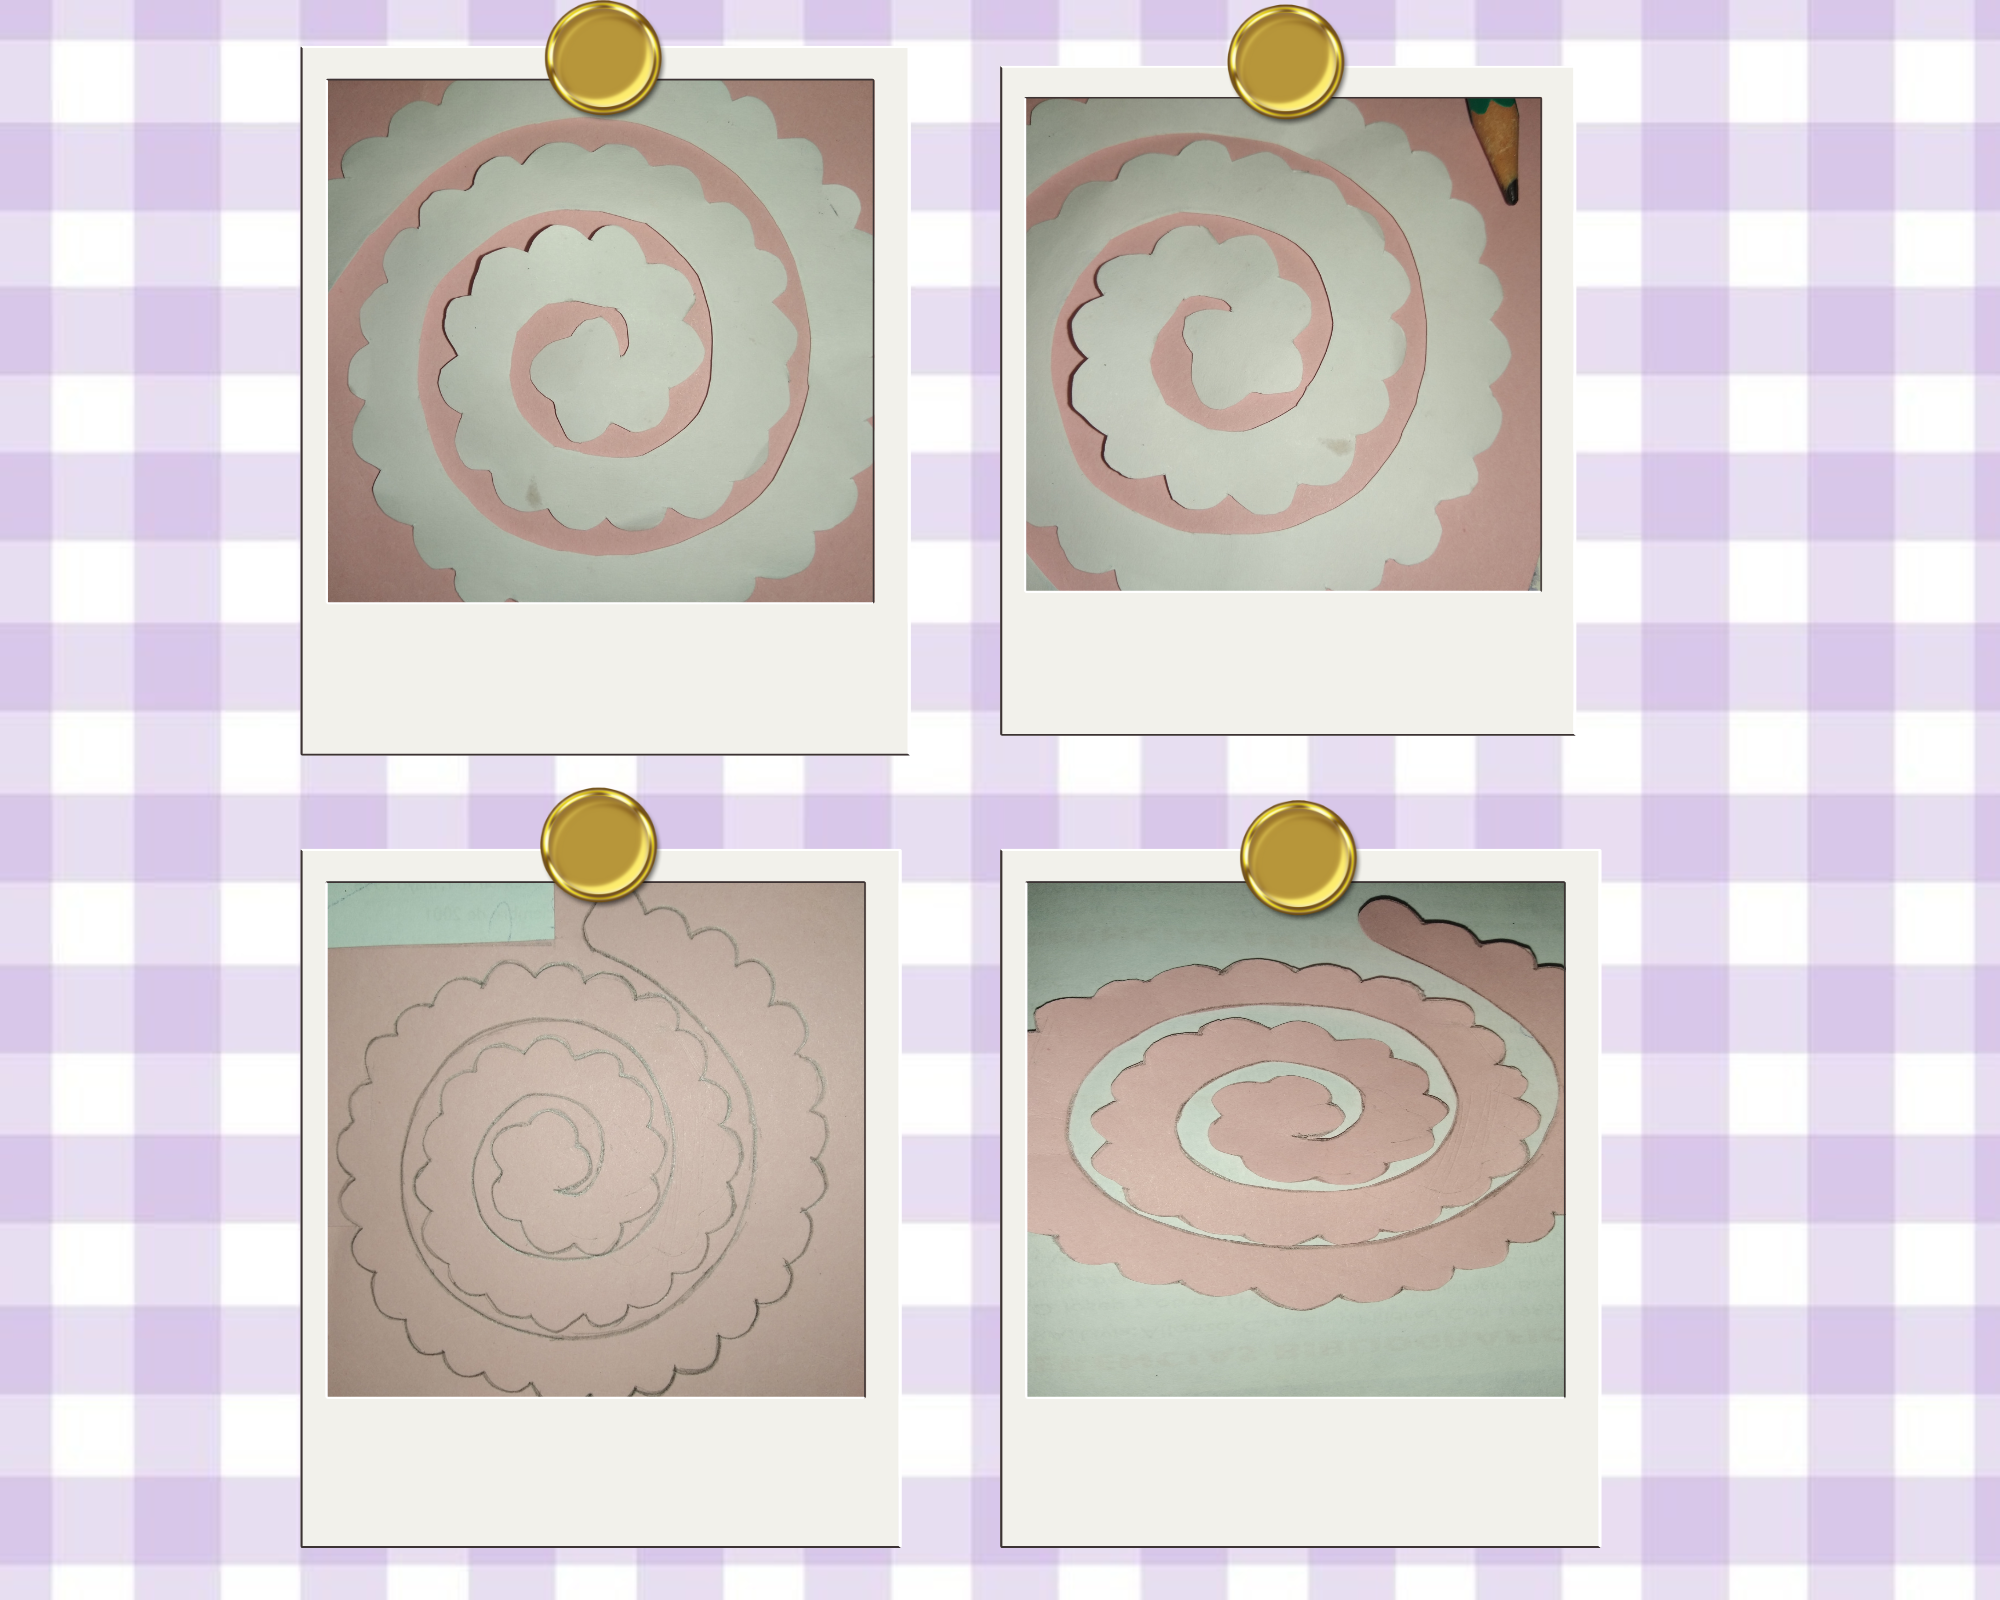
Paso 1:
Step 1:
Lo primero es tener la plantilla, está se las dejo aquí arriba para que la tengan y la puedan utilizar, la pueden hacer del tamaño que gusten, mientras no sea gigante, les recomiendo plasmarla en cartulina para mayor facilidad a la hora de usar, luego solo vamos a colocarla encima de nuestra cartulina y la vamos a sostener con nuestros dedos muy bien, y así, procederemos a marcar todo el borde con nuestro lápiz y vamos a recortar todo muy bien.
The first thing is to have the template, I leave it up here so that you have it and can use it, you can make it the size you like, as long as it is not gigantic, I recommend you to make it on cardboard for ease of use, then we will only place it on top of our cardboard and we will hold it with our fingers very well, and so, we will proceed to mark the entire edge with our pencil and we will cut everything very well.
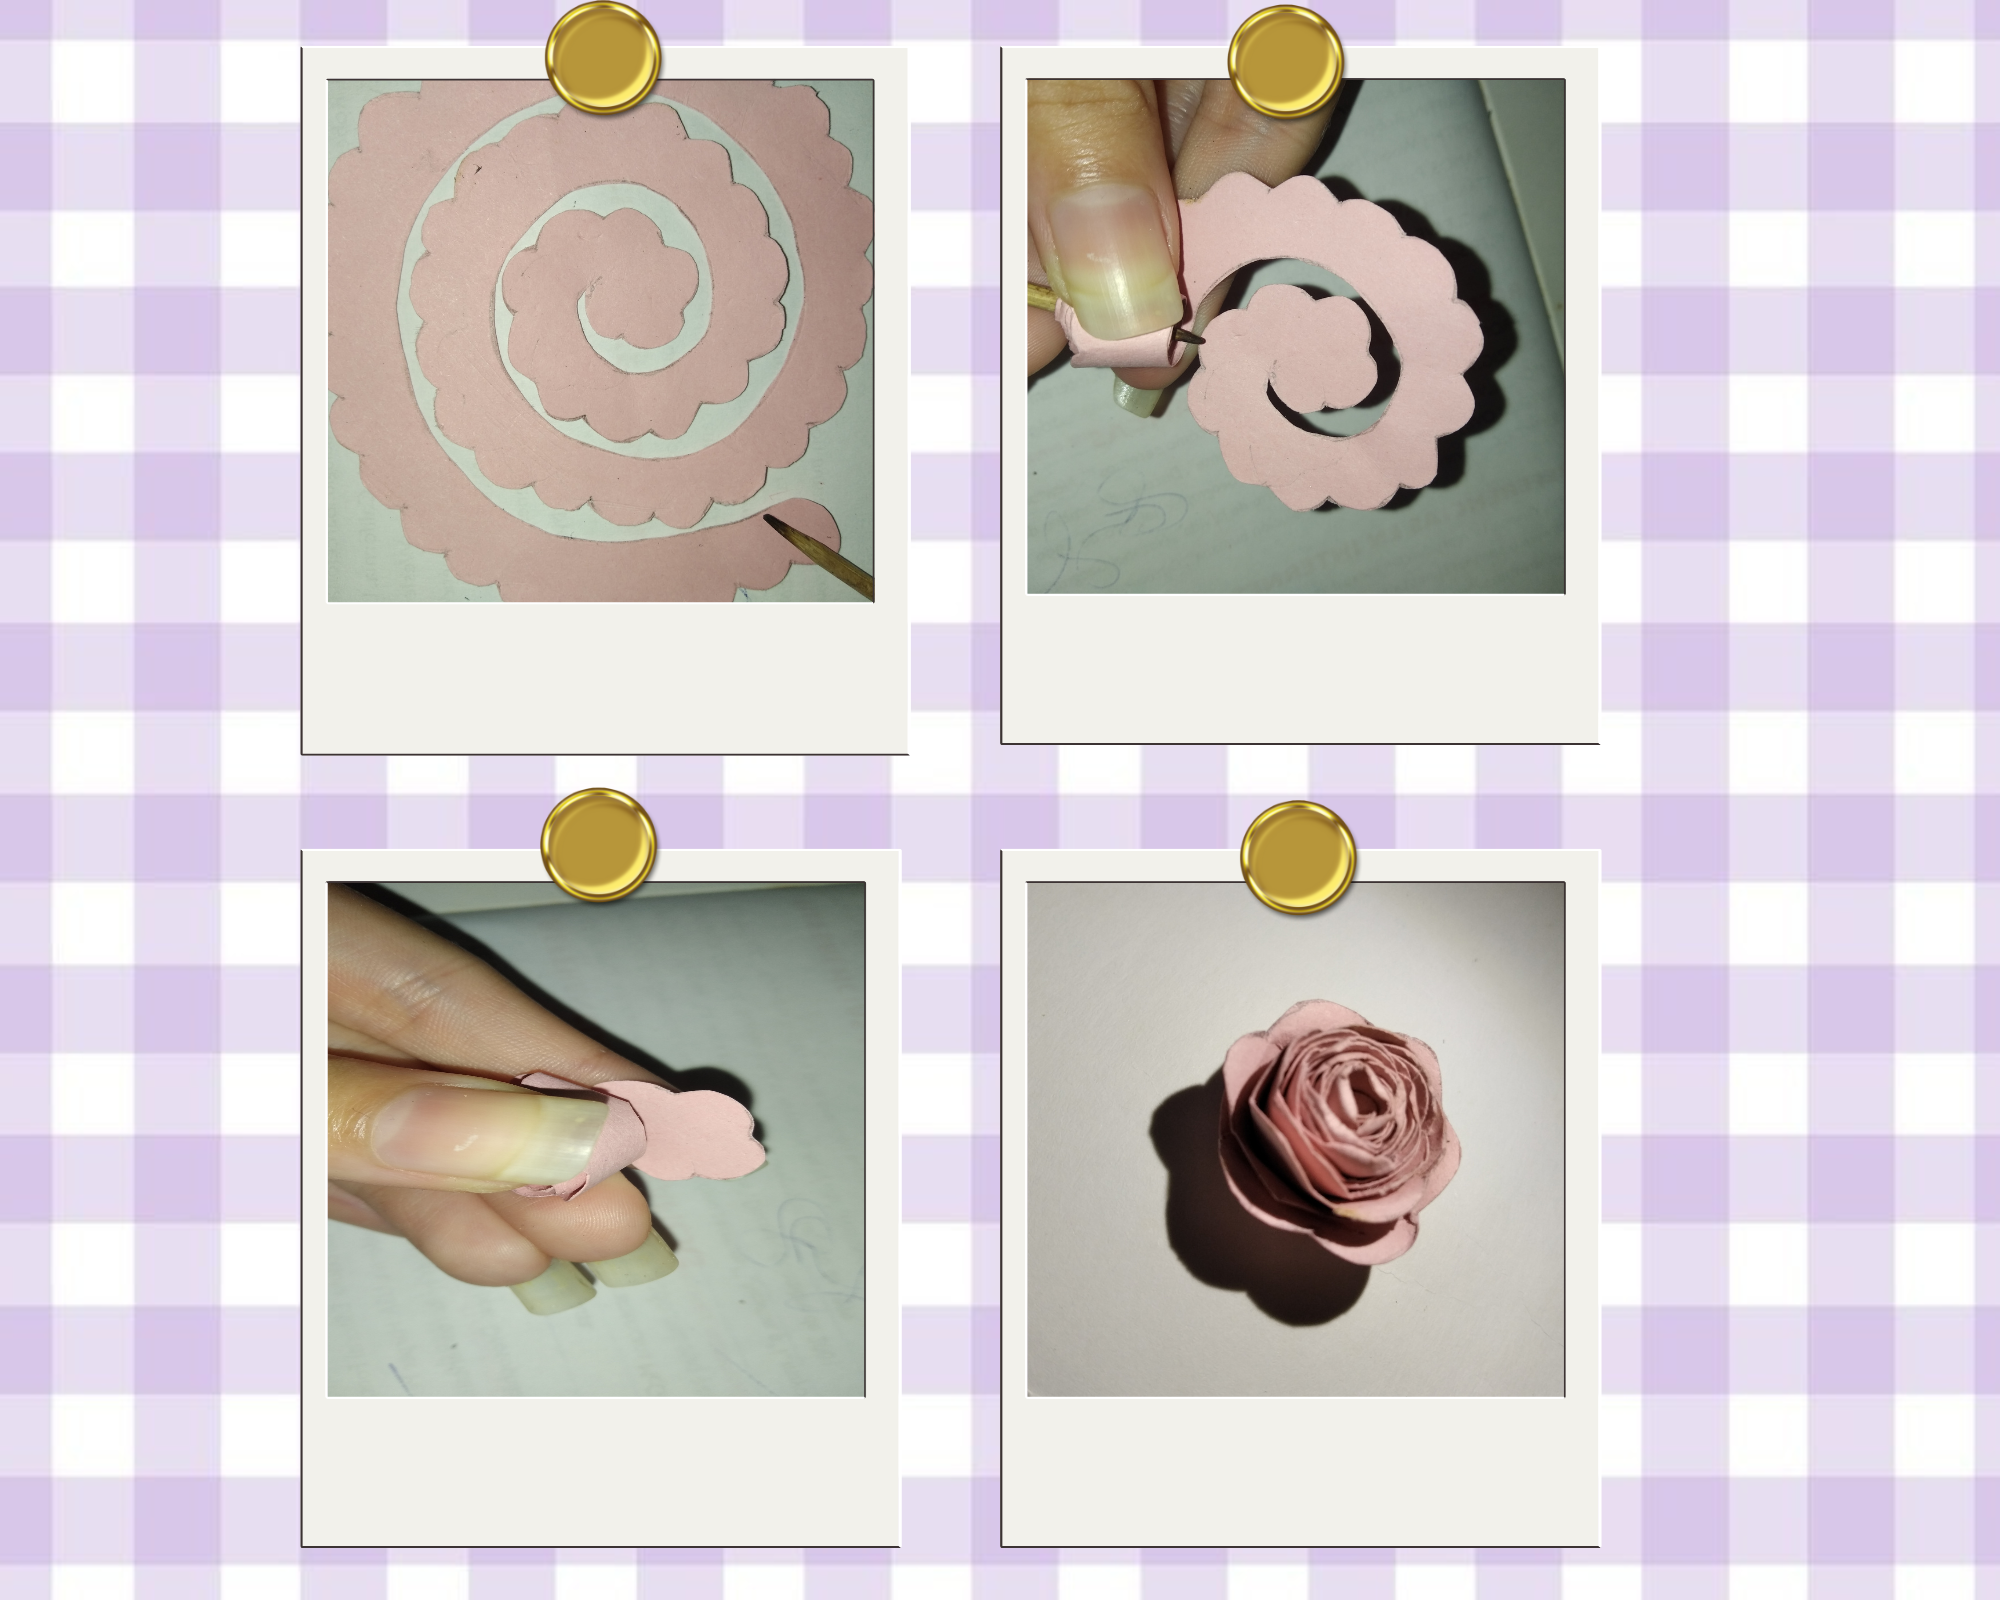
Paso 2:
Step 2:
Después con el Palito de altura, vamos a enrollar la forma desde esta punta que se muestra, así apretando un poco con nuestros dedos hasta llegar al final, dónde vamos a soltar a nuestro gusto y a acomodarla un poco, así mismo, solo vamos a colocar un punto de silicón en el círculo sobrante, para proceder a pegar y sostener un momento con los dedos nuevamente, ya pegado solo nos queda con el palito doblar los pétalos más sobresalientes hacía afuera.
Then with the height stick, we are going to roll the shape from this tip shown, thus squeezing a little with our fingers until the end, where we will release to our liking and to accommodate it a little, likewise, we will only place a dot of silicone in the excess circle, to proceed to paste and hold a moment with your fingers again, and glued only remains with the stick to bend the most protruding petals outward.
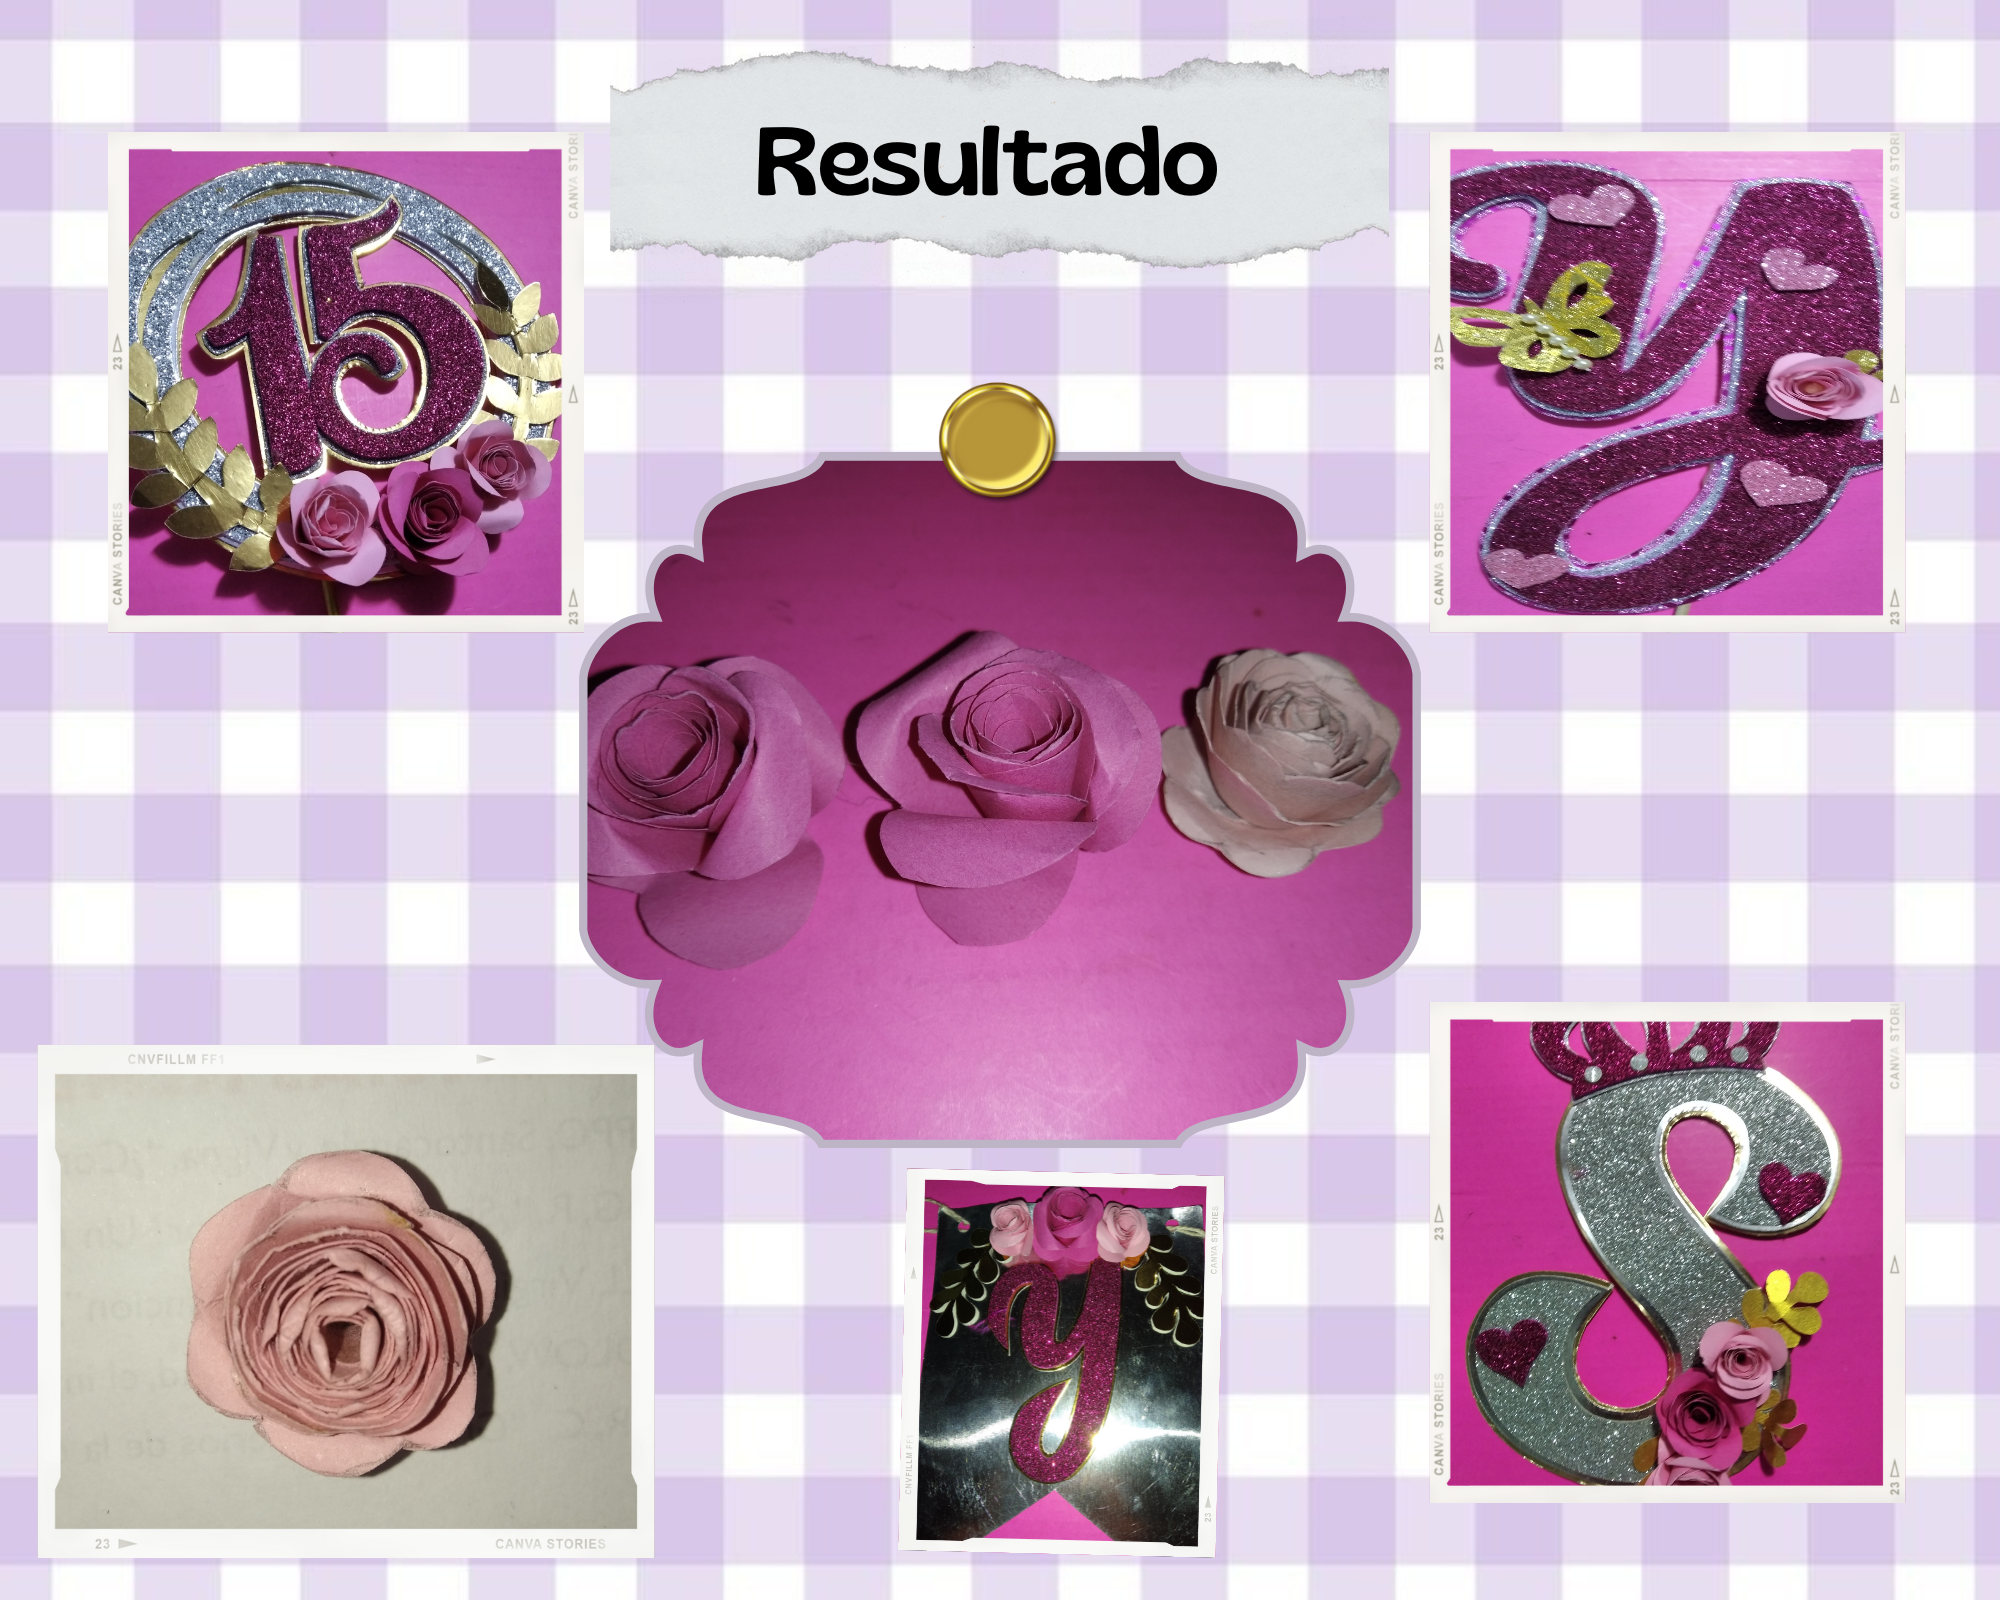
¡Y ya estaría! Así de fácil y rápido, listo para perfeccionar y agregar un toque más lindo, al igual que delicado a nuestras creaciones, en lo personal a mí me encantan y siento que es muy útil para muchas cosas, aquí les muestro unas cuantas cositas dónde se puede aplicar, que hice con la señora para mí cumpleaños, y el de mi hermana, estos unas letras decoradas y varios Cake Toppers, para decorar nuestras tortas. Estás se pueden hacer en diferentes tipos de cartulina e incluso podemos utilizar retazos de cartulina que tengamos en casa, para utilizar ese material de provecho.
And that's it! So easy and quick, ready to perfect and add a touch more beautiful, as well as delicate to our creations, personally I love them and I feel it is very useful for many things, here I show you a few things where you can apply, I did with the lady for my birthday, and my sister's, these decorated letters and several Cake Toppers, to decorate our cakes. These can be made in different types of cardboard and we can even use scraps of cardboard that we have at home, to use this useful material.
Una vez más, gracias por quedarte hasta el final y leer este post que hago con mucho cariño, esperando que se puedan inspirar e intentarlo.
Once again, thank you for staying until the end and reading this post that I make with much affection, hoping that you can be inspired and try it.
Gracias por su atención, nos leemos luego por aquí, saludos y abrazos.♡
Thank you for your attention, we will read each other later, greetings and hugs.♡
Congratulations @stefania16! You have completed the following achievement on the Hive blockchain and have been rewarded with new badge(s):
Your next target is to reach 2750 upvotes.
You can view your badges on your board and compare yourself to others in the Ranking
If you no longer want to receive notifications, reply to this comment with the word
STOPCheck out the last post from @hivebuzz:
Support the HiveBuzz project. Vote for our proposal!
Hola, quedan muy hermosas. Gracias por compartir.
Así es, gracias a ti por leer, saludos.💗✨
Thank you for sharing this amazing post on HIVE!
Your content got selected by our fellow curator @rezoanulvibes & you just received a little thank you via an upvote from our non-profit curation initiative!
You will be featured in one of our recurring curation compilations and on our pinterest boards! Both are aiming to offer you a stage to widen your audience within and outside of the DIY scene of hive.
Join the official DIYHub community on HIVE and show us more of your amazing work and feel free to connect with us and other DIYers via our discord server: https://discord.gg/mY5uCfQ !
If you want to support our goal to motivate other DIY/art/music/homesteading/... creators just delegate to us and earn 100% of your curation rewards!
Stay creative & hive on!
Muchas gracias por el apoyo.❤️