Te enseño como hacer una linda cajita de regalo 🎁💗 | Tutorial Paso a Paso - Fácil y Rápido ♡✨👣 [ESP-ENG]
A big greeting to all my dear and beautiful Hive Diy community! Happy and blessed Wednesday to all! I wish you all a Happy and good rest of the day, plus a week full of pure good things everywhere, as always I wish you never lack creativity, commitment, productivity and above all that you make many beautiful crafts for the community.♡
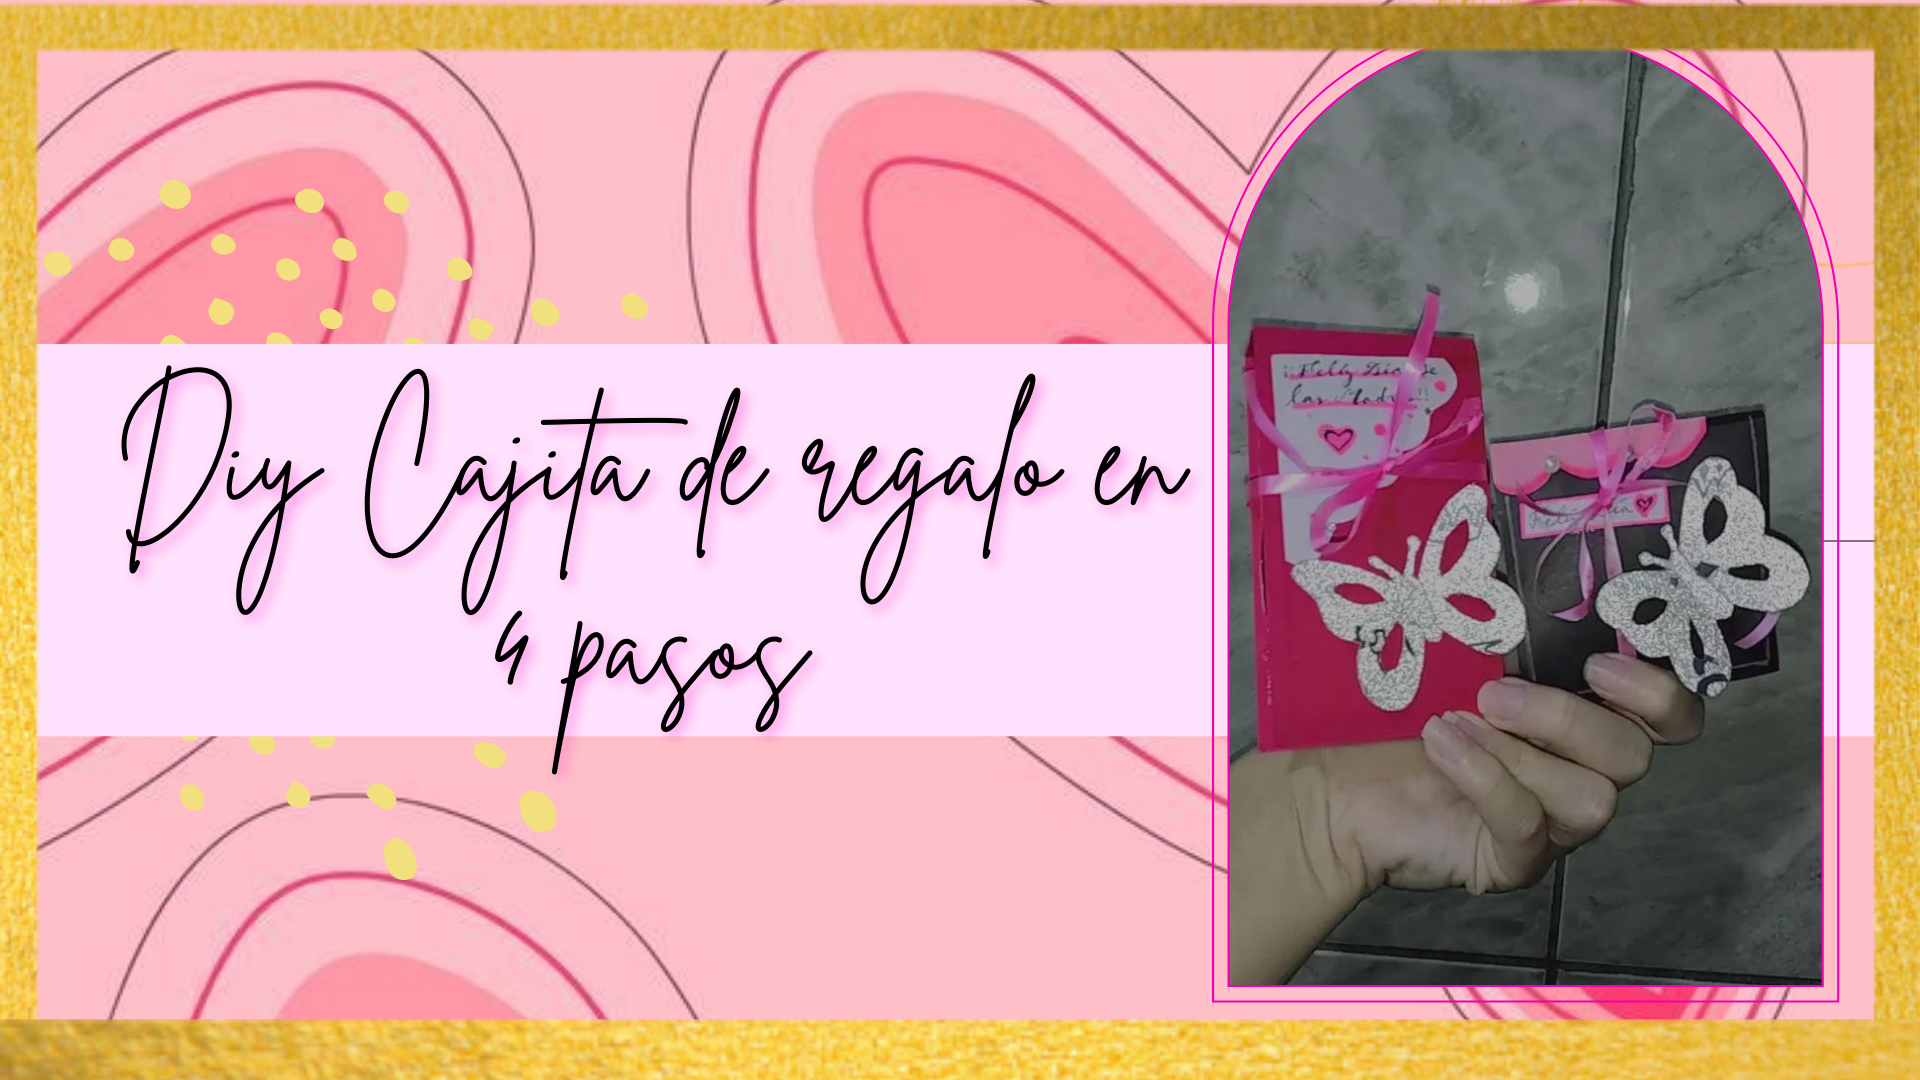
Justo ahora, les traigo una preciosa manualidad, en está ocasión es una mini caja para obsequiar, ya que a veces solemos tener el problema de querer hacer un regalo entre pequeño y mediano, pero no solemos encontrar este tipo de tamaños de empaques, por lo tanto es una cajita que se puede hacer en poco tiempo, del tamaño que necesitemos o queramos y como siempre lo mejor de todo es que ustedes eligen los detalles, de manera que es totalmente personalizada, así los materiales que estaremos utilizando son sumamente sencillos, por lo que se adapta a tu presupuesto muy bien. A continuación les muestro los materiales y el paso a paso bien estructurado que les prepare, para que puedan hacerlas o recrearlas cómo más les guste, yo le agregué maripositas porque es mi toque personal, me fascinan, pero ustedes eligen, así que ahí les va.
Just now, I bring you a beautiful craft, this time it is a mini box for gifts, because sometimes we usually have the problem of wanting to make a gift between small and medium, but we do not usually find this type of packaging sizes, so it is a box that can be done in a short time, the size we need or want and as always the best of all is that you choose the details, so it is fully customized, so the materials we will be using are extremely simple, so it fits your budget very well. Below I show you the materials and the well structured step by step that I prepared for you, so you can make them or recreate them as you like, I added butterflies because it is my personal touch, I love them, but you choose, so here you go.
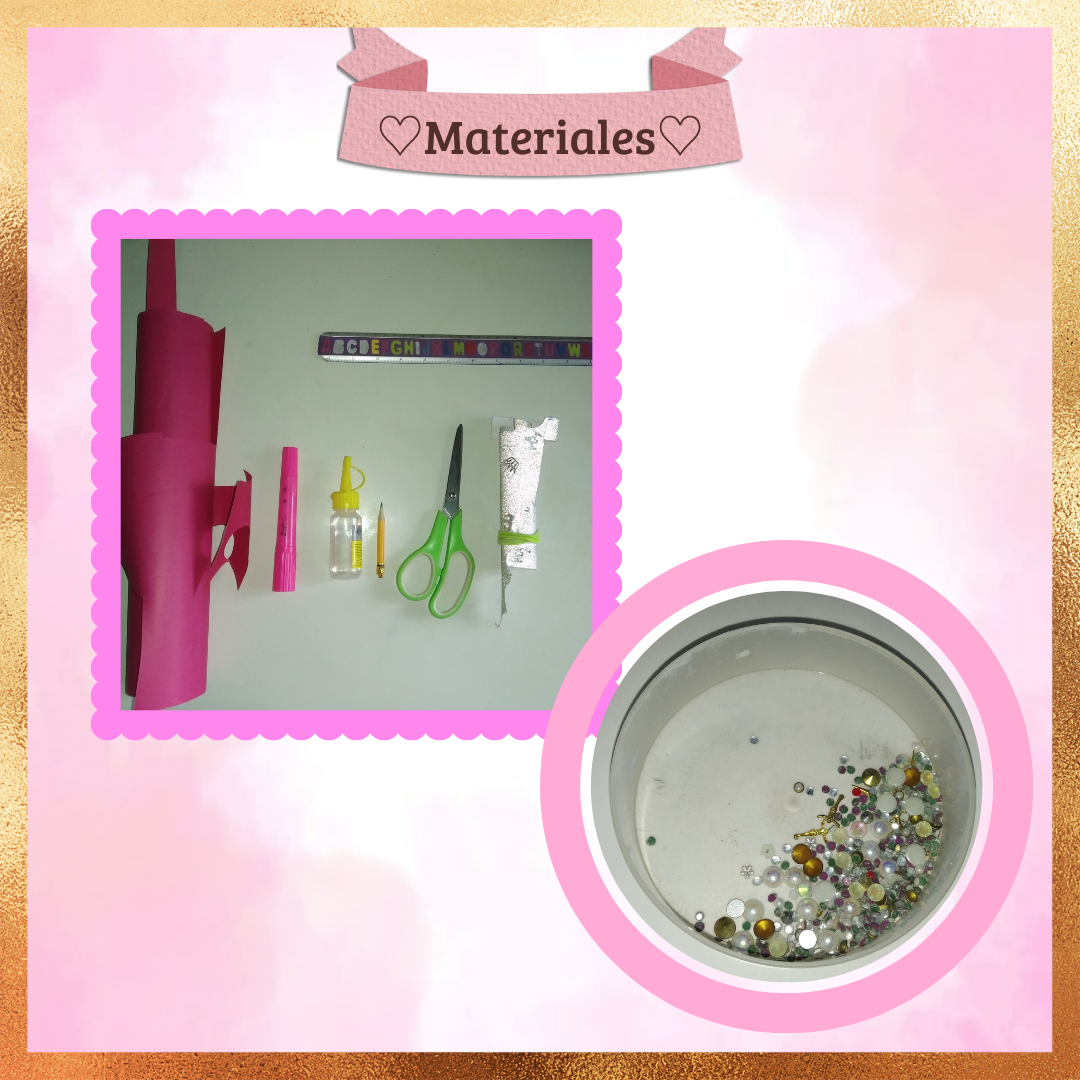
✨Materials to be used✨
- Cartulina unicolor
- Cartulina decorada
- Silicón
- Piedritas pequeñas
- Regla
- Lápiz
- Marcadores
- Unicolor cardboard
- Decorated cardboard
- Silicone
- Small stones
- Ruler
- Pencil
- Markers
♡Procedure Step-by-Step♡
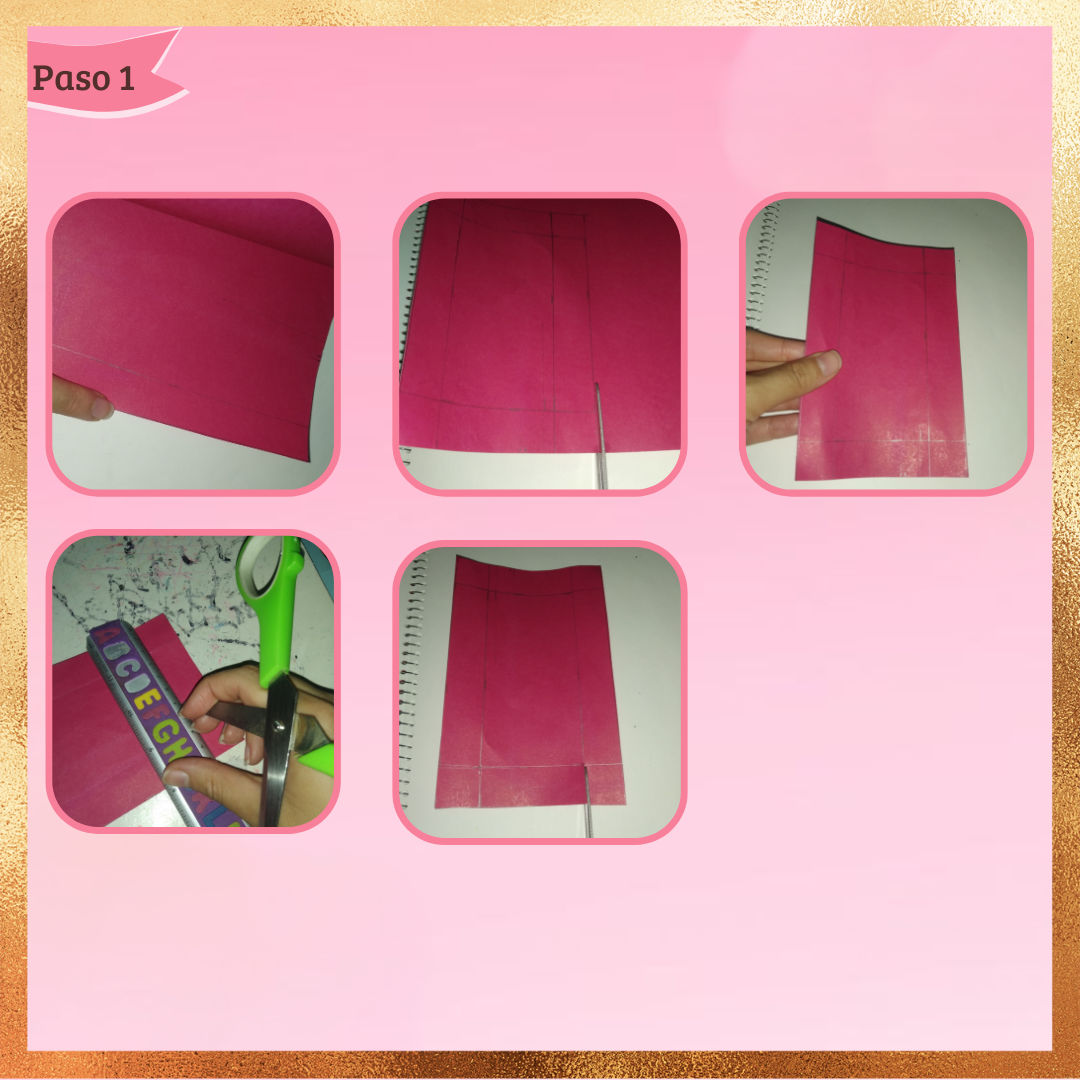
Paso 1:
Step 1:
Comenzaremos haciendo nuestra propia plantilla, de manera que simplemente vamos a trazar directamente en la cartulina la medida que queramos yo en este caso use una medida de 5.5 cm x 11 cm y seguidamente le agregaremos 1.5 cm a cada lado, como se puede mostrar en las imágenes que les dejó. Luego seguimos a marcar los dobleces sosteniendo una regla y ayudándonos de la punta filosa de la tijera, así la pasaremos sutilmente sin aplicar mucha presión, ahora con la misma tijera recortaremos de forma recta un solo lado de los cuadrados de las esquinas, como también pueden ver.
We will begin by making our own template, so we will simply trace directly on the cardboard the measure we want, in this case I used a measure of 5.5 cm x 11 cm and then we will add 1.5 cm on each side, as you can see in the images that I left. Then we continue to mark the folds holding a ruler and helping us with the sharp end of the scissors, so we will subtly pass it without applying much pressure, now with the same scissors we will cut straight only one side of the squares of the corners, as you can also see.
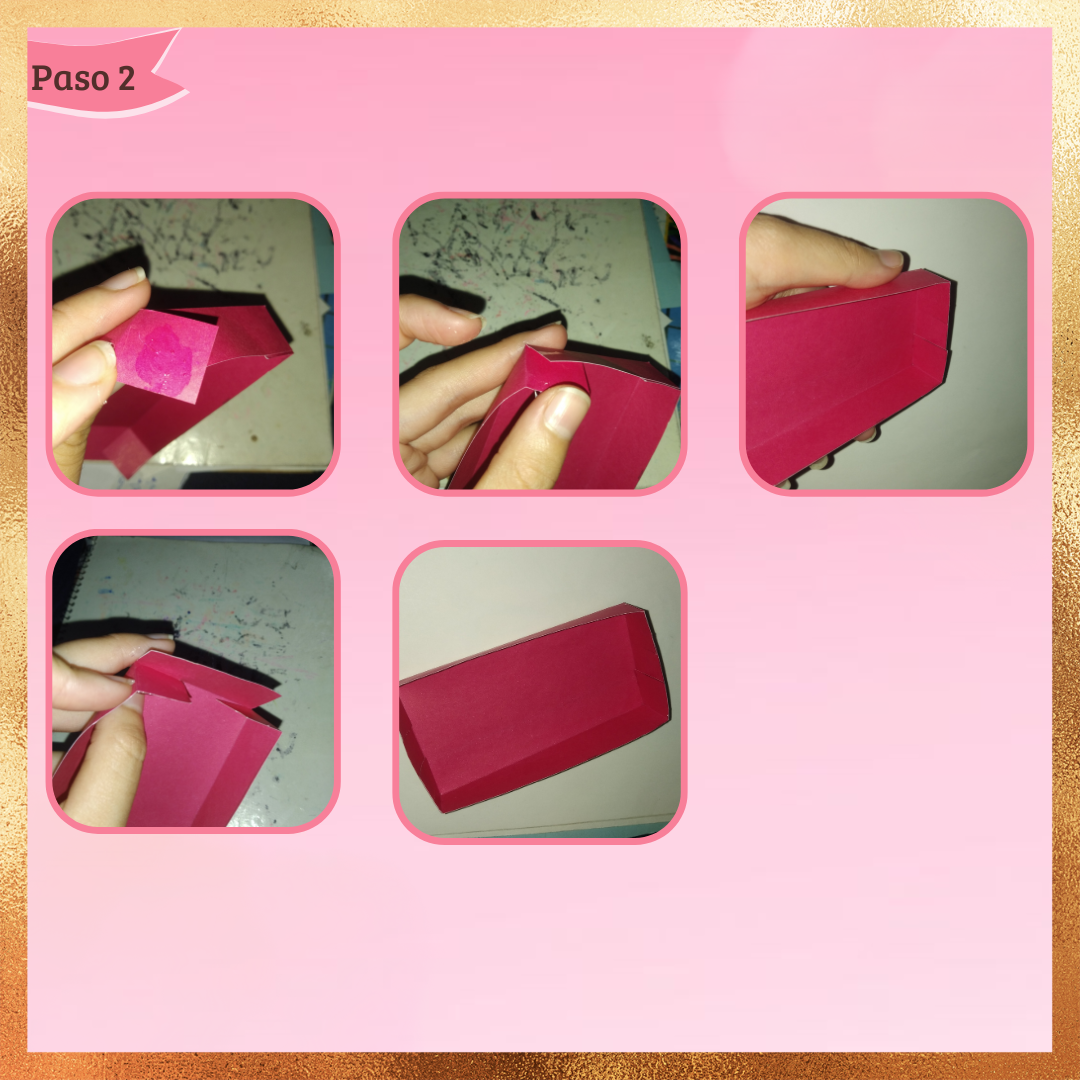
Paso 2:
Step 2:
Continuamos agregando silicón en cada una de las pequeñas solapas tipo cuadrado que dejamos anteriormente, seguidamente pegaremos todas hacía adentro cuidadosamente con cuidado de no esparcir en exceso el silicón, luego de esto ya tendremos la primera pieza de la cajita formada.
We continue adding silicone on each of the small square flaps that we left previously, then we will glue all of them inwards carefully taking care not to spread the silicone too much, after this we will have the first piece of the box formed.
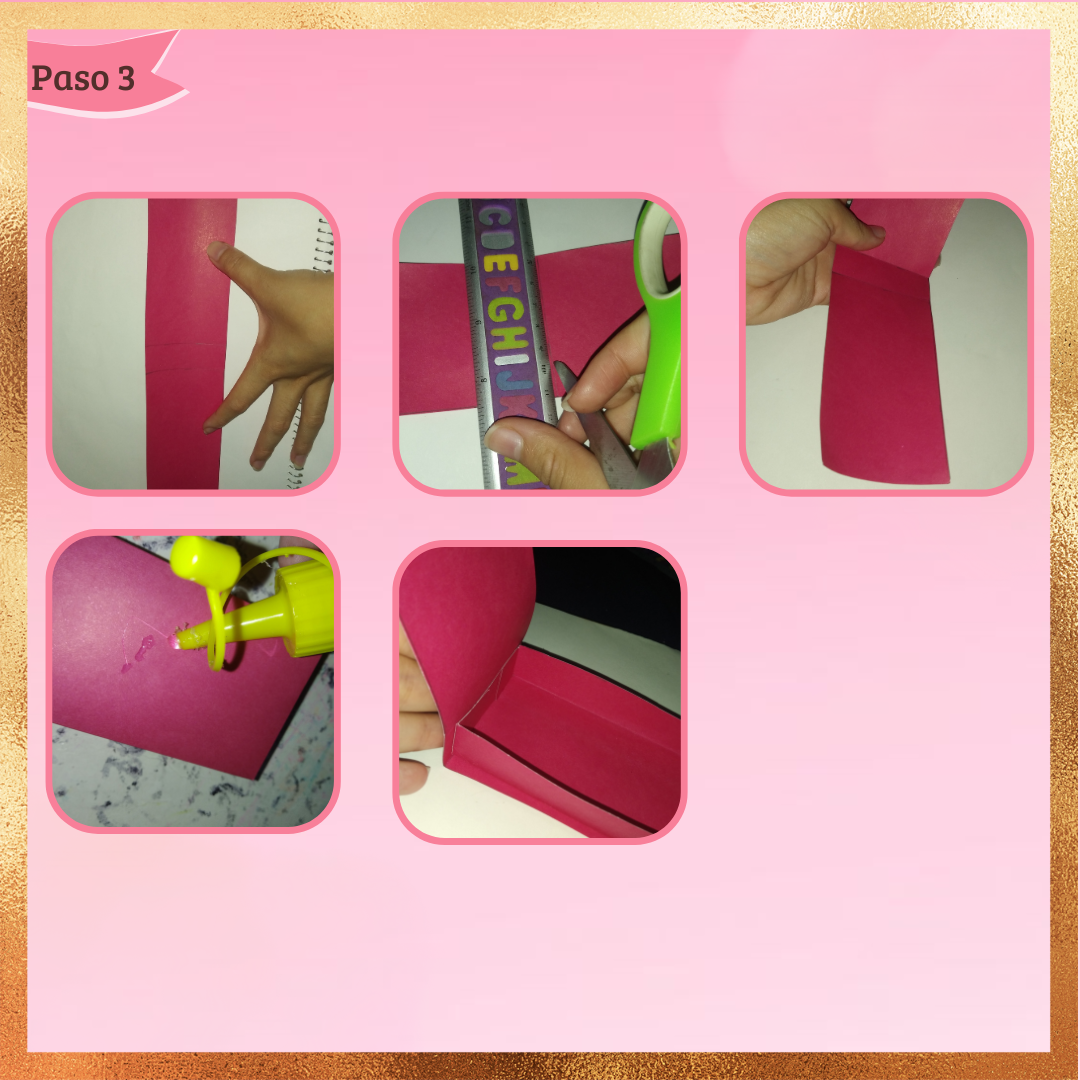
Paso 3:
Step 3:
Procedemos con las segunda pieza, para está vamos a marcar en la cartulina nuevamente unicolor una tira de 6.5 cm x 11.5 cm, o si la están haciendo de otra medida, la cosa solo está en agregar 0.5 cm de más a cada lado, después agregaremos una línea de 1.5 cm de ancho justo en el medio de la tira. A continuación utilizaremos la regla y la tijera de nuevo para marcar la última línea que hicimos, ahora solo nos quedaría agregar silicón en la parte de abajo de la cajita anterior que hicimos, esparcirla y unir con cuidado las dos piezas, agregando presión unos cuantos segundos, también pegaremos la marca de 1.5 cm a la caja, quedando justa como pueden apreciar en la imágen.
We proceed with the second piece, for this we are going to mark on the unicolor cardboard again a strip of 6.5 cm x 11.5 cm, or if you are making it of another size, the thing is just to add 0.5 cm more on each side, then add a line of 1.5 cm wide right in the middle of the strip. Next we will use the ruler and the scissors again to mark the last line we made, now we just need to add silicone on the bottom of the previous box we made, spread it and carefully join the two pieces, adding pressure for a few seconds, we will also glue the 1.5 cm mark to the box, being just as you can see in the image.
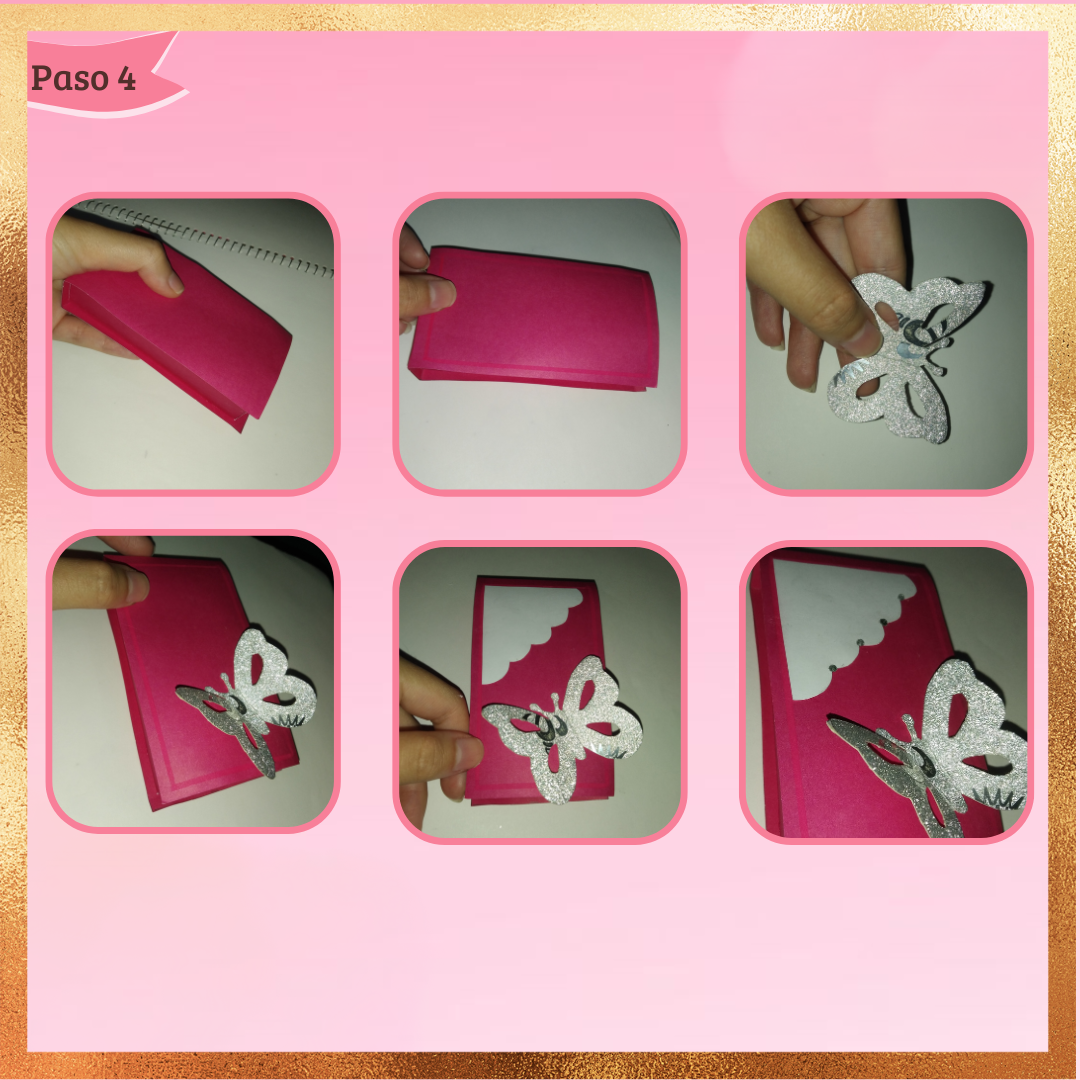
Paso 4:
Step 4:
Ahora bien, para darle nuestro toque agregaremos la decoración a nuestro gusto, primero con algún marcador haremos un pequeño borde a cada lado dejando apenas un pequeño espacio, después recorte una mariposa mediana en cartulina decorada plateada y con silicón frío la pegue en la orilla derecha, luego recorte una figura igual a la de la esquina, pero curveada en el borde y igualmente con silicón la pegue, así para escribir un pequeño mensaje, por último pegue perlitas en el borde de la parte blanca y ya está.
Now, to give it our touch we will add the decoration to our taste, first with a marker we will make a small border on each side leaving just a small space, then cut a medium size butterfly in silver decorated cardboard and with cold silicone glue it on the right edge, then cut a figure like the one in the corner, but curved on the edge and also with silicone glue it, so to write a small message, finally glue pearls on the edge of the white part and that's it.
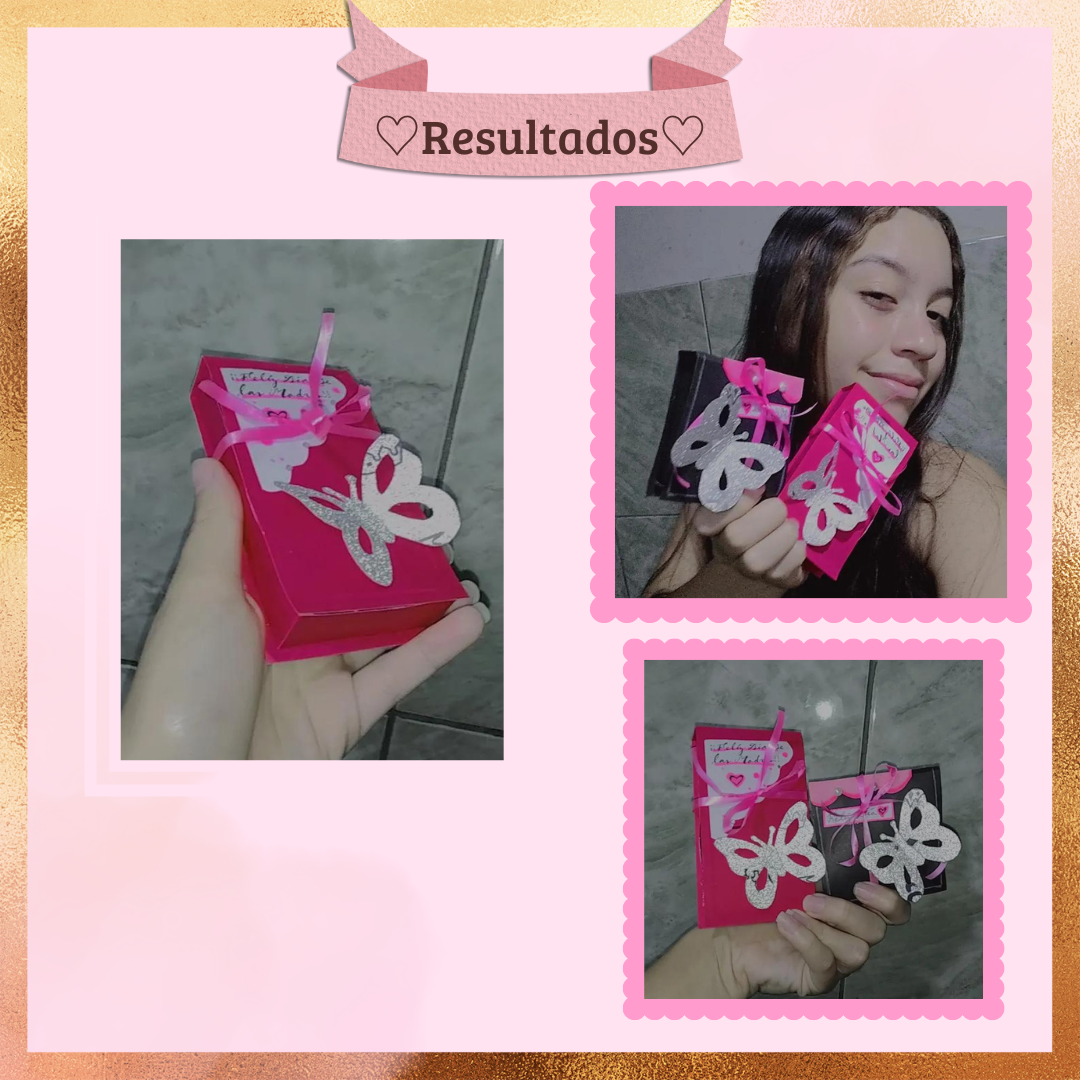
Así en unos cuatro sencillos pasos y con materiales sencillos obtenemos nuestra hermosa cajita hecha por nosotros totalmente a nuestro gusto y elección, ideal para regalar en cualquier ocasión, para darle ese toque especial personalizado a algún regalo que queramos obsequiar por ahí con mucho amor.
Thus in four simple steps and with simple materials we obtain our beautiful little box made by us totally to our taste and choice, ideal for any occasion, to give that special personalized touch to a gift that we want to give away with love.
Este pequeño empaque tiene las tres B, bueno, bonito y barato, así que no duden en hacerla, porque no tiene gran dificultad, espero que les guste y que sea de su utilidad en algún momento, esto es todo por la manualidad de hoy, nos leemos pronto.♡
This small packaging has the three B's, good, nice and cheap, so do not hesitate to make it, because it has no great difficulty, I hope you like it and that it will be of use to you at some point, this is all for today's craft, see you soon.♡
♡Gracias por leer una vez más ¡Hasta la próxima! Mi gente creativa.♡
♡Thanks for reading once again See you next time! My creative people.♡
Photos of my authorship taken from my Xiaomi Redmi 7 phone, edited in the free version of Canva.