Sourdough Discard Pizza Recipe!

Who doesn’t like a good pizza? Really now. It’s pretty much like a toasted cheese sandwich on crack! Well, I guess that’s not the greatest association, haha. The problem though, is that every part of that pizza needs to come together in the right way. If your base isn’t right, it will spoil your pizza. Wrong tomato base, ugh. Poor quality mozzarella, yup, again, spoilt.
I used to make a pretty badass normal base. By normal, I mean dough activated with instant dry yeast. As good as it was, I felt I could do even better. Guess what… I just leveled up! By levelling up I mean it’s totally knocked any other pizza I’ve ever tried completely off the podium. Yes, this base takes 1st, 2nd & 3rd place. It’s really that good! It’s light and fluffy on the inside, with a perfectly balanced chew and crunch.
There was lots of trial and error involved. Anyone who’s ever worked with Sourdough knows it’s quite different from the normal dough. The dough is stickier, takes longer to rise, and behaves differently depending on the strength of your culture. I ended up with pizza bases that were too dense, too crispy and just plain awful. I didn’t give up and eventually ended up with this magic recipe.
This makes 4 large pizza bases. Approximately 35cm or 13.78in.
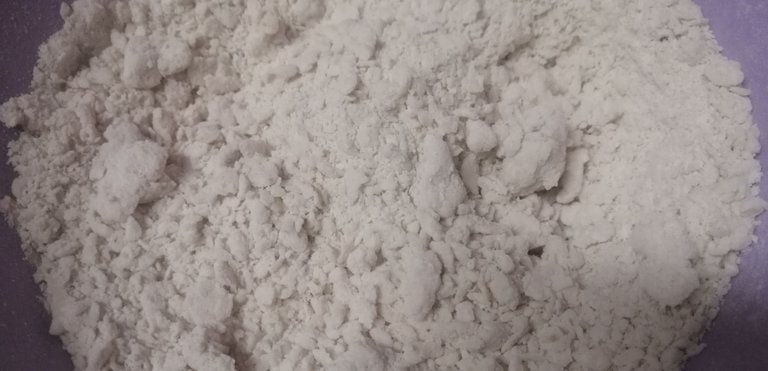
Ingredients:
| Unbleached Flour | 600gm | 21.16oz |
| Unfed Discard | 460gm | 16.22oz |
| Water | 280gm to 320gm | 9.86oz to 11.28oz |
| Olive Oil | 2 tablespoons plus a little extra |
| Salt | 2 teaspoons |
| Instant or Active Dry Yeast | 1 teaspoon |
Requirements:
| Pizza Stone, Pizza Pan, Pizza Oven, or Bullet Smoker |
| Baking Paper |
| Pizza Peel |
Before we move on to the instructions, you’ll notice there is a little cheat in this recipe. 1 teaspoon of Yeast. This helps speed up the process. Depending on how old your Sourdough Starter is, this can be scaled down. I’ve used a combination of ½ a teaspoon Active Dry Yeast, with the same amount of Sourdough Discard that was still quite active, and it worked like a charm. Another point to remember is the older your Discard is, the more of that Sourdough tang it will have.
Let’s March Along Onto The Instructions:
Step 1
In a large mixing bowl, start off by mixing your dry ingredients first. Flour, Salt & Yeast. You can use a fork, paddle, or cake mixer.
Step 2
Add the Sourdough Discard and start mixing it with your Dough Hooks. If you don’t have those, you can mix it by hand. It will become very sticky though once you’ve added your water. At this point, it will be very dry and crumbly.
Step 3
After giving it a good mix, you can add Olive Oil and Water. After pouring the Olive Oil, start by adding 250gm/8.82oz Water, then slowly increase it until your Dough sticks to the Dough Hooks, but pulls away slightly from the sides of your bowl. This is the consistency you want. Since Flour varies from brand to brand, it may require more, hence the extra Water up to 320gm/11.28oz. For me, the sweet spot is 280gm/9.86oz.
Your dough needs to mix for 10 minutes. You’ll notice as it mixes, the consistency starts to change, and the dough has a slightly ‘shiny’ look to it. This is exactly what you’re looking for. This means the Gluten Structure is changing, which gives your Pizza Base that amazing texture.
Step 4
Now it’s time to get that Sticky Dough out. First, dust a solid surface with a good amount of Flour. I put a little Olive Oil on my hand, then proceed to scoop the Dough out of the bowl and onto the surface.
Next, get a bowl and pour enough Olive Oil to create a thin lining. I use my fingers to rub it around. Scoop up your Dough and carefully shape it into a round, before putting it into the lined bowl. If some of the Dough got stuck to the surface, you could always use a Dough Scraper to get the rest off. If you’ve put down enough Flower, it shouldn’t be an issue. Cover the top of the bowl with plastic wrap, then wait for your Dough to rise. It needs to double in size. There are variables involved here like temperature and how active your Discard is. If it’s quite cold, you can speed it up by putting your Dough in a warmer part of your house, like the top of a fridge.
For me, the initial rise takes 2 hours with 1 teaspoon Yeast and 4 hours with ½ a teaspoon.
Step 5
Now you’re going to punch down your dough and fold it over on itself. It should come off the sides of the bowl easily, so just stick your hands down the sides, then gently pull it over while pushing it back down the middle. Turn your bowl and do this about 6 times over. Again, a little Olive Oil on your hands helps so it doesn’t stick.
Step 6
You’re almost there! Now that you’ve waited for your Dough to double in size again, you can start making the crust. I start with two bases at a time, so initially, I half the Dough, then half it again. You’re going to do this on a floured surface.
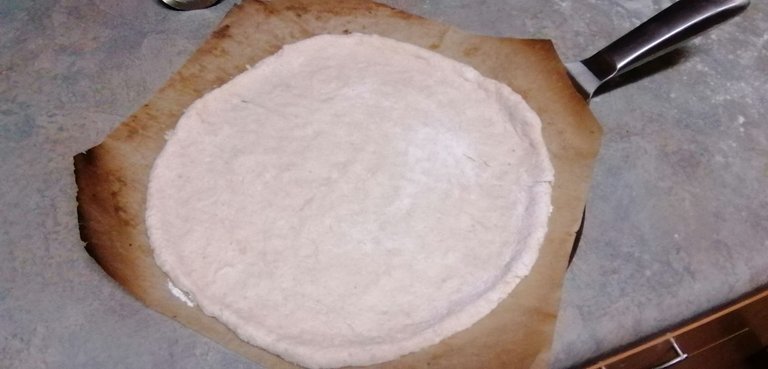
After cutting your Dough into equal portions, you’ll shape it into individual balls. This is when your baking paper comes into play. Dust the baking paper with Flour, then dust some Flour on top of your ball. Place the ball Floured side down onto the sheet. This will ensure it doesn’t stick to the sheet. Gently press down on top of the ball, using extra flour as you proceed to press it from the center outwards, into a rounded shape.
When I’m pressing the Dough out, I do so with flattened fingers, starting with my pinky and ending with my index finger. This can be done with a rolling pin, but it’s not necessary since the Dough is soft enough to be pressed out by hand. I also feel I have more control over shaping this way.
If you’ve done everything correctly, you should be left with a thin base and a nice little ridge around the edges. Now, loosely cover your base with plastic, and allow it to rest for 5 – 10 minutes.
Step 7
Finally, we’re getting to baking that beautiful crust! Your hard work is almost ready to pay off in leaps and bounds! But wait, this is not going to be a single step. I’m going to give you two options here.
1. Bake & Eat
2. Bake & Freeze
If you’re too hungry and ready to try it out for immediate consumption, just check out #1
Bake & Eat
Whichever baking method you’re using, make sure it’s Hot, Hot, Hot! For simplicity’s sake, I’ll give you the oven method. If you’re using a Bullet Smoker, be sure you have an easy-burning wood that gives you enough flames to get it way past that smoking gauge.
For the Oven, I’m putting mine on max, which reaches 300 °Celsius or 572 °Fahrenheit.
Using a fork, gently score your base throughout, spaced at about 2cm or 1inch intervals. This will help so the base doesn’t completely bubble up. Don’t worry though, there will still be loads of little air pockets inside.
Carefully slide your Pizza Peel under the Baking Sheet. I prefer grabbing the tips of the sheet, then pulling it onto the Peel. Now it’s time for the First Bake. At the mentioned temperature, this takes about 5 minutes.
You’ll notice all those beautiful bubbles forming throughout. Some will be smaller, others bigger, but trust me, this is going to be perfect!
During this stage, you’re not going for the golden crust yet. You simply want to firm up the dough, so you’re getting ready for the toppings. This step helps bubbles to form better in your crust and stops it from becoming soggy.
Next, you’ll sprinkle a little Mozzarella Cheese on the base. Not much, just a pinch or two. This will help your toppings stick better to the base. There’s nothing worse than cutting a Hot Pizza and the toppings go sliding around all over the place.
Next, you add your favorite Tomato Base. I use a combination of good quality canned Italian Tomato, crushed, mixed with Tomato Paste, and a pinch or two of Salt. For me, about four heaped tablespoons are sufficient per base. That will all depend on your personal preference though.
Now you can add your Toppings, Mozzarella, and put that Bad Boy back in the oven. For a plain Margarita Pizza, this should take another 10 minutes. You just keep an eye on those edges and wait for those golden spots to appear on top, then you’re done. Yum! Finally eating time 😊
Bake & Freeze
The bake and freeze process has one extra step. Follow the same steps as above, until the base is ready to go in for the 1st round of baking.
Your initial bake will be around 5 minutes, just until the dough has firmed and bubbles have formed. Next, you’ll add your tomato base. You won’t need the Mozzarella as per # 1 since you’ll be drying out your tomato somewhat with the next bake. This will ensure your toppings don’t slide around and the base won’t get soggy.
Now, bake it just with the tomato base. The crust around the edges can go slightly brown and you’ll see the liquids evaporate. Don’t overbake it, or else you’re going to end up with burnt edges later. Allow the pre-cooked base to cool down, then you can wrap it and freeze it as is or freeze it with Mozzarella added on top.
Frozen is never as good as fresh, but these are still Champion! They will freeze well for two weeks, likely even longer.
Alright, there you have it. If you have any questions or comments, feel free to drop them down below.
Do you have a sourdough culture? If yes, what it your culture's name? Ours is named Smineva :) My son, @rexydayz is really good at coming up with names, and came up with this as reference to sourdough making a huge comeback, and been around for centuries.
Thanks for stopping by :)
Cheers!

awesome, you cant beat some nice home made pizza!! :)
For sure! I've been doing homemade pizza's for years now. This one takes the cake 😁
!CTP
Best Pizza Ever. Thank you for ruining another restaurant favorite of mine hahaha 😆 My list of what to order when we do eat out has shrunk to sushi only. Love you babes 😘
Haha, perhaps it's time to connect with Vivian and start a sushi journey 🤣
!CTP
Congratulations @therneau! You have completed the following achievement on the Hive blockchain and have been rewarded with new badge(s):
Your next target is to reach 3500 comments.
You can view your badges on your board and compare yourself to others in the Ranking
If you no longer want to receive notifications, reply to this comment with the word
STOPSupport the HiveBuzz project. Vote for our proposal!
Wow! Very detailed instruction. Thanks!
I had noticed that you enjoyed good food and this recipe is no exception. I am not sure what Sourdough discard is but I will figure it out. Thanks for sharing.
Sourdough discard comes from a natural yeast culture. We grow our own yeast at home to use with baking. It's the way they used to bake bread centuries ago, and the way it breaks down the gluten makes it better for our bodies to absorb and dissolve.
!CTP
Woa, very detail instruction. Did you share the recipe so that people can make their own and no need to use bitcoin to buy pizza on the pizza day?
Haha, no, I would never discourage anyone buying pizza's with Bitcoin... except for high gas fees, haha
That sounds awesome, @therneau. I have never had sourdough pizza before but I would bet that it is amazing. Thanks for sharing.
!CTP
It is really good, even if I had to say so myself 😁
I've had some really good pizza's before, but this, *THIS! *, lol.
!CTP
That looks great! Thanks for sharing your process and recipe. When you mention unfed discard what does that mean? Is it a portion of starter that you take away before you feed the rest of it again? I did a sourdough starter a long time ago but it went off on me because I was neglectful. One of these days I'd like to try again. These pizza recipes are an inspiration.
!CTP
With the feeding regime of the yeast culture, you always pour a section off, before feeding again.
Now, instead of throwing that part away, you leave it in the fridge. That is your discard, and I've had discard in the fridge for 2 weeks, which was still good. I'd just pour some of my latest discard to it, and it's good to go!
You should totally try and get yours going again. I'll put mine on a feeding schedule for 3 days, then park it in the fridge, so I only need to pull it out a week later to feed.
What do you keep it in? Do you keep it covered tightly? So, you're saying that you do the daily feeding for 3 days and once a week once it is in the fridge. That's more manageable I think. Thanks for the info, @therneau! Enjoy your day and the rest of the week. 😀
!CTP
Yeah, I keep it in a glass jar in the fridge. Whatever I pour off (the discard), I pour into plastic container.
Yes, pretty much. So once I pull it out of the fridge, I feed it again, and leave it out for a day or two. You can leave it in the fridge for 7 days, and it'll be okay. I've forgotten and went for about 9 days previously. Smineva (my starter) came back around 😊
!CTP
That's good to know that it's not terribly high maintenance. That's why I can't keep plants. When we had basil and some other herbs my husband took care of them. I didn't want to deal with the bugs and dirt. LOL Keeping a sourdough is an indoor thing. I can do that. Have a great day, @therneau. 😀
!CTP
Yummy!
!PIZZA
PIZZA Holders sent $PIZZA tips in this post's comments:
@drunksamurai(2/15) tipped @therneau (x1)
Learn more at https://hive.pizza.