[ESP-ENG] Lindos globos para decorar | Cute balloons to decorate
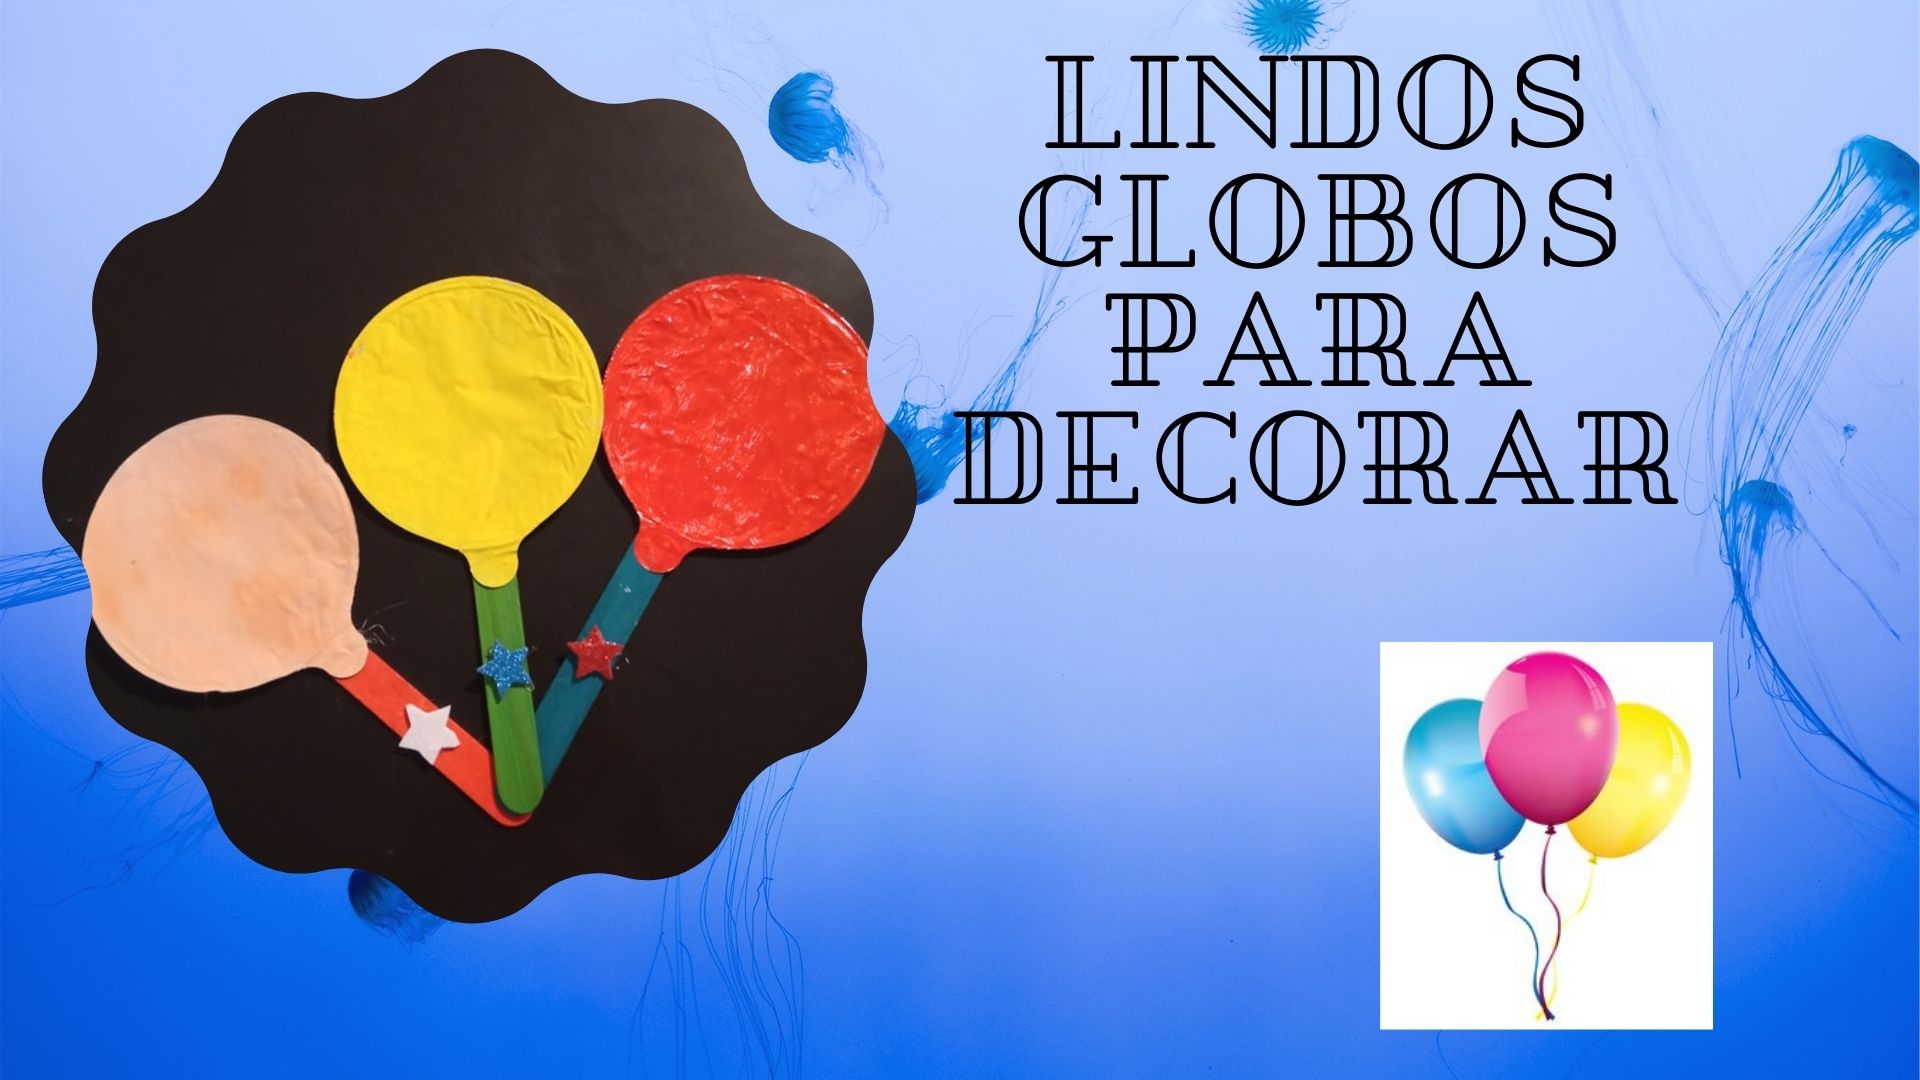
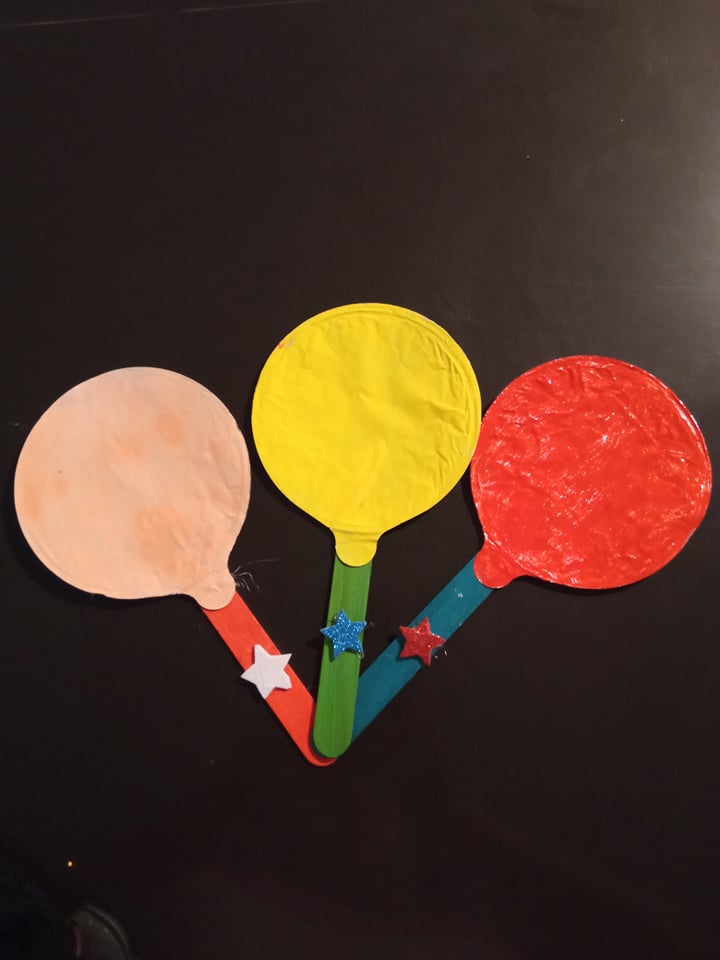
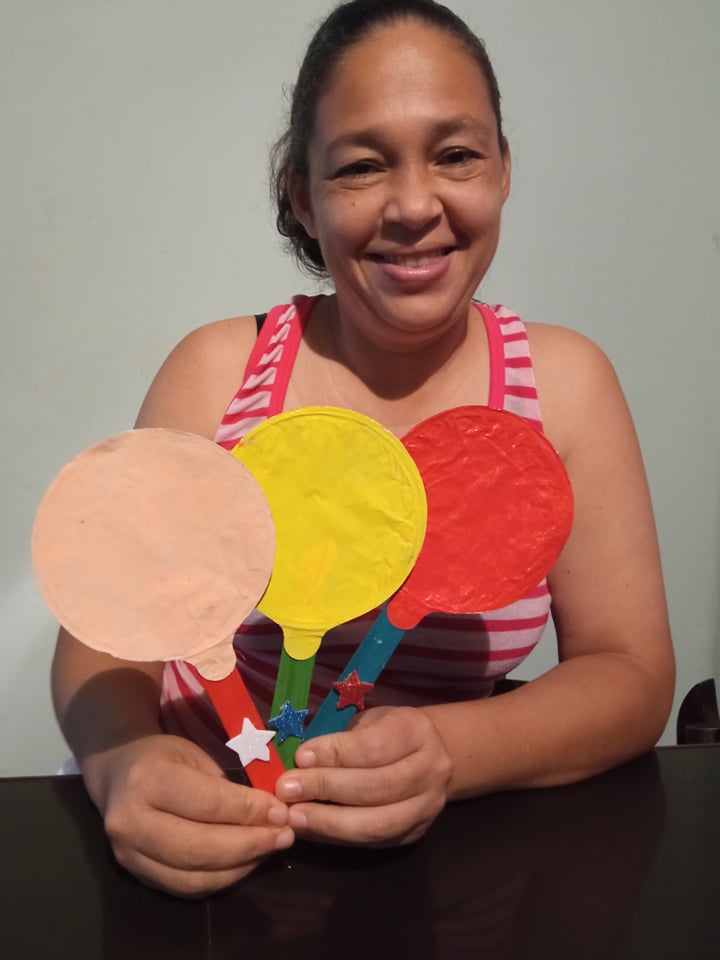
Again happy to be sharing with each of you, a big hug for everyone, today I want to show you some cute balloons to decorate any corner of our house, especially the rooms of the little ones or for any children's event, these balloons are made of aluminum caps that come in the children's milk. Here is the step by step.

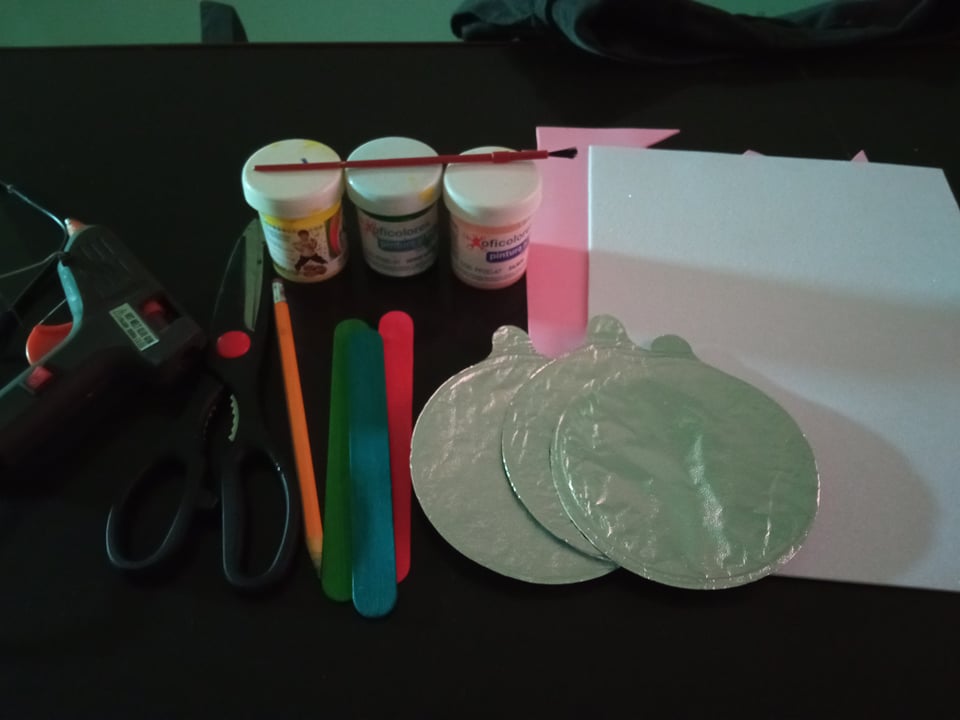
- Los materiales a utilizar son:
- Tijera.
- Pintura al frío o tempera.
- Pincel.
- Silicón en barra.
- Foami del color a preferir.
- Lápiz.
- 3 Paletas de colores.
- 3 Tapas de alumino ( de las que vienen después de la tapa principal de las leches de los niños).
- The materials to be used are:
- Scissors.
- Cold paint or tempera.
- Brush.
- Silicone stick.
- Foami in the color of your choice.
- Pencil.
- 3 color palettes.
- 3 Aluminum lids (the ones that come after the main lid of the children's milk).
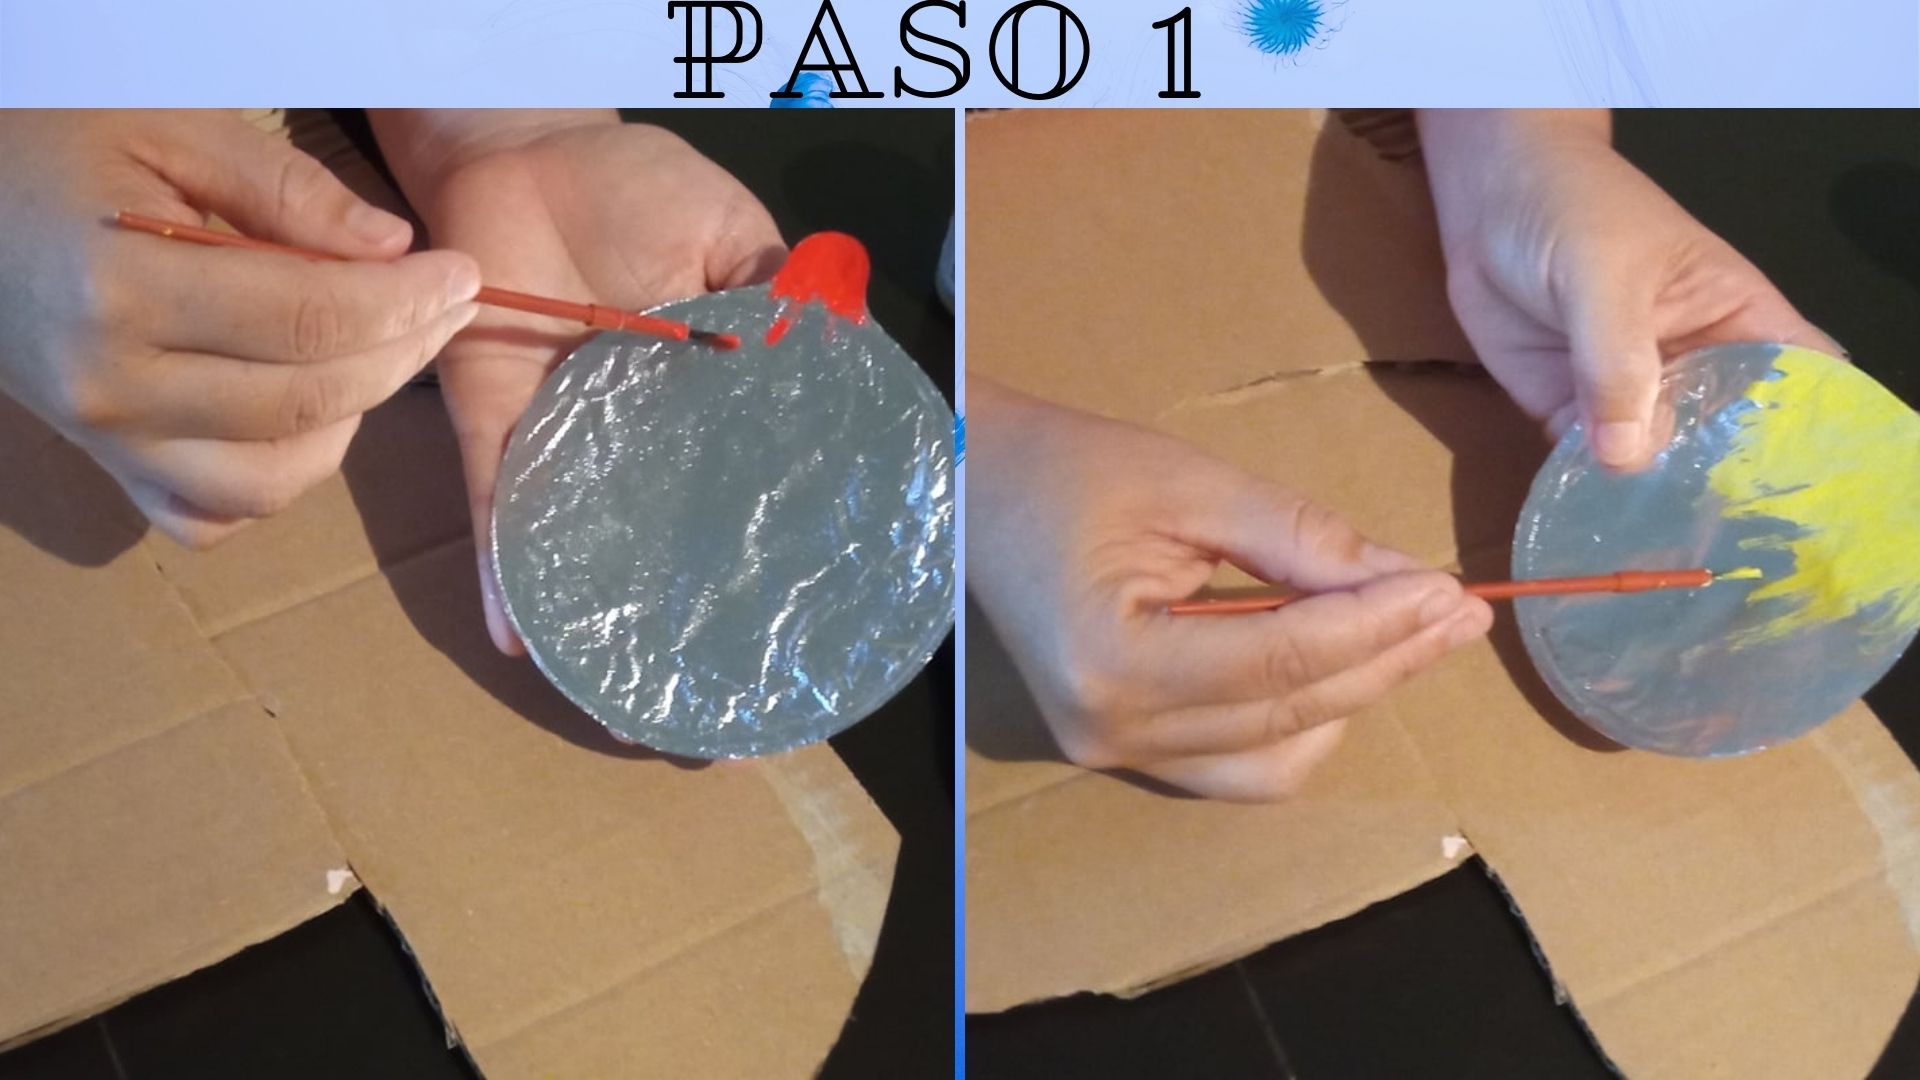
- Paso 1: Lo primero que debemos hacer es pintar las tapas de aluminio del color de su preferencia, una vez que estén secas, podrá observar si es necesario pasar una segunda mano de pintura, sí lo es, proceda a pintar nuevamente hasta que quede bien cubierta.
- Step 1: The first thing to do is to paint the aluminum caps in the color of your choice, once they are dry, you can see if it is necessary to pass a second coat of paint, if it is, proceed to paint again until it is well covered.
.jpg)
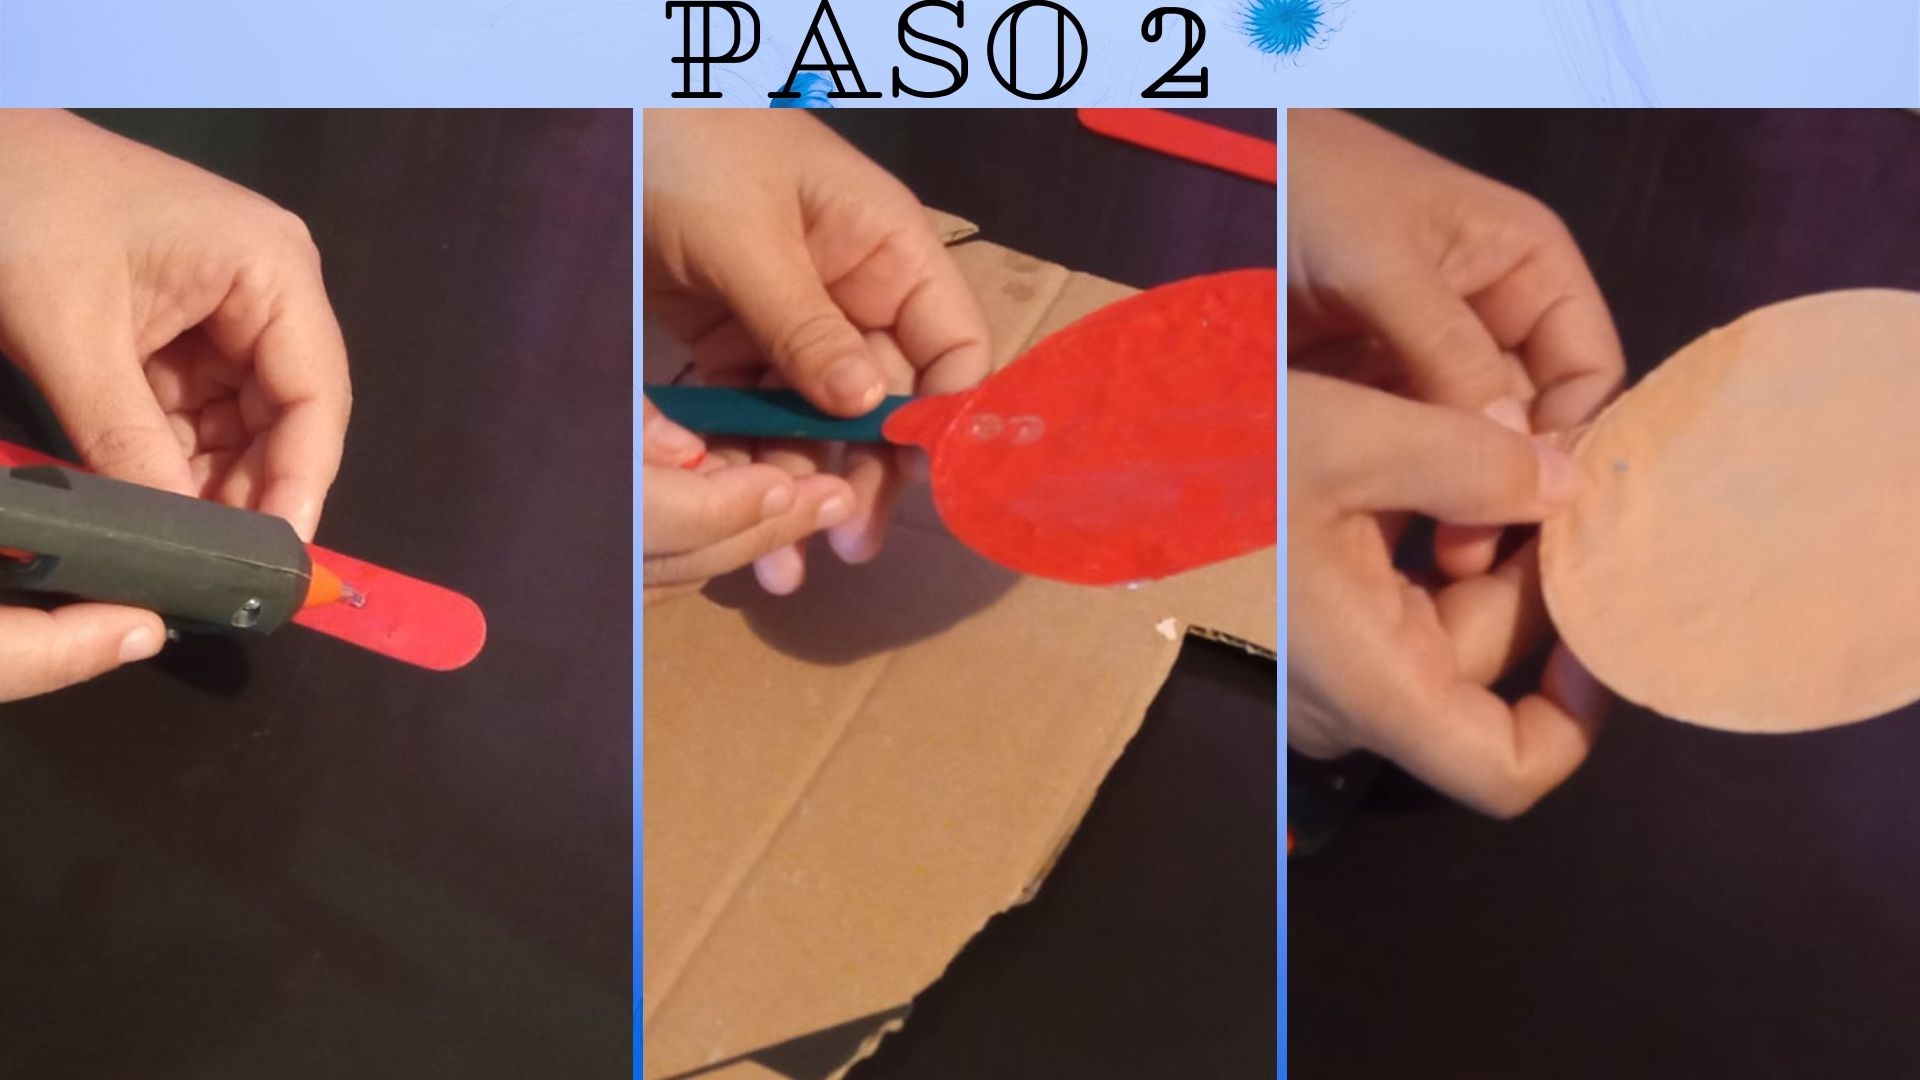
- Paso 2: Una vez que la pintura esté seca, procedemos a pegarlas a las paletas de colores, esto lo debemos hacer con cuidado ya que las tapitas son muy frágiles.
- Step 2: Once the paint is dry, we proceed to glue them to the color palettes, this must be done carefully as the caps are very fragile.
.jpg)
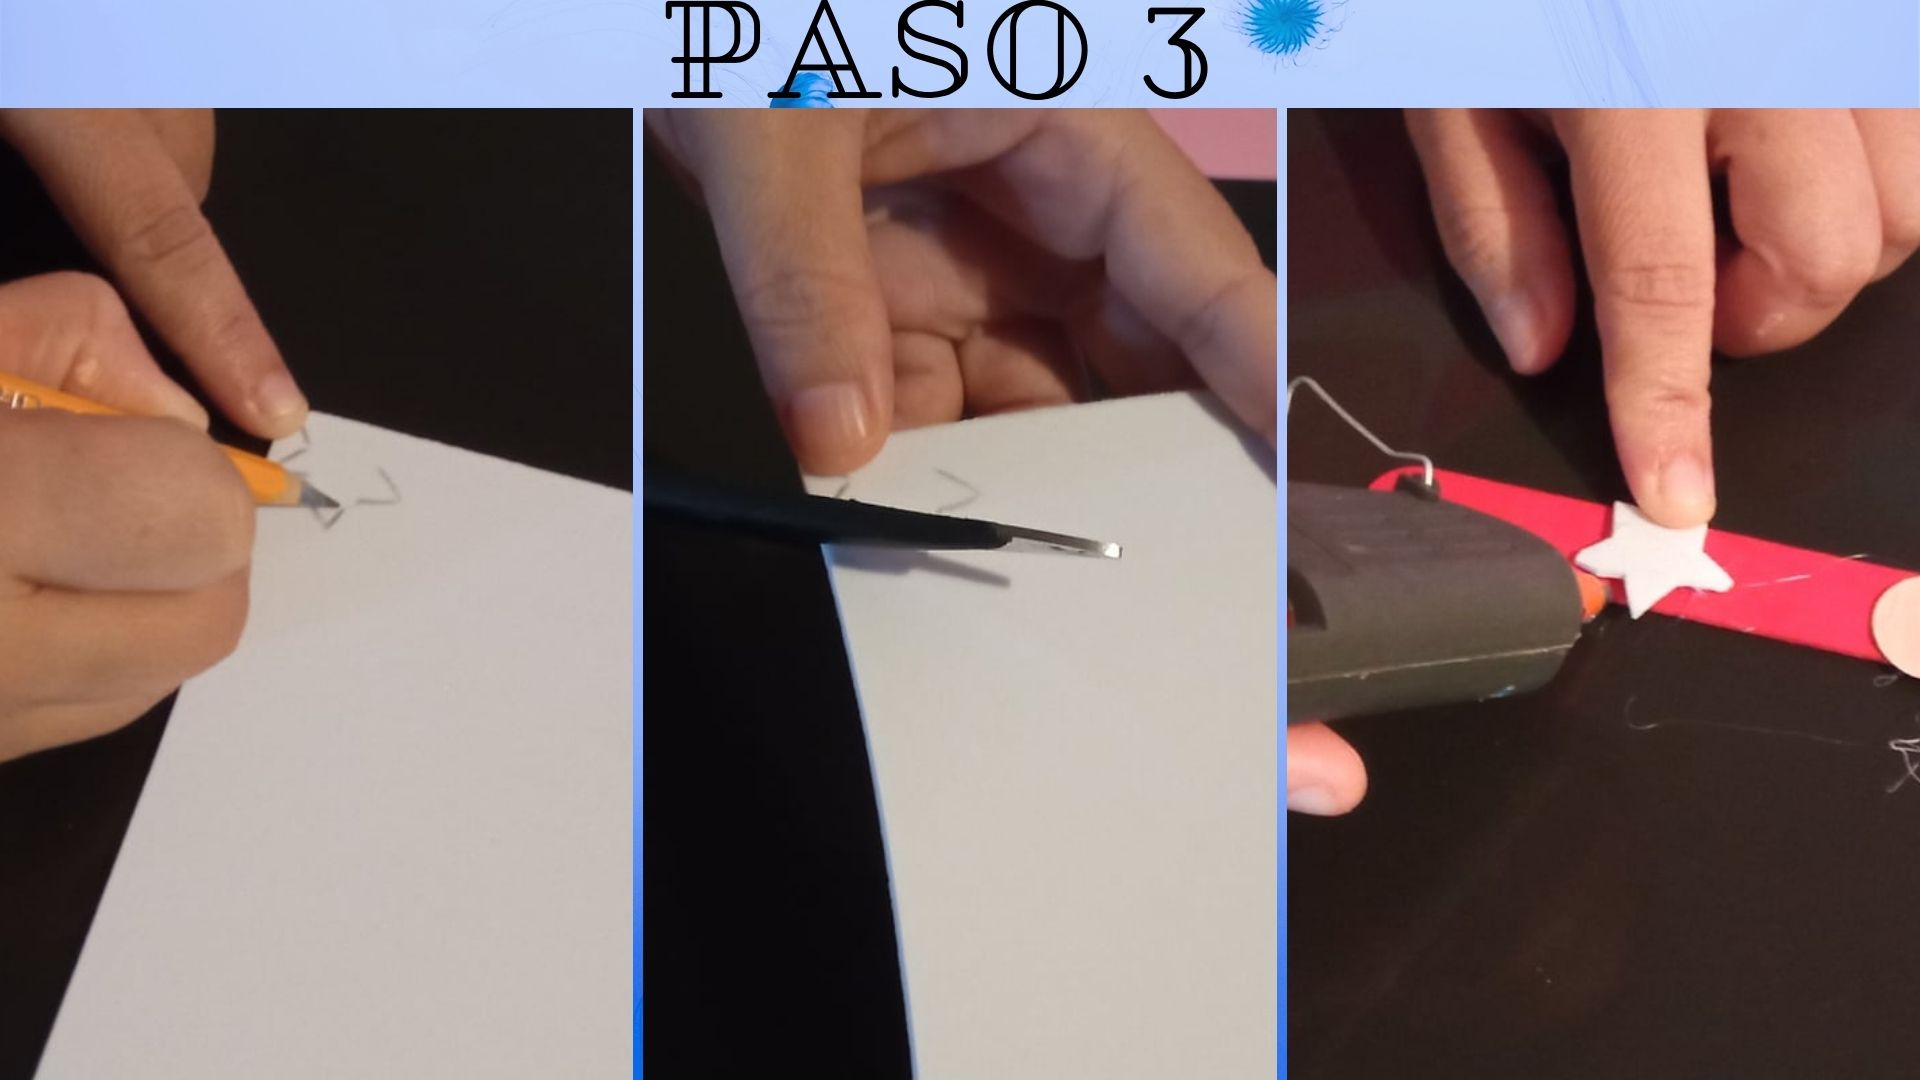
- Paso 3: Luego que ya hemos pegado todo, procedemos a dibujar en el foami la figura que a usted le guste para decorar nuestro globo, en mi caso yo dibuje una estrella pero usted lo puede hacer con lo que prefiera, recortamos la figura y pegamos con el silicón en la paleta.
- Step 3: After we have glued everything, we proceed to draw on the foami the figure that you like to decorate our balloon, in my case I drew a star but you can do it with whatever you prefer, cut out the figure and paste with silicone on the palette.

0
0
0.000
Congratulations @yannet80! You have completed the following achievement on the Hive blockchain and have been rewarded with new badge(s) :
Your next target is to reach 50 posts.
You can view your badges on your board and compare yourself to others in the Ranking
If you no longer want to receive notifications, reply to this comment with the word
STOPCheck out the last post from @hivebuzz:
Support the HiveBuzz project. Vote for our proposal!