[ESP-ING] Te enseño como hacer una ponquesera para tus decoraciones. || I show you how to make a poncho box for your decorations.
¡Hola comunidad de Hive!
Hello Hive community!
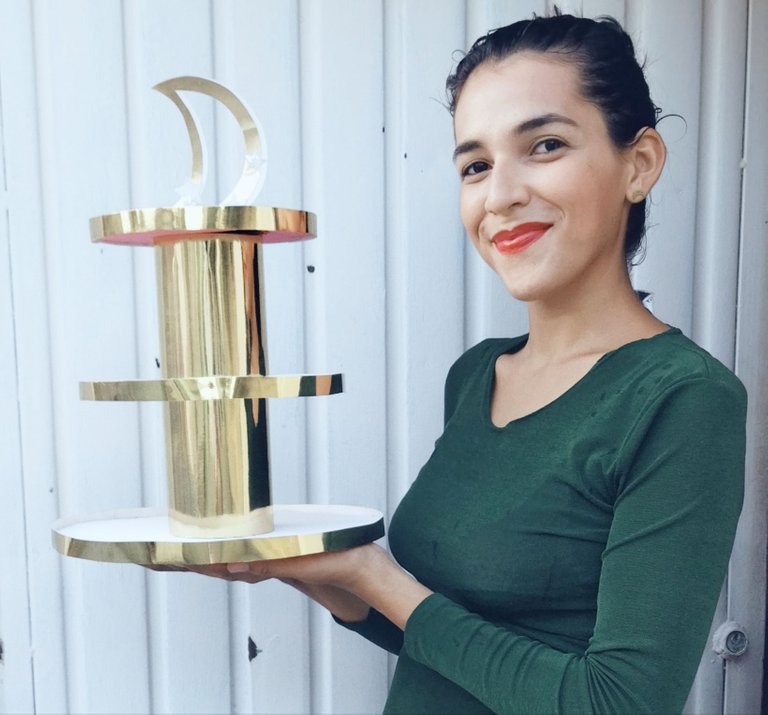
Hola gente linda de hive, espero su día haya sido genial. Estoy en los preparativos del primer cumpleaños de mi bebé y hoy realicé una ponquesera que pondré en la mesa de dulces, este tipo de adornos nos ayudan mucho a la hora de decorar, además que aportan relieve a la mesa donde estará la torta y los demás postres. Hacer una ponquesera es muy fácil y lo mejor de todo es que usamos material de provecho para elaborarla, mi inspiración para decorar mi ponquesera será la luna y las estrellas pero tú puedes usar cualquier motivo. Sin más que decir comencemos...
Hello beautiful people of hive, I hope your day has been great. I am in the preparations for my baby's first birthday and today I made a cake stand that I will put on the candy table, this kind of decorations help us a lot when decorating, plus they bring relief to the table where the cake and other desserts will be. Making a pony dish is very easy and the best of all is that we use useful material to make it, my inspiration to decorate my pony dish will be the moon and the stars but you can use any motif. Without further ado, let's get started...
Necesitaremos || We will need
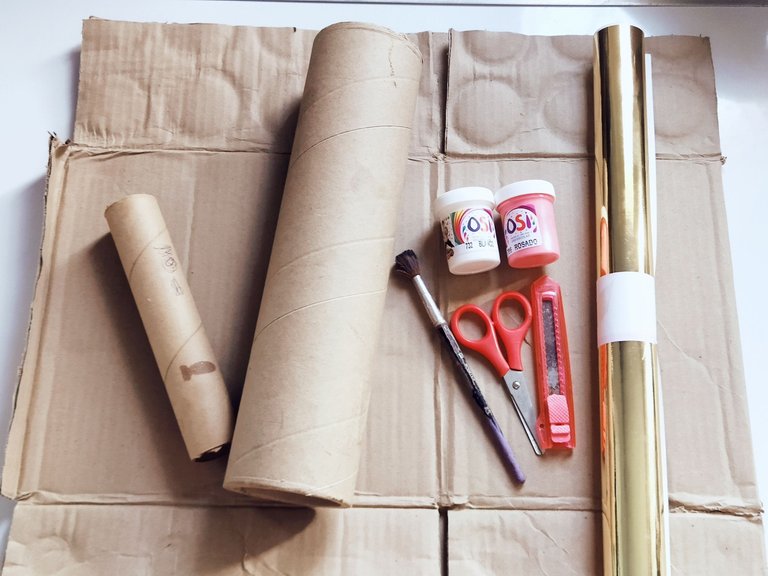
- Cartón Reciclado
- Cartulina espejo dorada
- Pintura al frío blanca y rosada
- Tubo de cartón grueso
- Pincel
- Silicón al frío y caliente
- Lápiz
- Tijera
- Recycled Cardboard
- Gold mirror cardboard
- White and pink cold paint
- Thick cardboard tube
- Paintbrush
- Hot and cold glue
- Pencil
- Scissors
Paso 1 || Step 1
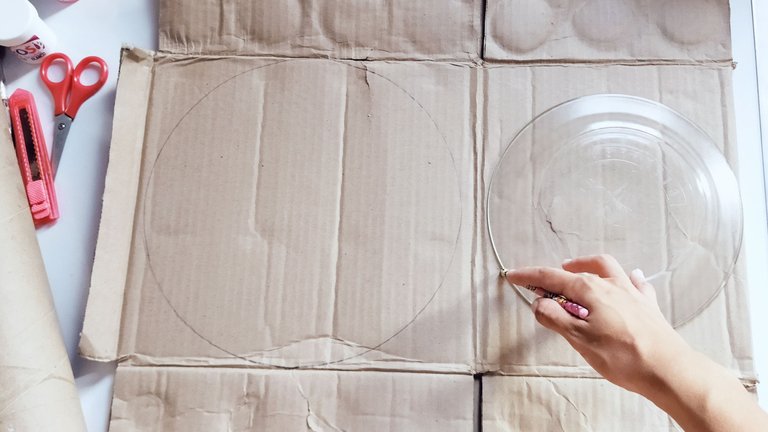
Marcamos un círculo en el cartón del tamaño que deseemos sea la base de la ponquesera, luego sacamos dos círculos más uno más pequeño que el otro.
Haremos una ponquesera de tres niveles y de cada nivel o círculo vamos a sacar dos, esto para darle más firmeza.
We mark a circle on the cardboard of the size we want to be the base of the poncho box, then we make two more circles, one smaller than the other.
We will make a three level poncho box and from each level or circle we will make two circles, this to give it more firmness.
Paso 2 || Step 2
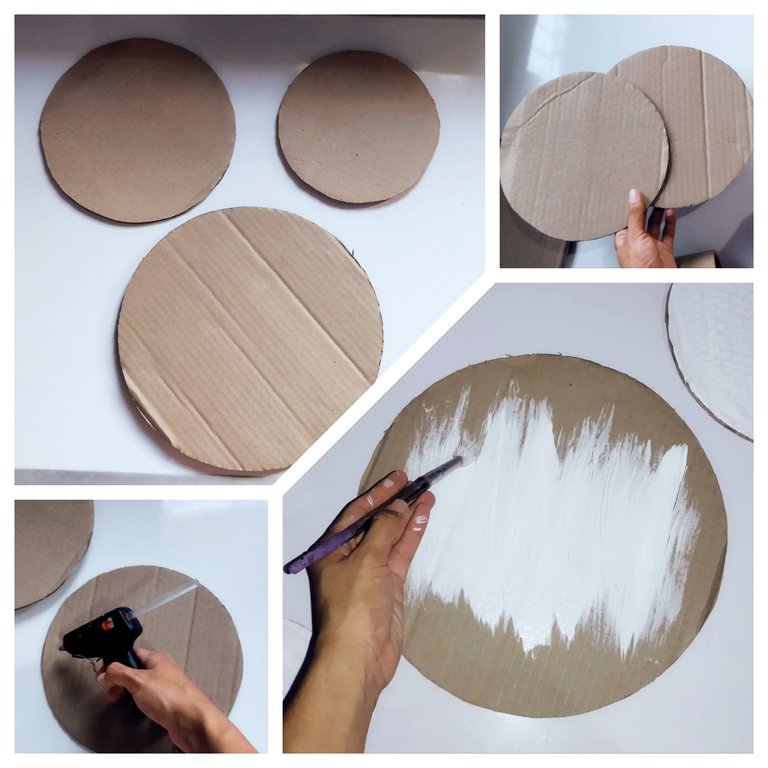
Teniendo los círculos ya cortados procedemos a pegar, con silicón caliente pegamos los dos círculos que sacamos del mismo tamaño y así hacemos con los otro cuatro.
Con pintura blanca pintamos solo uno de los lados del círculo, el otro lo pintamos pero de color rosada.
Having the circles already cut we proceed to glue, with hot silicone we glue the two circles that we took out of the same size and so we do with the other four.
With white paint we paint only one of the sides of the circle, the other one we paint it but in pink color.
Paso 3 || Step 3
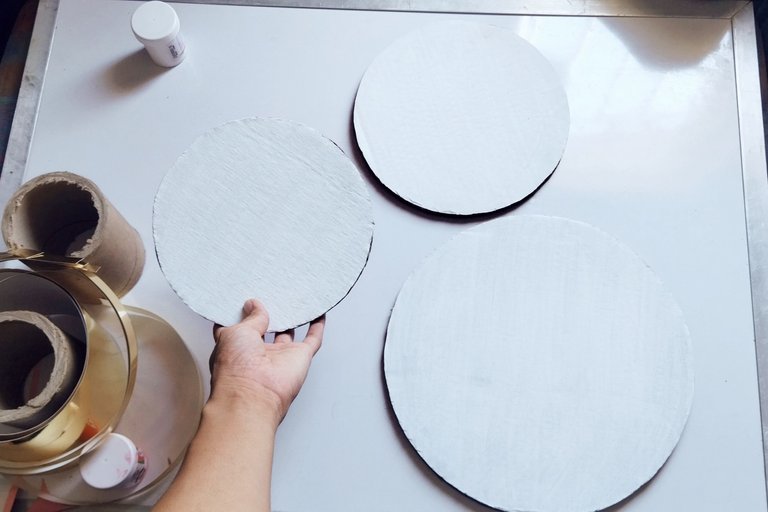
Posiblemente tengamos que pasar varias capas de pintura para obtener un blanco perfecto como el de la imagen 🖕🖕🖕
We may have to apply several coats of paint to obtain a perfect white like the one in the image 🖕🖕🖕
Paso 4 || Step 4
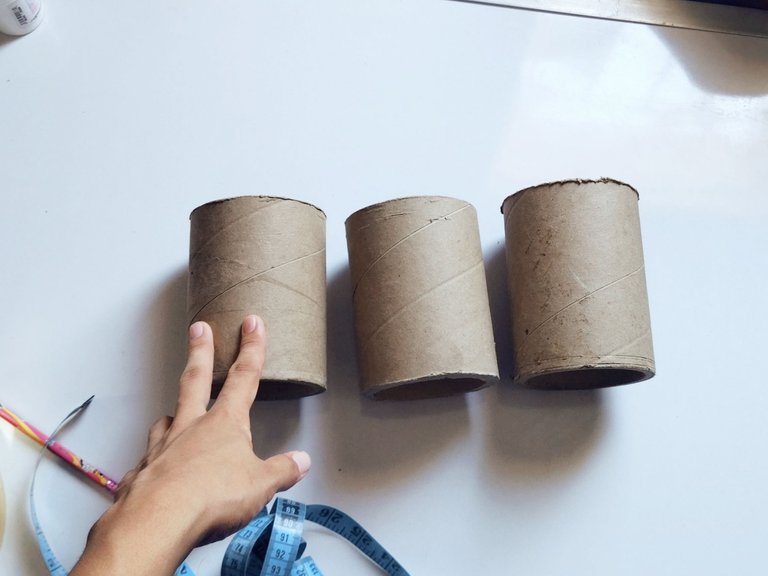
Picamos el tubo de cartón en tres partes, cada una tiene 12cm de alto. Reservaremos una pues solo necesito dos.
We cut the cardboard tube in three parts, each one is 12cm high. We will reserve one because we only need two.
Paso 5 || Step 5

De la cartulina espejo vamos a cortar dos triángulos del contorno y alto de los tubos y también cortaremos tiras de 1,5 cm para pegar al borde de los círculos.
Pegue la cartulina espejo en los tubos con silicón caliente.
From the mirror cardboard we will cut two triangles of the contour and height of the tubes and we will also cut 1.5 cm strips to glue to the edge of the circles.
Glue the mirror cardboard to the tubes with hot silicone.
Paso 6 || Step 6
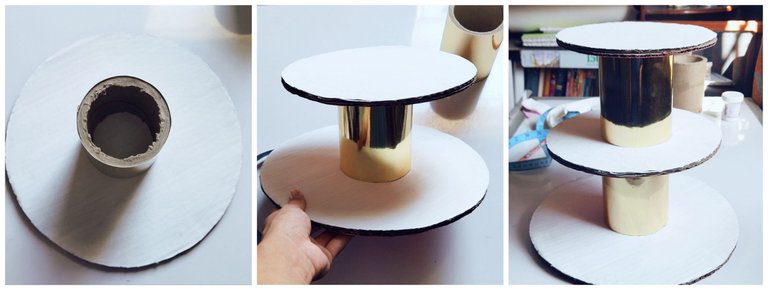
Pegamos el primer tubo sobre el círculo o base más grande, muy pendientes de pegarlo justo el el centro.
Luego a este tubo le pegamos el círculo mediano y sobre el el otro tubo y culminamos con el círculo más pequeño, para pegar todo esto utilice silicón caliente.
Glue the first tube over the larger circle or base, being very careful to glue it right in the center.
Then to this tube we glue the medium circle and over the other tube and we finish with the smallest circle, to glue all this we use hot silicone.
Pasos finales || Final steps
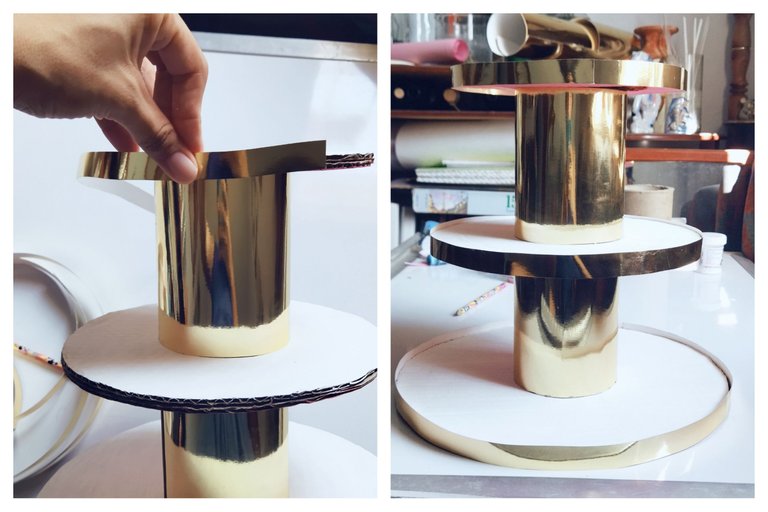
Pegamos la tira de cartulina por todo el borde de los círculos de cada nivel.
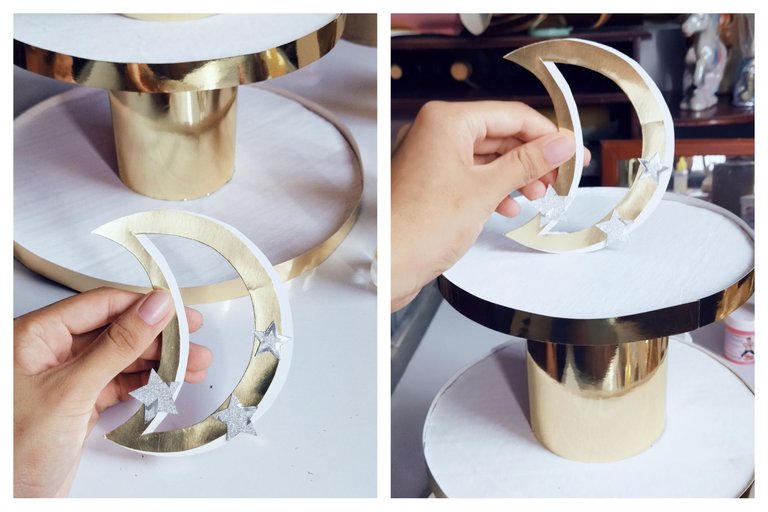
Para terminar está linda ponquesera elabore un lindo Topper de media luna con estrellas y lo pegue en la parte superior de la ponquesera.
Glue the cardboard strip all around the edge of the circles of each level.
To finish this cute punch bowl, make a cute crescent topper with stars and glue it to the top of the punch bowl.
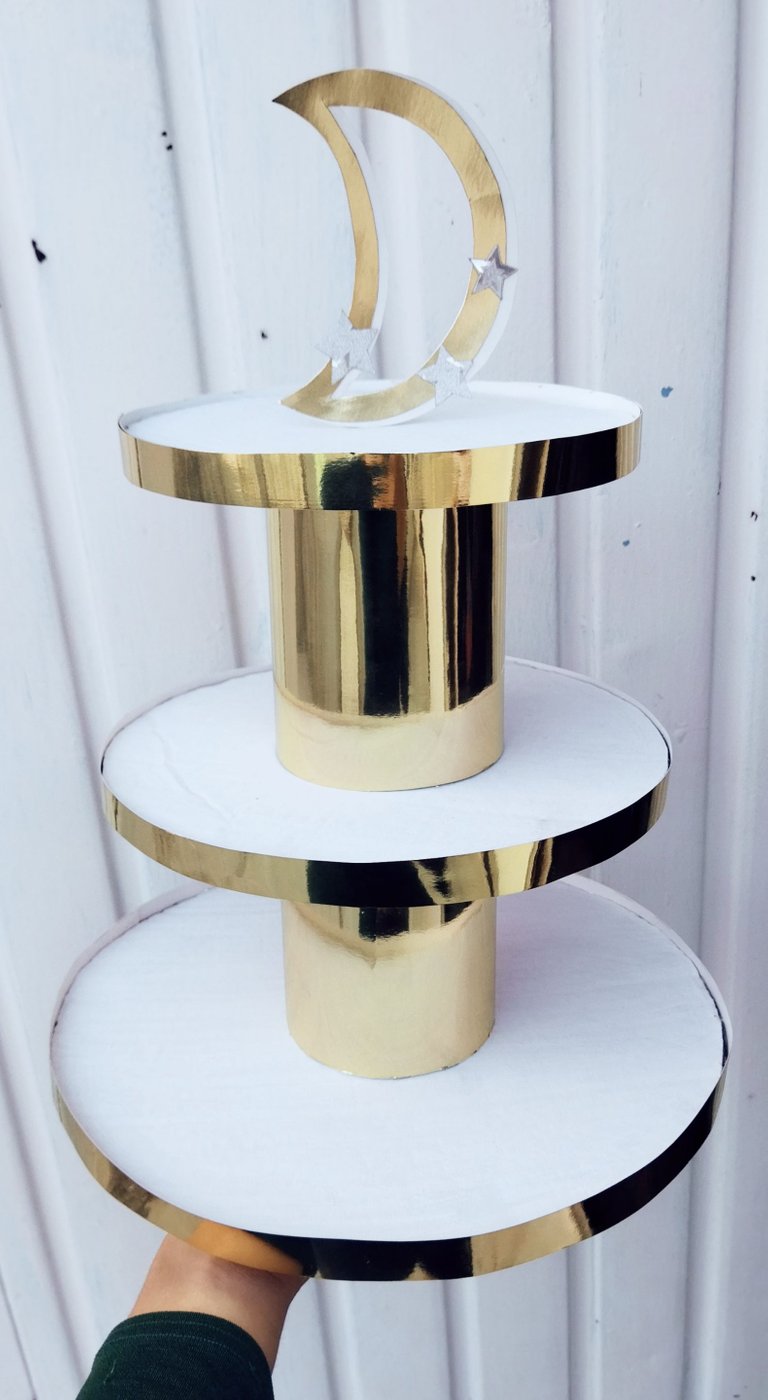
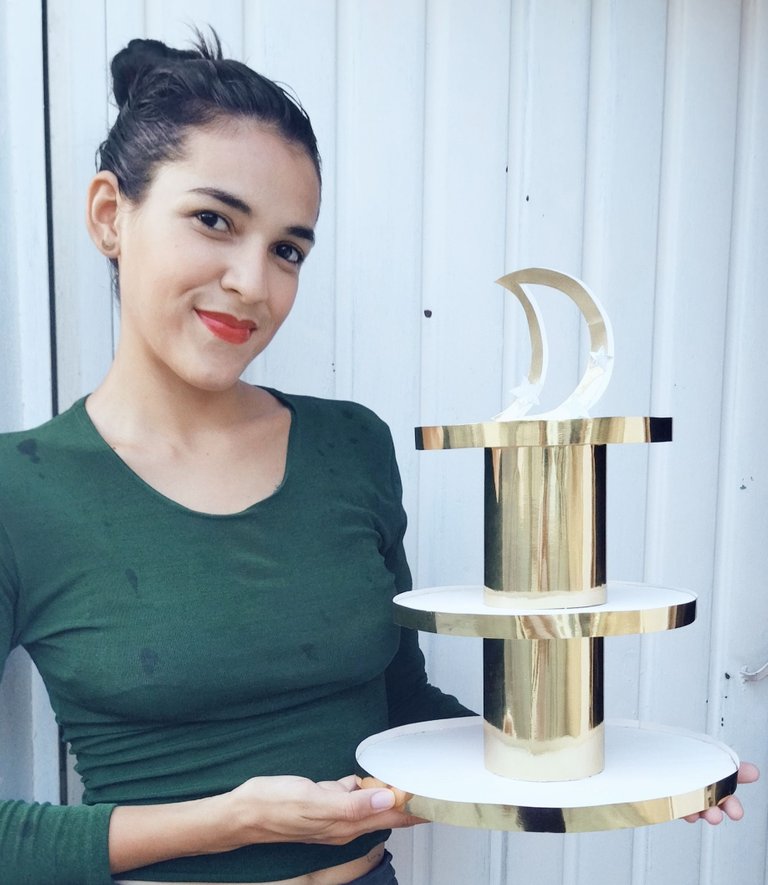
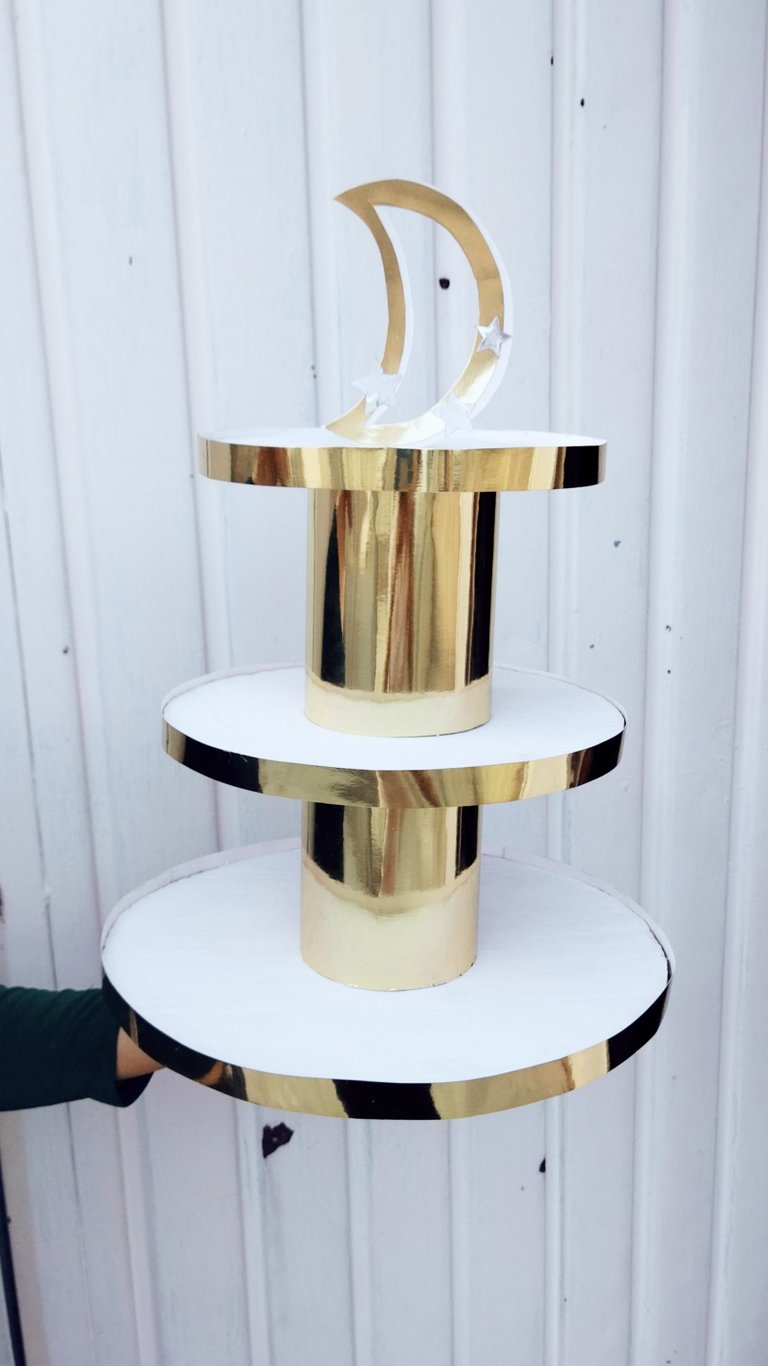
Resultado final.
Final result.
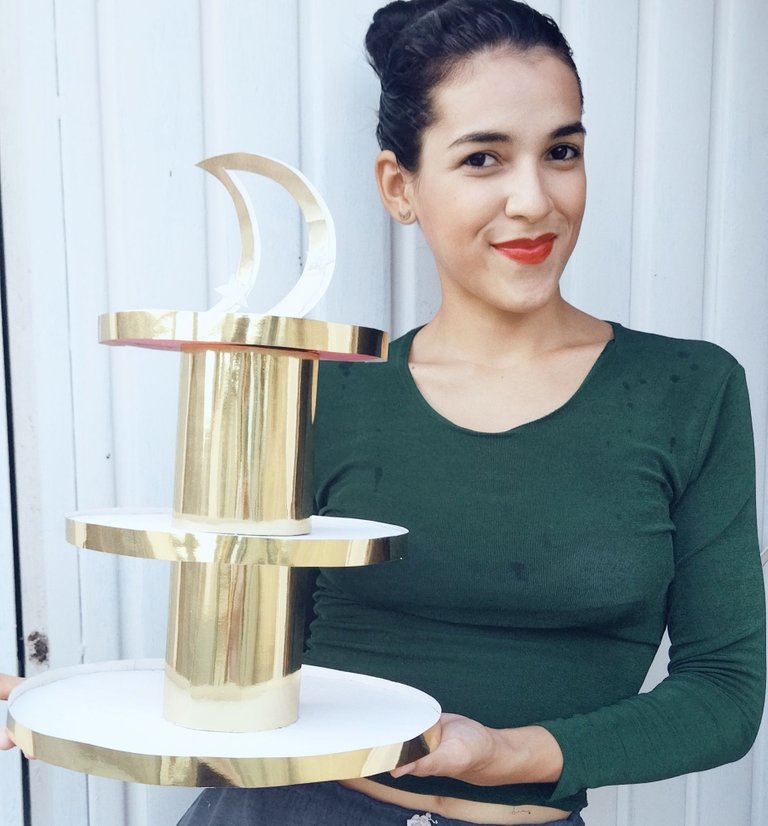
Así finaliza este post, agradecida, espero les haya gustado como quedó está linda ponquesera que les aseguro les va a ser muy útil a la hora de decorar. Si llegaste hasta aquí muchísimas gracias por leer mi post.
This is the end of this post, thank you, I hope you liked the way this cute poncho box turned out, I assure you it will be very useful when decorating. If you made it this far, thank you very much for reading my post.
All images are my property / Todas las imágenes son de mi propiedad
Camera: Xiaomi Redmi 9T.
Translation: Deepl.com
Quedó hermosaaa!!!❤️
Siii, mañana hago la piñata.
Thank you for sharing this amazing post on HIVE!
Your content got selected by our fellow curator @rezoanulvibes & you just received a little thank you via an upvote from our non-profit curation initiative!
You will be featured in one of our recurring curation compilations and on our pinterest boards! Both are aiming to offer you a stage to widen your audience within and outside of the DIY scene of hive.
Join the official DIYHub community on HIVE and show us more of your amazing work and feel free to connect with us and other DIYers via our discord server: https://discord.gg/mY5uCfQ !
If you want to support our goal to motivate other DIY/art/music/homesteading/... creators just delegate to us and earn 100% of your curation rewards!
Stay creative & hive on!
Te ha quedado bellísima. Creo que me animare a hacer una 😁