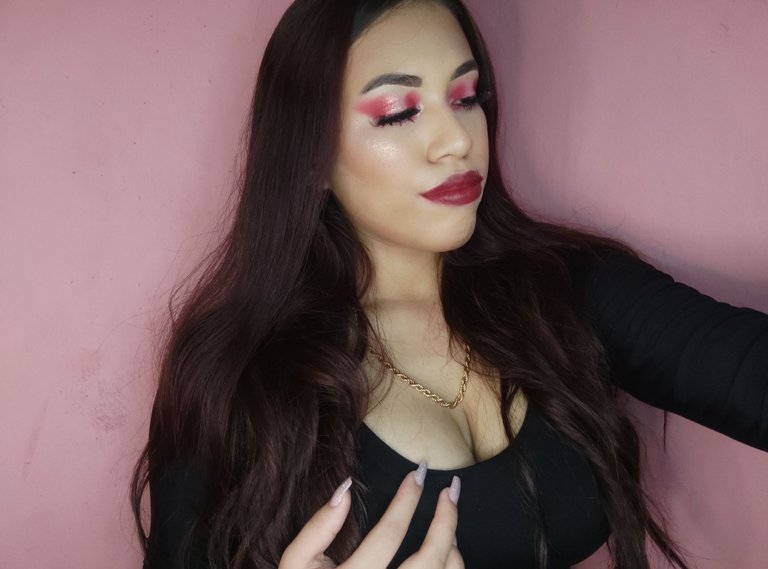
RED Halo eyes!
💕 Hello Hive Community! 💕
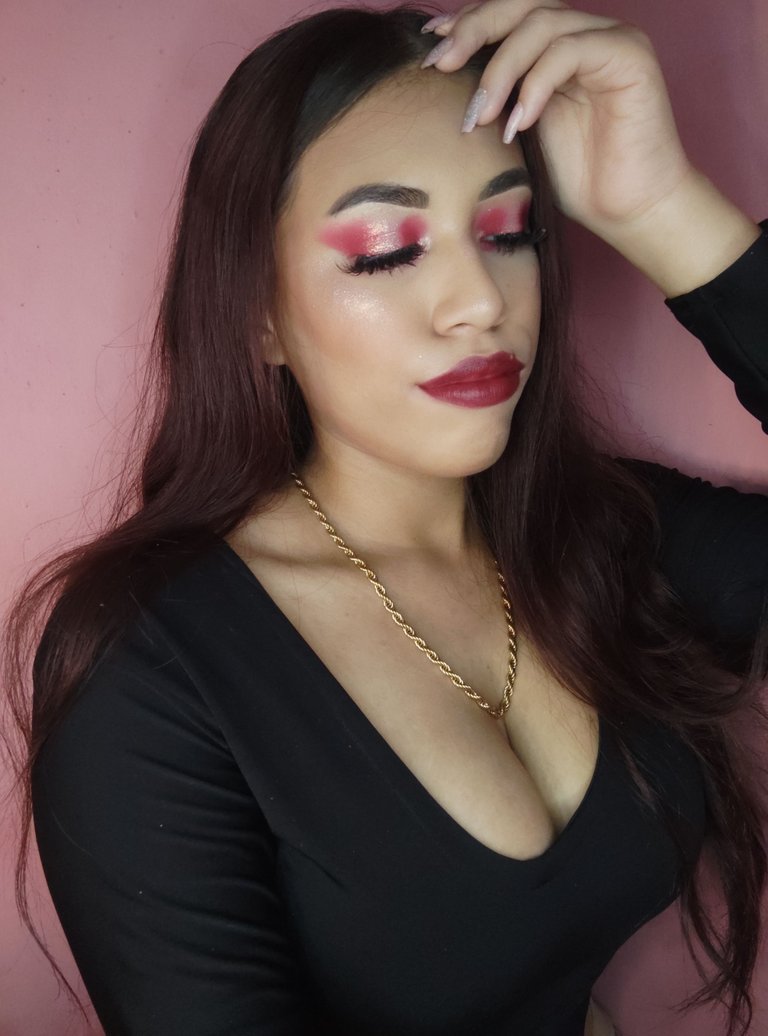
He regresado con dos cosas que me encantan: El maquillaje y el color rojo. Había tardado mucho tiempo en maquillarme porque mis ánimos estaban por lo suelos con respecto a este pequeño arte. Para hacerme un reto decidí implementar la técnica del Halo Eyes, una que no utilizo mucho porque no me gusta demasiado y no soy muy buena haciéndola, les comparto ese tutorial con mucho cariño.

I'm back with two things I love: makeup and the color red. It had taken me a long time to do my makeup because my spirits were at rock bottom regarding this little art. To challenge myself I decided to implement the Halo Eyes technique, one that I don't use much because I don't like it too much and I'm not very good at it, I share this tutorial with a lot of love.
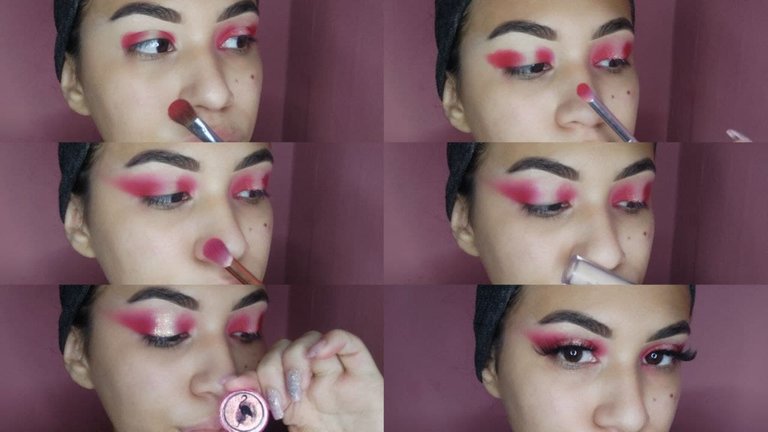
Primero prepare mi parpado con un corrector matte bastante claro para que las sombras pigmentaran mucho más. Luego tome una brocha para aplicar color y coloque un rojo bastante fuerte en dos zonas de mi parpado, tomando otra brocha luego para medio difuminar con otro tono. Después tome una brocha de difuminar grande para los bordes y en el centro coloque corrector. Seguidamente en el área donde esta el corrector coloque un pigmento suelto de Flamingo Color y tome finalmente mis pestañas postizas.
First I prepared my eyelid with a light matte concealer so that the shadows would pigment much more. Then I took a brush to apply color and put a pretty strong red on two areas of my eyelid, then took another brush to half blur with another shade. Then I took a large blending brush for the edges and in the center I placed concealer. Next in the area where the concealer is I placed a loose pigment of Flamingo Color and finally I took my false lashes.

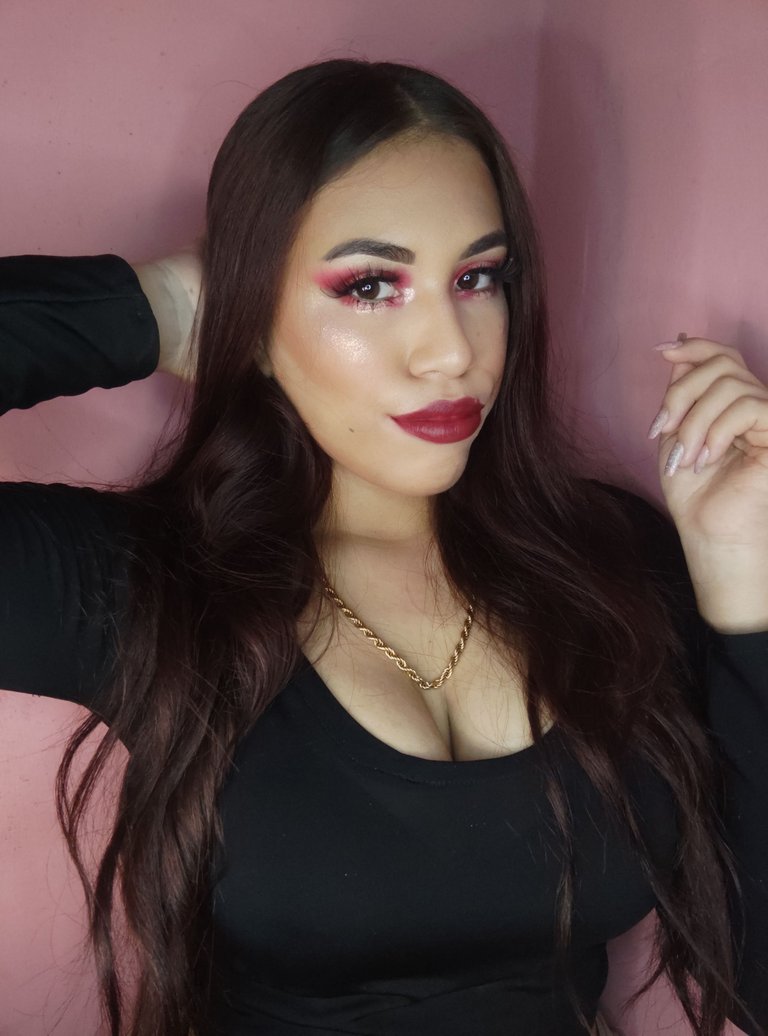
Para hacer mi piel tome mi prebase favorita de Salome Makeup para difuminar mis poros, luego coloque la base Velvet Touch de la marca Dolce Bella en el tono 07 y la coloque en el centro de mi rostro, esparciendo con una brocha kabuki. Para neutralizar tome el corrector de salome en el tono 02. Hice los contornos con una base multi usos de Maybelline en el tono Deep Bronze. Coloque un rubor en crema de la marca Dolce Bella y termine iluminando mi rostro con el corrector hidratante de Salome Makeup en el tono 01.
To do my skin I took my favorite Salome Makeup primer to blur my pores, then applied Dolce Bella's Velvet Touch foundation in shade 07 and placed it in the center of my face, blending with a kabuki brush. To neutralize I took Salome concealer in shade 02. I contoured with a Maybelline multipurpose foundation in shade Deep Bronze. I applied a cream blush from Dolce Bella and finished by illuminating my face with Salome Makeup's moisturizing concealer in shade 01.
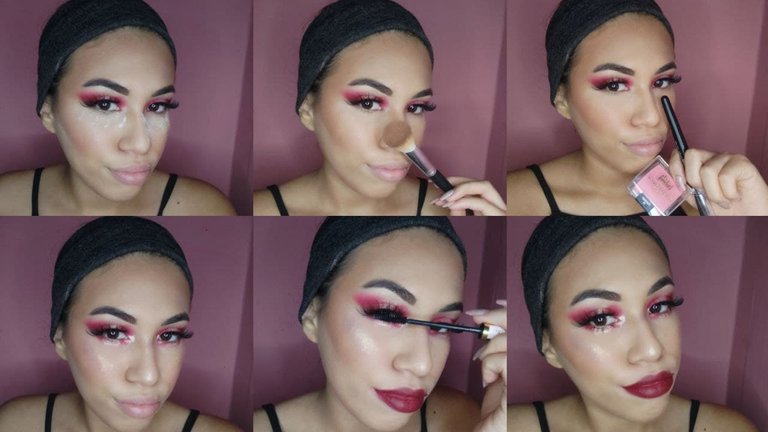
Aplicando polvos comencé sellando la zona de las ojeras y debajo de los pómulos con el polvo suelto Perfect de AOA Studio. Coloque un poco de Bronceador en polvo de Mon Reve en el tono 30. Tome un rubor de Valmy en el tono Flamingo y como iluminador estuve llevando el mismo pigmento de Flamingo Colors que lleve en los ojos, justamente en la tonalidad Tulipán. Finalizo este maquillaje completando la lineal inferior de las pestañas, colocando una mascara de pestañas de Valmy y un labial en barra Vinotinto de la marca Body.
Applying powder I started by sealing the under eye circles and under the cheekbones with AOA Studio's Perfect loose powder. I applied a little powder bronzer from Mon Reve in shade 30. I took a blush from Valmy in shade Flamingo and as a highlighter I was using the same pigment from Flamingo Colors that I used on the eyes, just in the shade Tulip. I finish this makeup completing the lower line of the eyelashes, placing a mascara from Valmy and a lipstick stick Vinotinto from the brand Body.
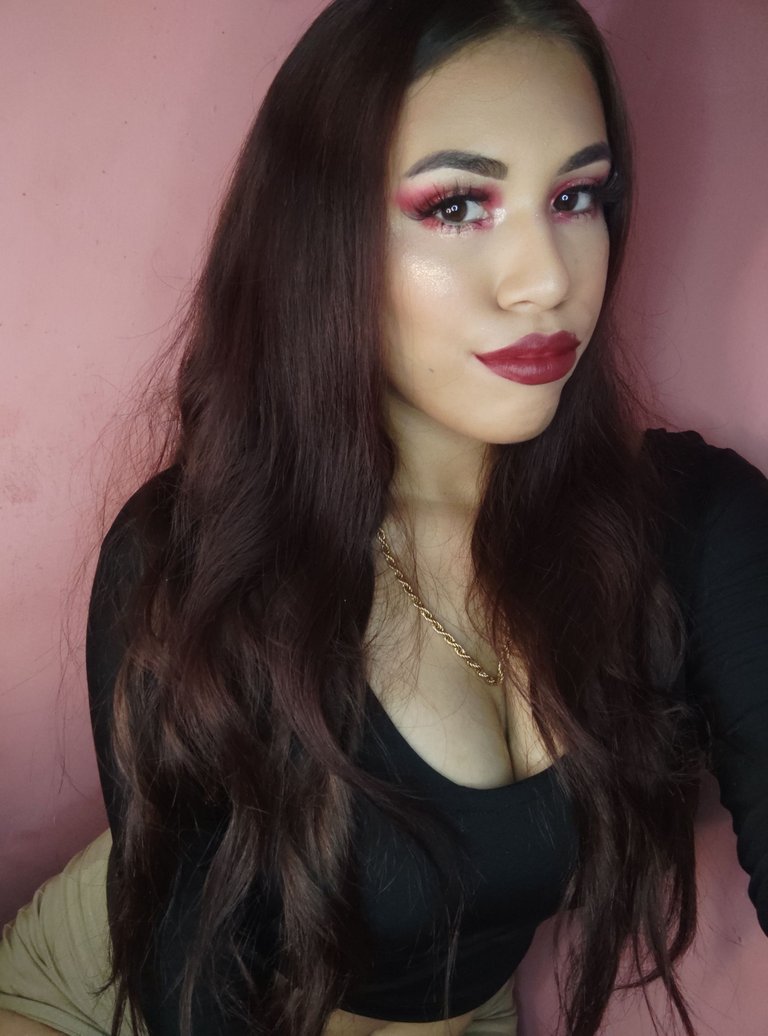
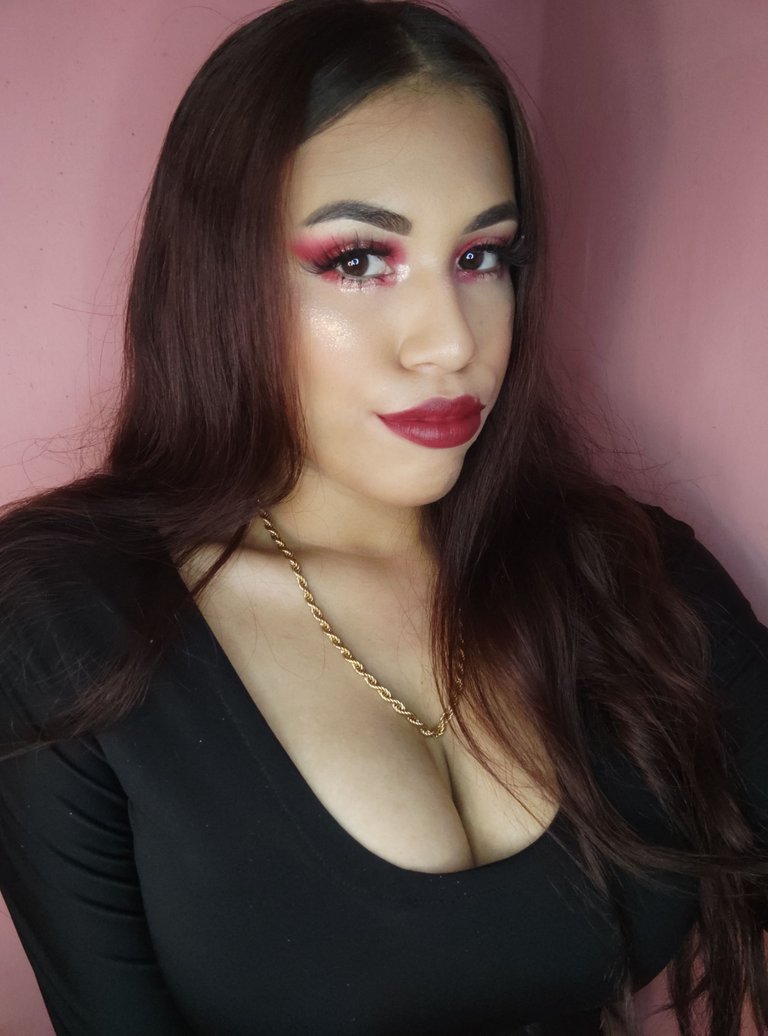
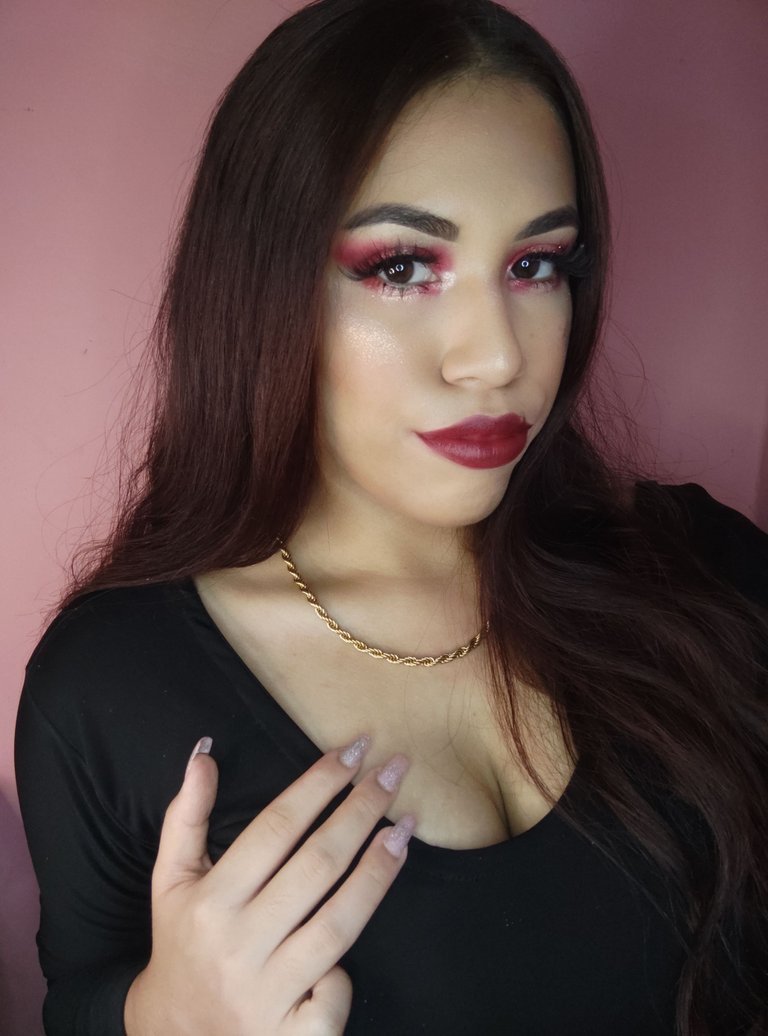
Al final estuve muy feliz porque el maquillaje me quedo bonito, aunque a mitad de este tutorial mi pigmento flamingo se cayo y se desperdicio un poco de producto, pero con respecto al maquillaje todo lo sentí muy bien. Las fotos me encantaron, me siento muy orgullosa porque ninguna tiene edición, ni filtros, ni están en modo retrato que agrega un poco de suavidad, estas fotos tienen la calidad original y eso me encanta. Espero que les haya gustado este maquillaje rojo, nos vemos pronto!
At the end I was very happy because the makeup was beautiful, although halfway through this tutorial my flamingo pigment fell out and wasted a little bit of product, but regarding the makeup everything felt very good. I love the pictures, I feel very proud because none of them have any editing, no filters, nor are they in portrait mode which adds a bit of softness, these pictures have the original quality and I love that. I hope you liked this red makeup, see you soon!
Pictures of my property. Camera: CellPhone Xiaomi Redmi Note 10. Si te gusta el maquillaje, el mundo de la belleza o hacer arte en tu piel te invito a la comunidad y al Telegram: If you like makeup, the world of beauty or making art on your skin I invite you to the community and the Telegram:Makeup Power Telegram
Makeup Power

Este maquillaje es fuego amii🤩