Basic Women's Shirt with Cotton Fabric and Printed Drawings 👚💄
💕 Hello Hive Community! 💕
Nuevamente me encuentro en esta comunidad de un talento muy hermoso en las diferentes creaciones de costura, bordados, tejidos y demás. En esta oportunidad les comparto el tutorial de una camisa básica, hace poco fui a comprar telas con mi mamá para hacerme una serie de camisas sencillas pero bonitas, no deje pasar la oportunidad de hacer un tutorial detallado y mostrarles que fácil resulta hacer este tipo de camisas, en especial cuando utilizamos una tela estampada.
Once again I find myself in this community of a very beautiful talent in the different creations of sewing, embroidery, fabrics and others. This time I share with you the tutorial of a basic shirt, I recently went shopping for fabrics with my mom to make me a series of simple but beautiful shirts, I did not miss the opportunity to make a detailed tutorial and show you how easy it is to make this type of shirts, especially when we use a printed fabric.
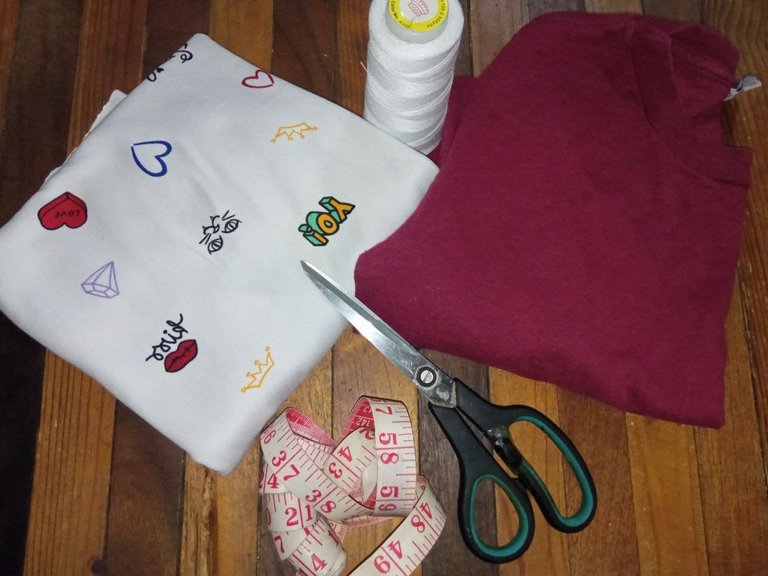
Materiales que utilicé:
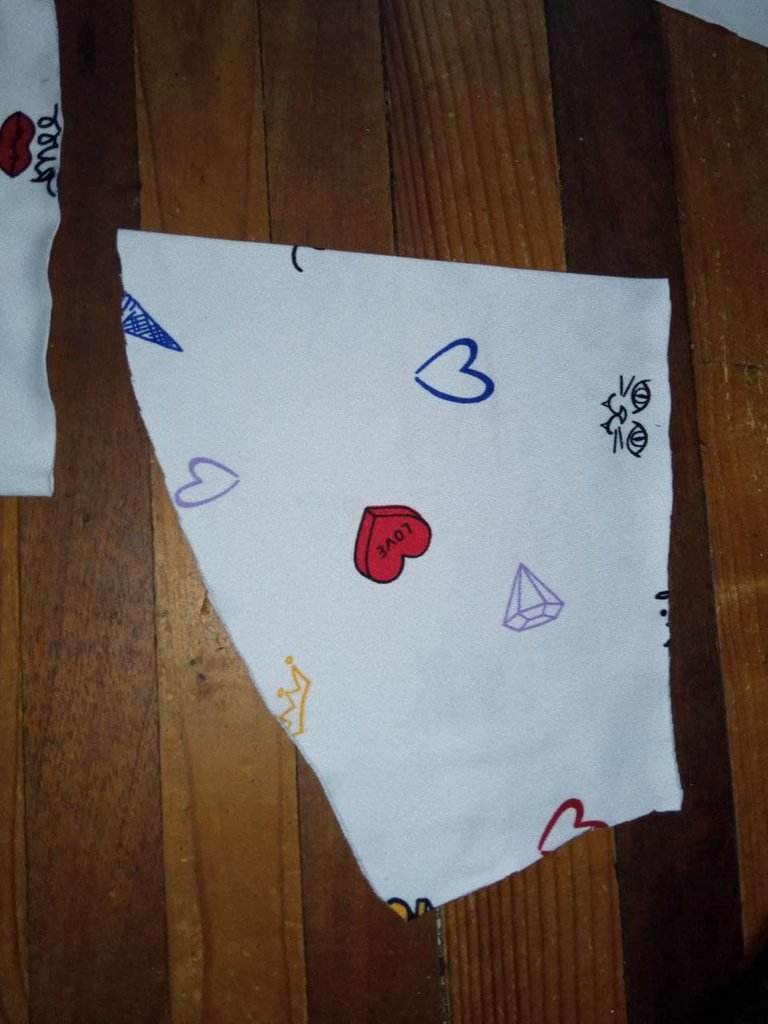
- 70cm de Tela Micro Durazno o Piel de Durazno (Es una tela de algodón, lisa y suave).
- Maquina de Coser.
- Hilo y Tijeras.
- Una camisa para utilizar de medida.
Materials I used:
- 70cm of Micro Peach or Peach Skin Fabric (It is a cotton fabric, smooth and soft).
- Sewing Machine.
- Thread and scissors.
- A shirt to use as a measure.
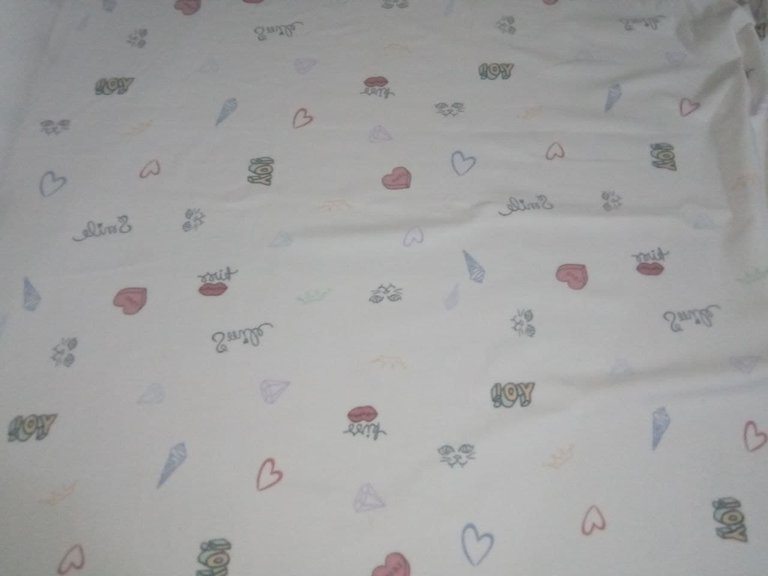
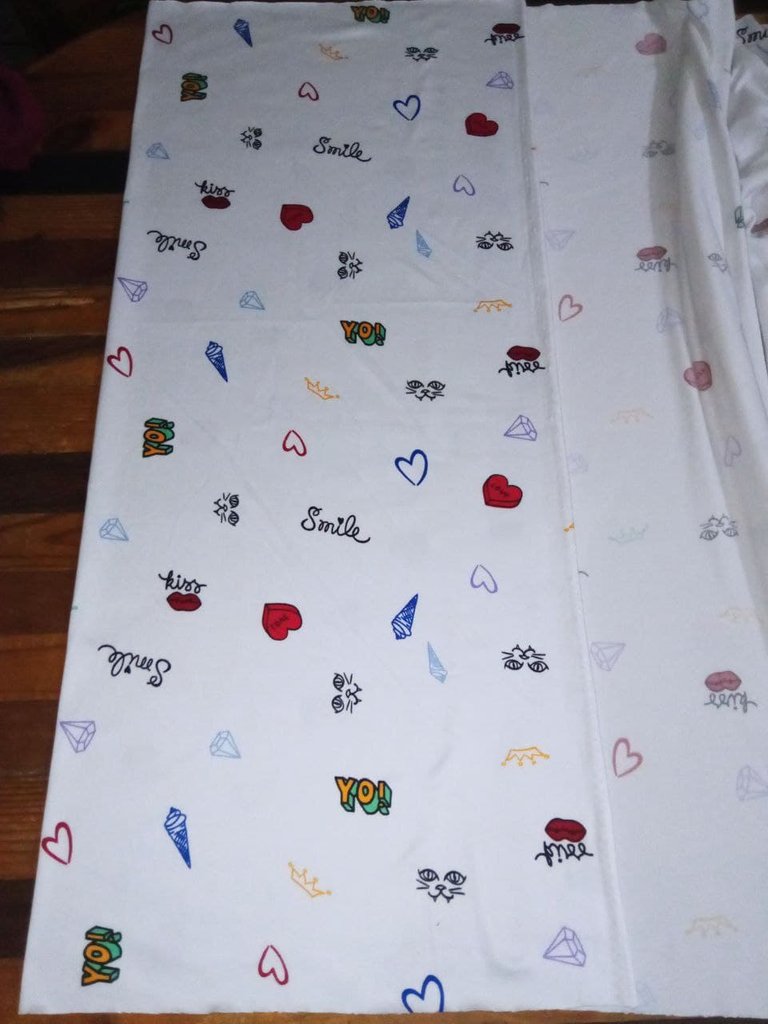
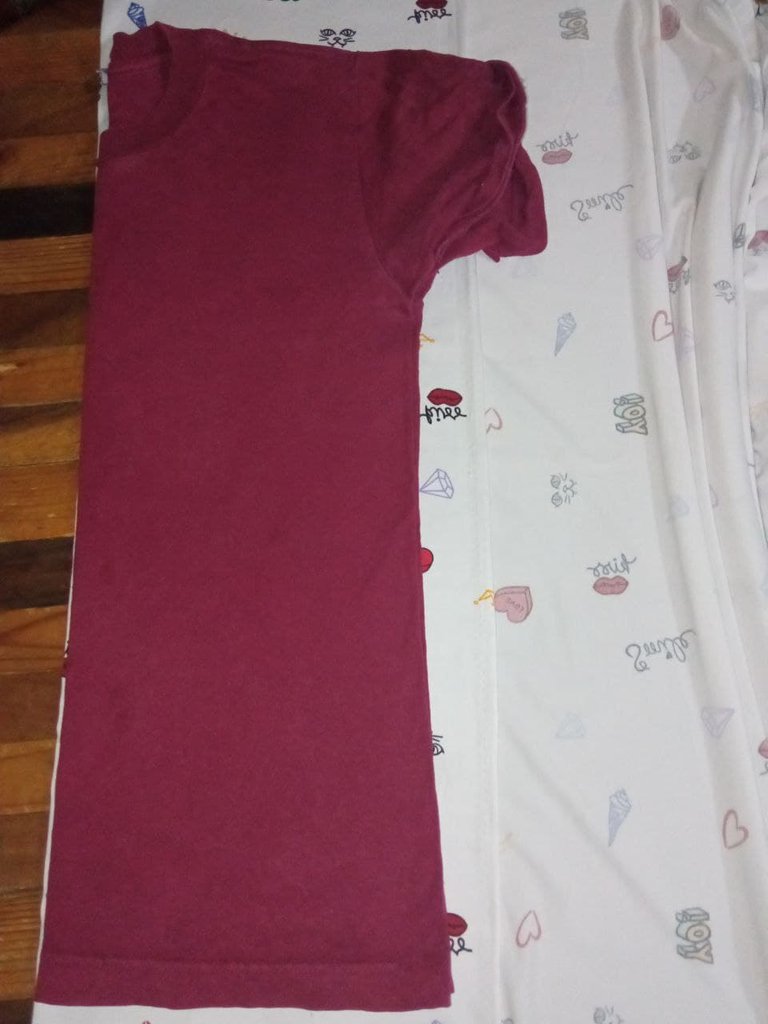
- Debemos tener un espacio bastante amplio para poder colocar la tela con comodidad, en este caso utilizamos una mesa. Se coloca la tela teniendo en cuenta hacia donde estira y que se vea correctamente el estampado. Doblamos la tela y colocamos la camisa que estaremos utilizando como medida.
- We must have a large enough space to place the fabric comfortably, in this case we use a table. We place the fabric taking into account where it stretches and that the print can be seen correctly. We fold the fabric and place the shirt that we will be using as a measure.
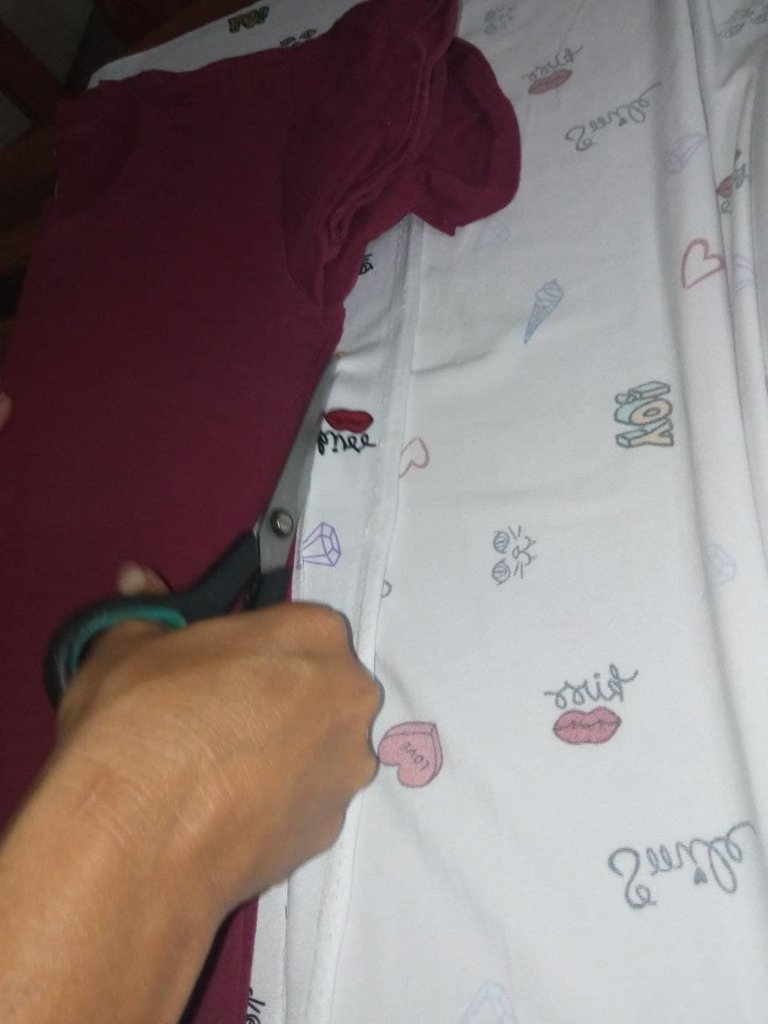
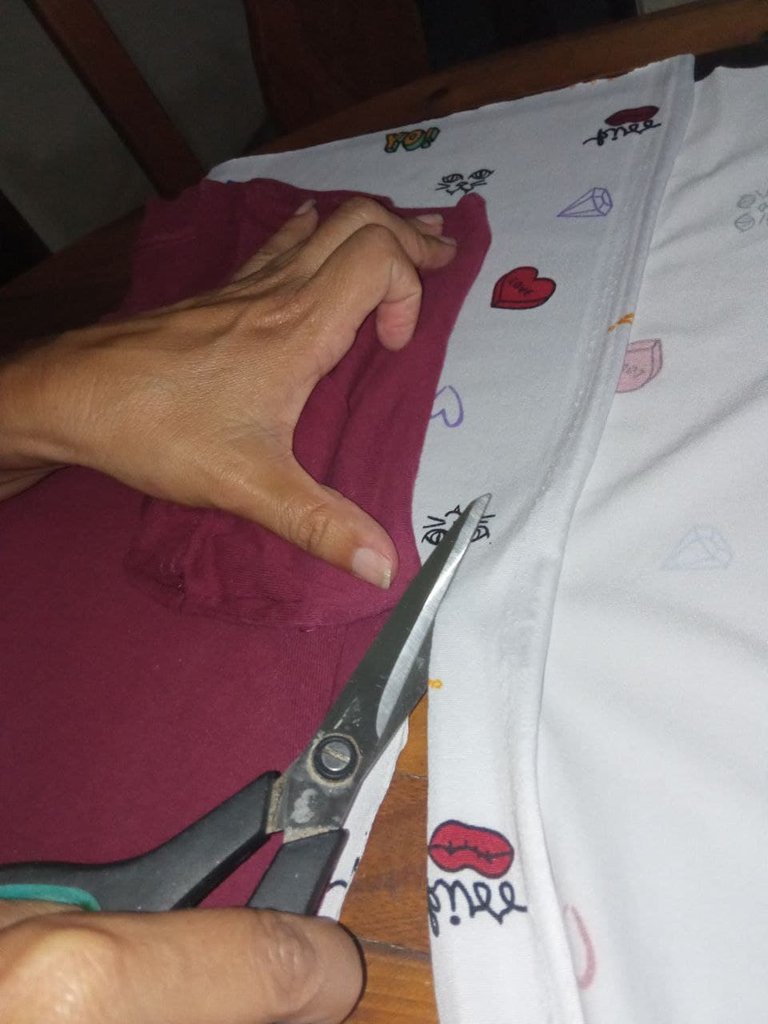

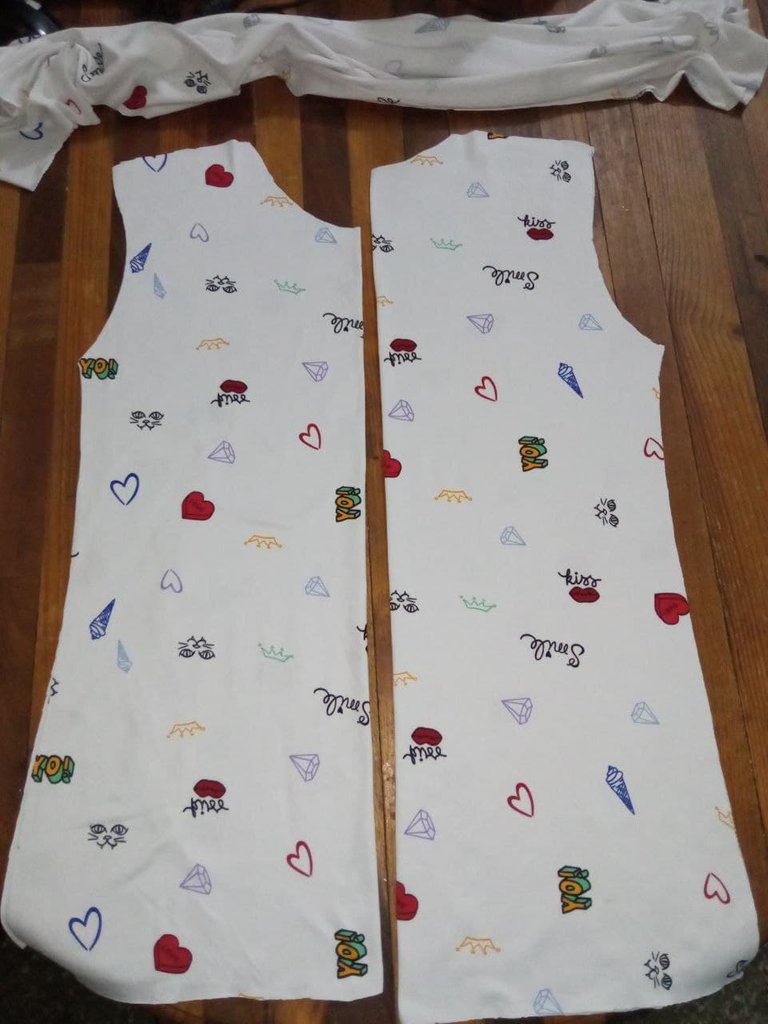
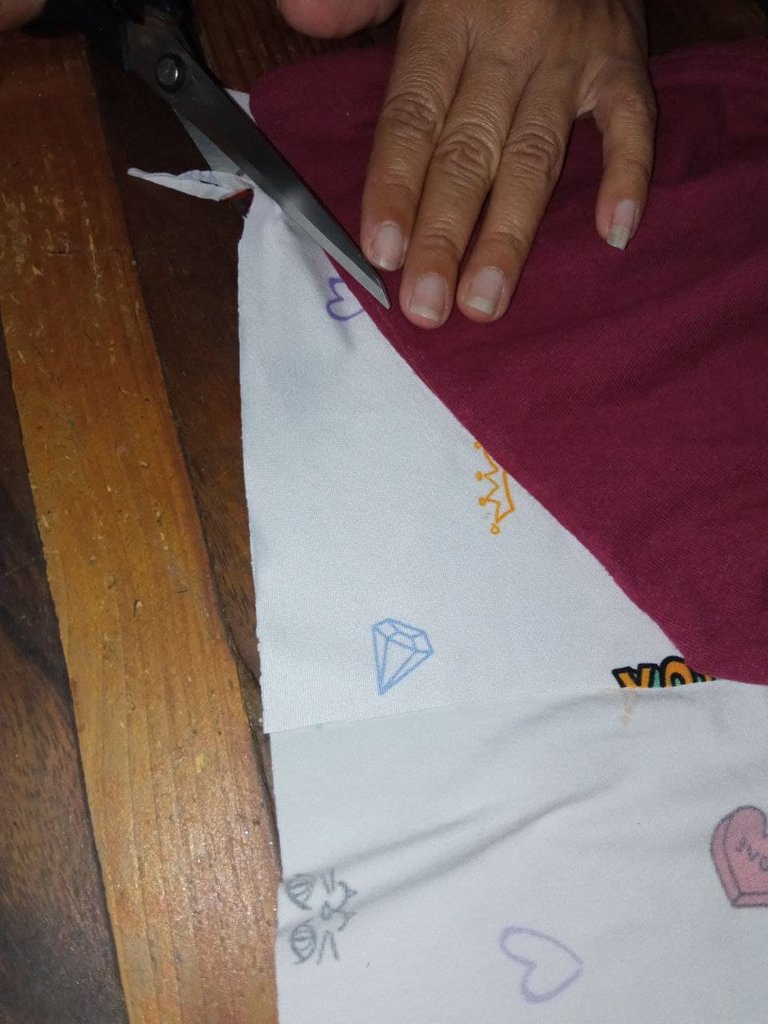
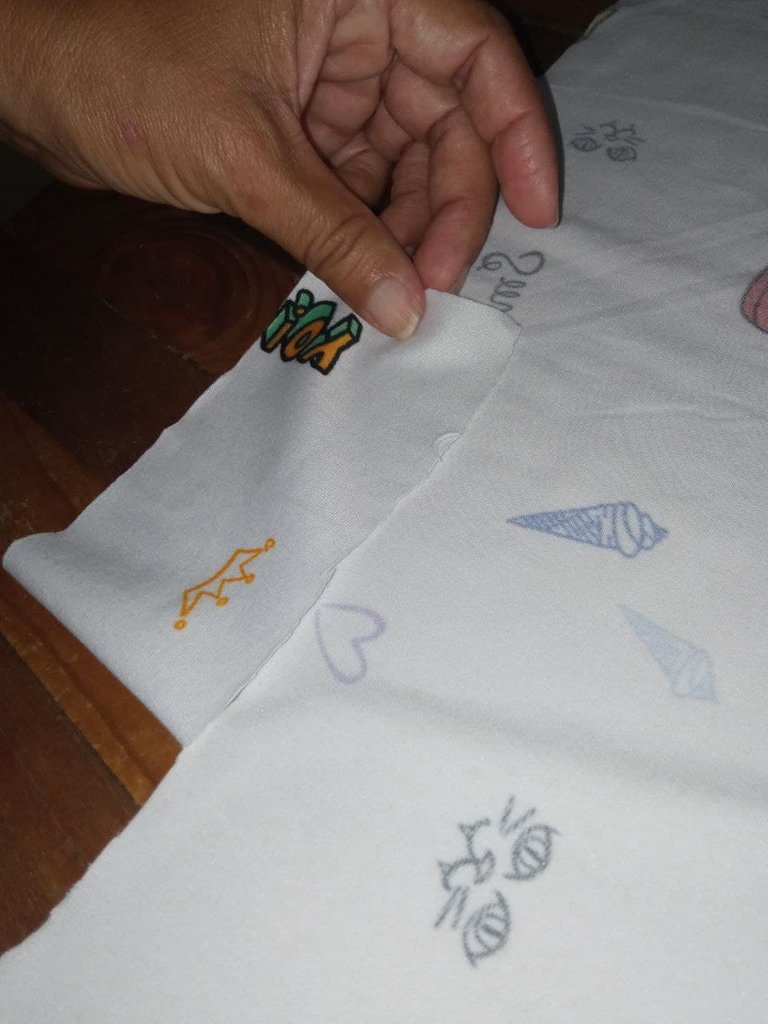
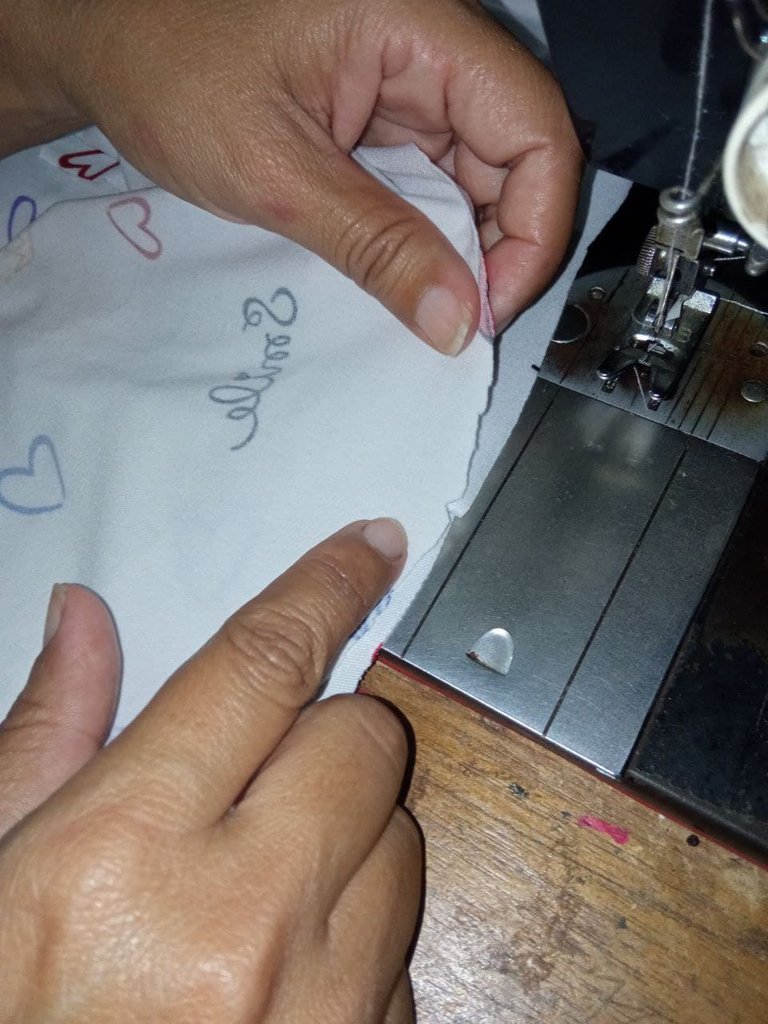
- Primero debemos cortar las piezas del frente y de la espalda, las cuales se diferencian debido a que la parte del frente tiene el cuello más bajo, guiándonos con nuestra medida. Cuando vayamos a cortar debemos hacer el corte 1 cm más grande que la medida, para poder hacer la costura cómodamente.
- First we must cut the front and back pieces, which differ because the front part has a lower neck, guided by our measurement. When we are going to cut we must make the cut 1 cm bigger than the measurement, to be able to make the seam comfortably.
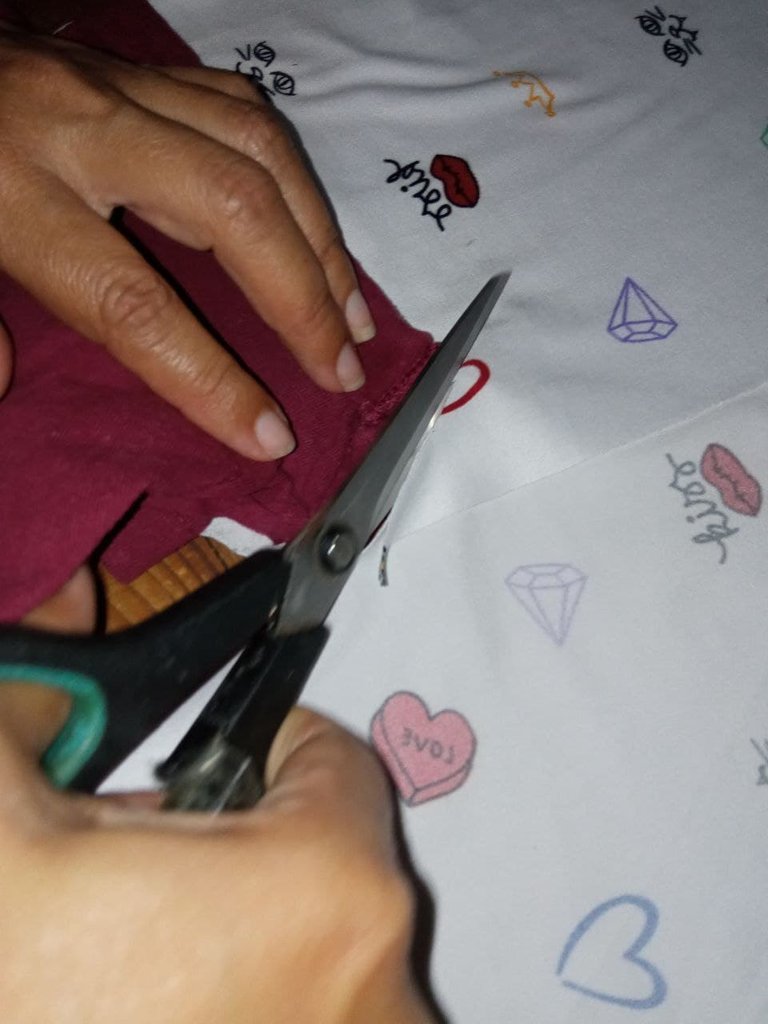
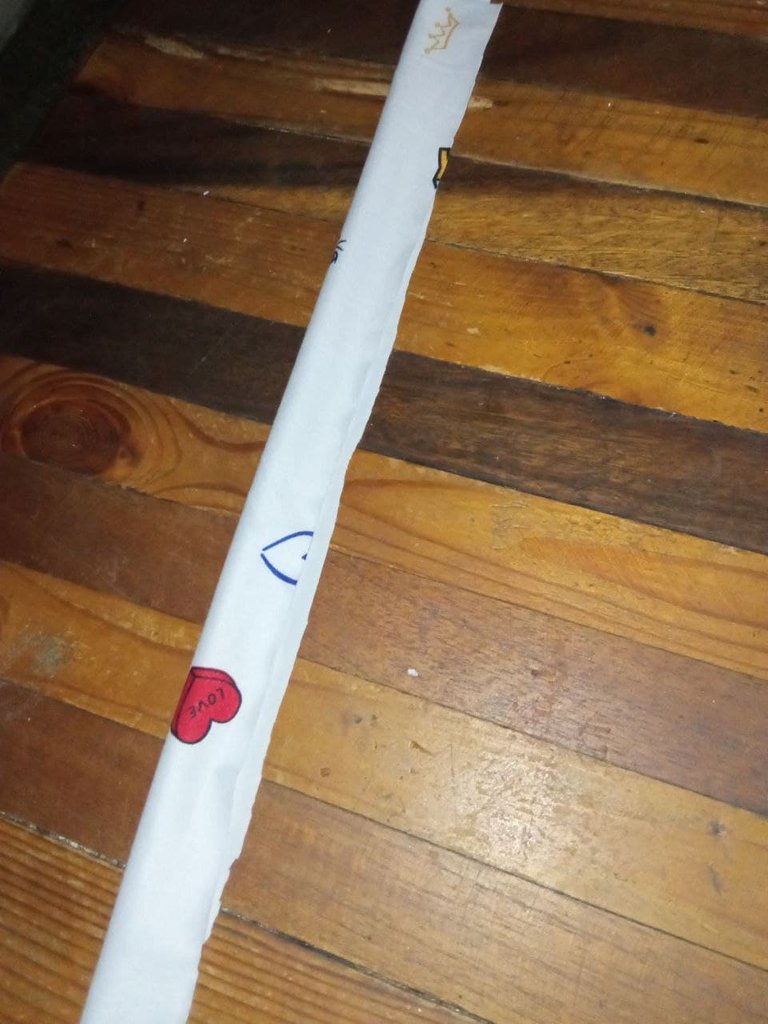
- Pasamos a cortar las mangas y el cuello de la camisa. Las mangas se cortan tal cual como las tenemos en nuestra medida.
- Now we cut the sleeves and the collar of the shirt. The sleeves are cut as we have them in our measurement.
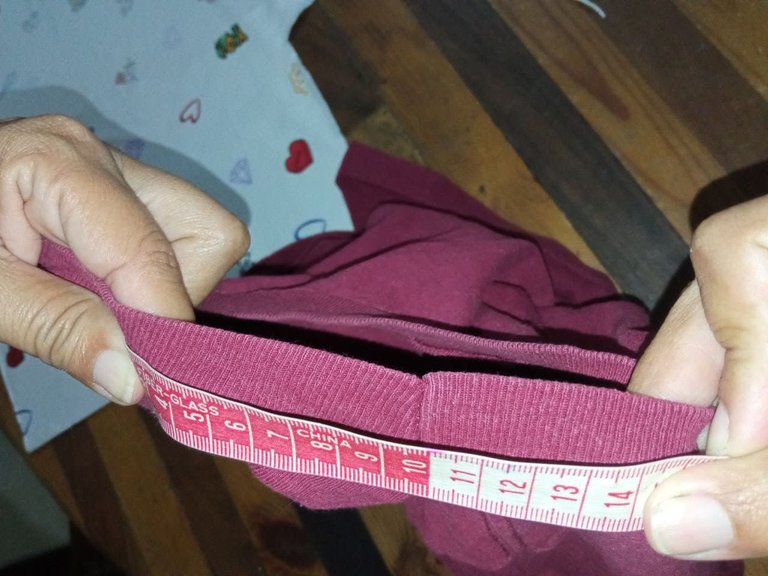

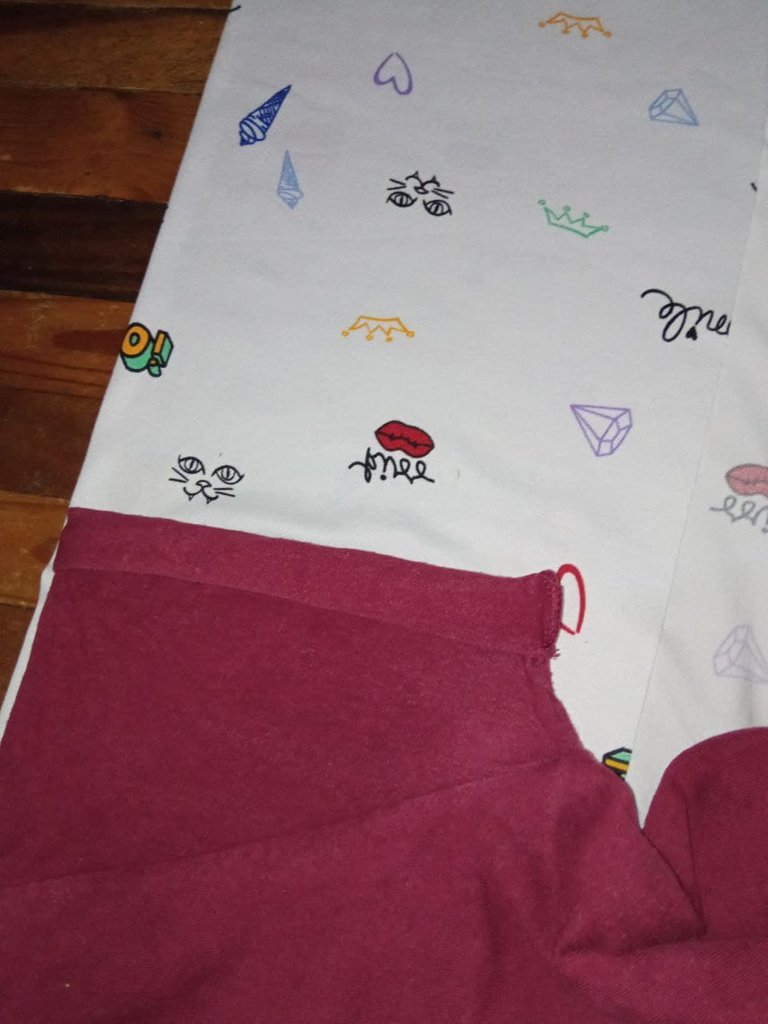
El cuello es una tira la cual para cortarse debemos medir primero el cuello de nuestra medida, luego le restaremos el 10% y cortamos, esto se hace para que el cuello no quede demasiado grande.
The collar is a strip which to cut we must first measure the neck of our measurement, then we subtract 10% and cut, this is done so that the neck is not too big
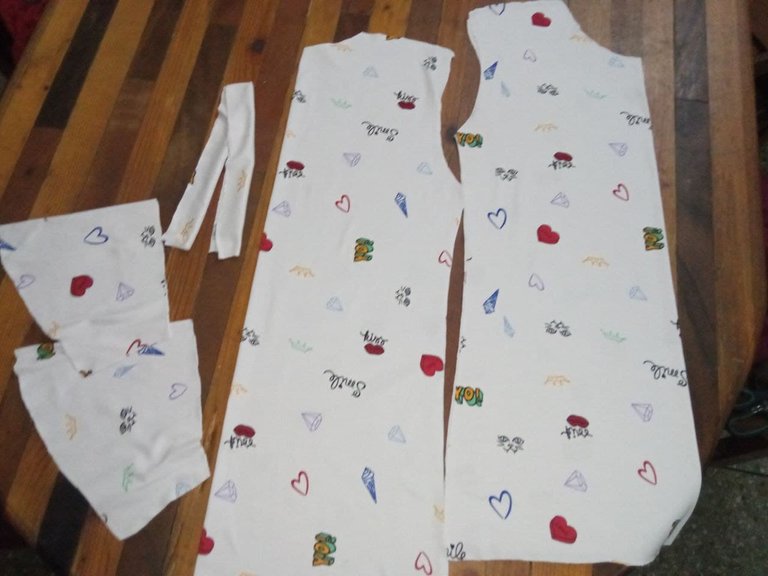
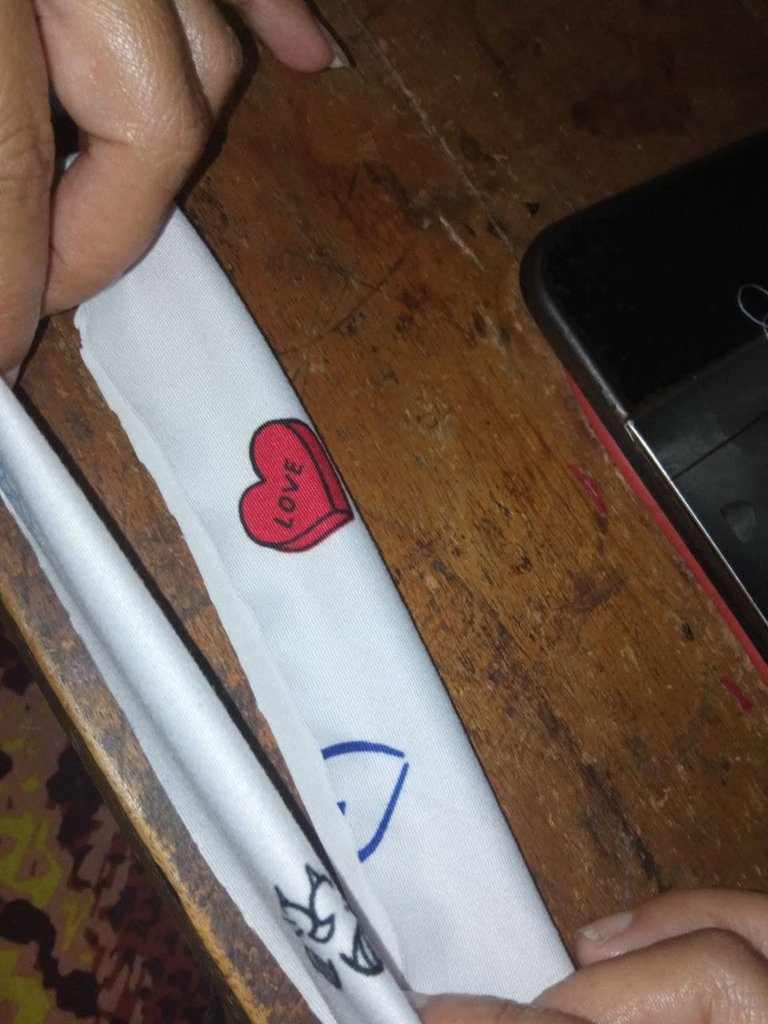
Aquí podemos observar todas las piezas cortadas | Here we can see all the cut pieces
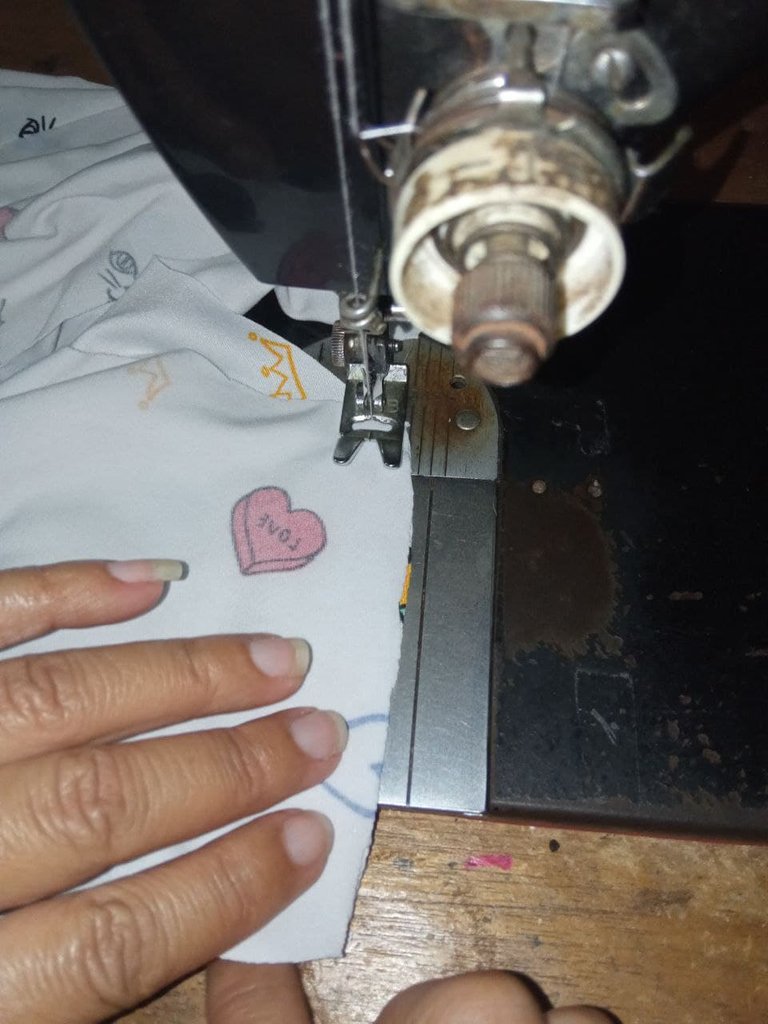

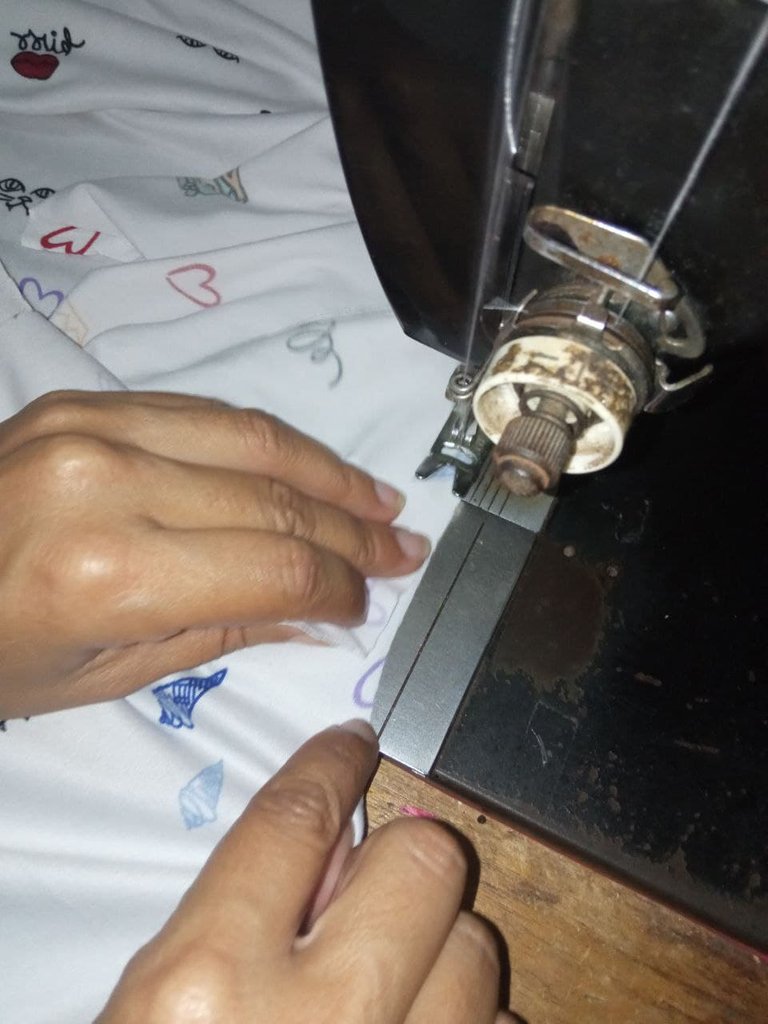
- Una vez que tengamos todas nuestras piezas cortadas pasamos a unirlas, con ayuda de nuestra maquina de coser. La primera pieza que vamos a unir serán la del frente y la espalda, se unen en los hombros.
- Once we have all our pieces cut we will join them together, with the help of our sewing machine. The first piece we are going to join will be the front and back, they are joined at the shoulders.
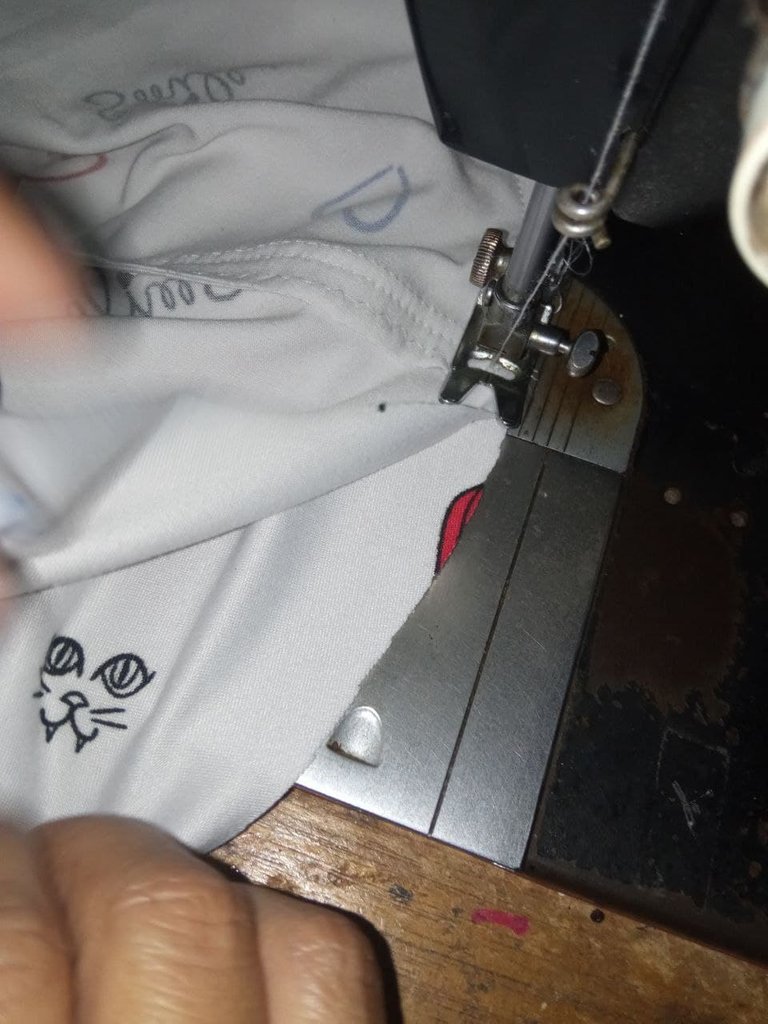
- Luego vamos a unir las mangas a la camisa para luego coser el borde de estas mismas, se puede coser el borde de las mangas antes de unirla a la camisa sin ningún problema, depende del gusto a la hora de trabajar.
- Then we are going to join the sleeves to the shirt and then sew the edge of the sleeves, you can sew the edge of the sleeves before joining it to the shirt without any problem, it depends on your taste when it comes to work.
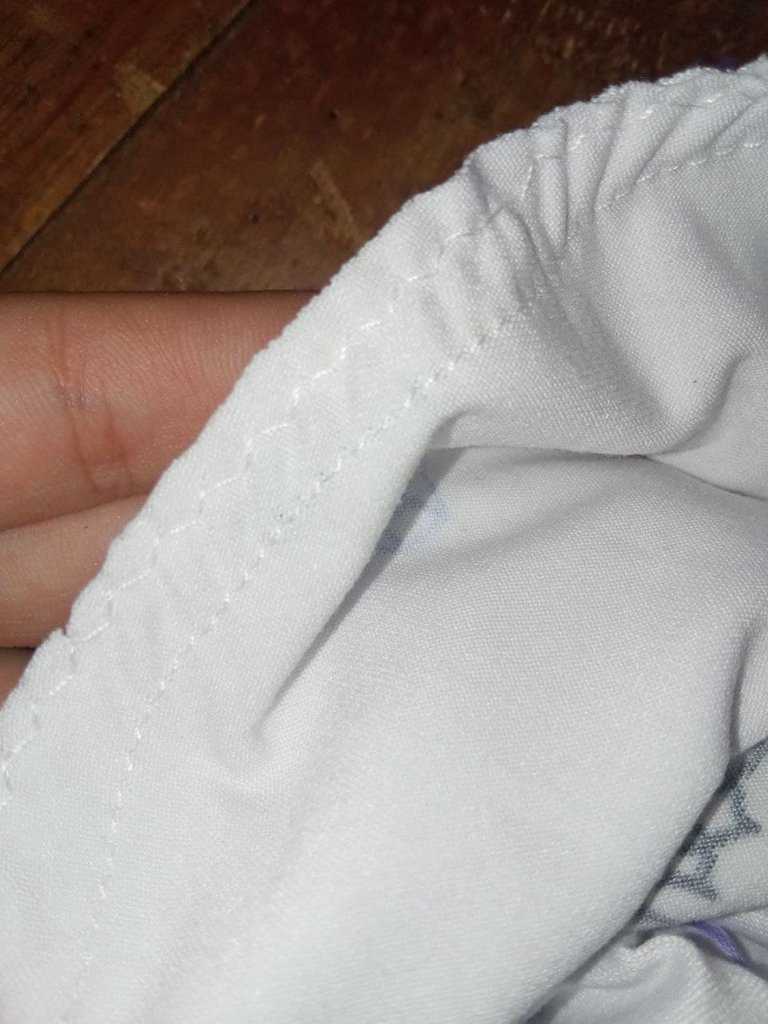
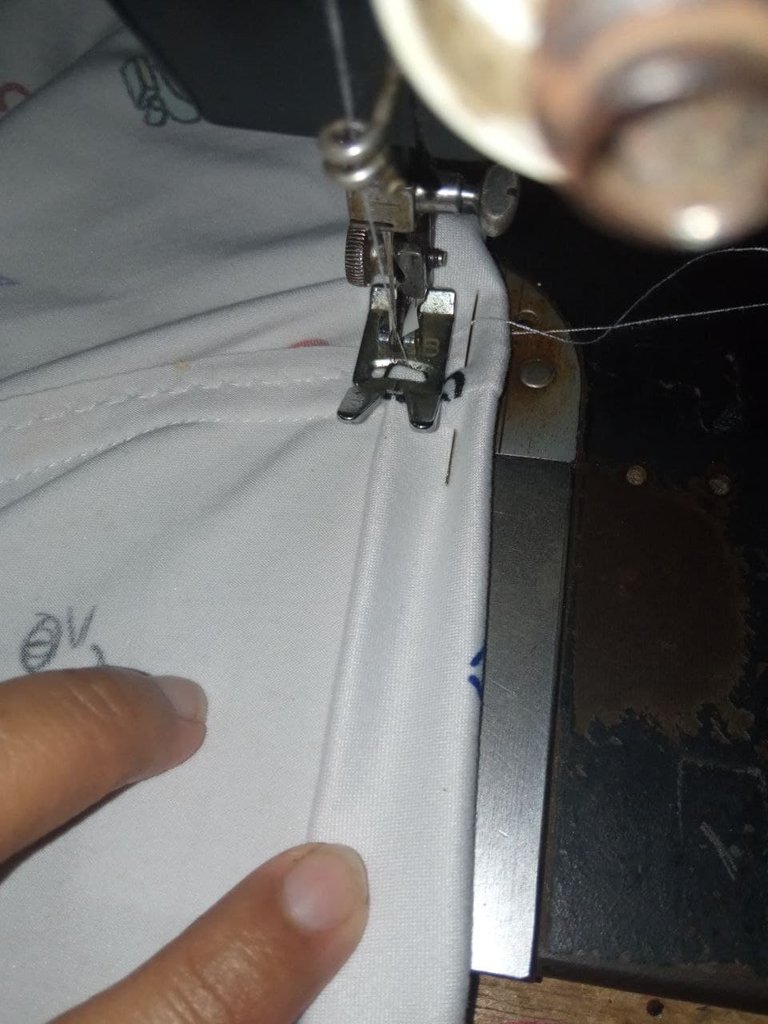
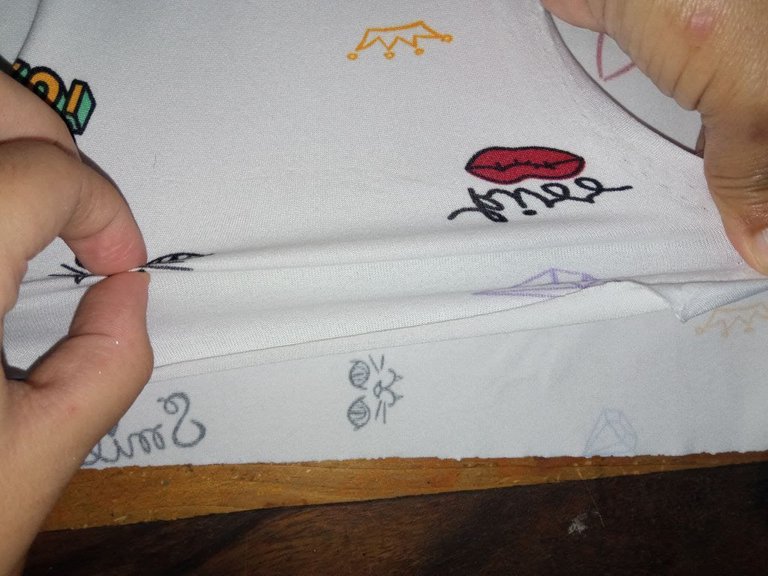
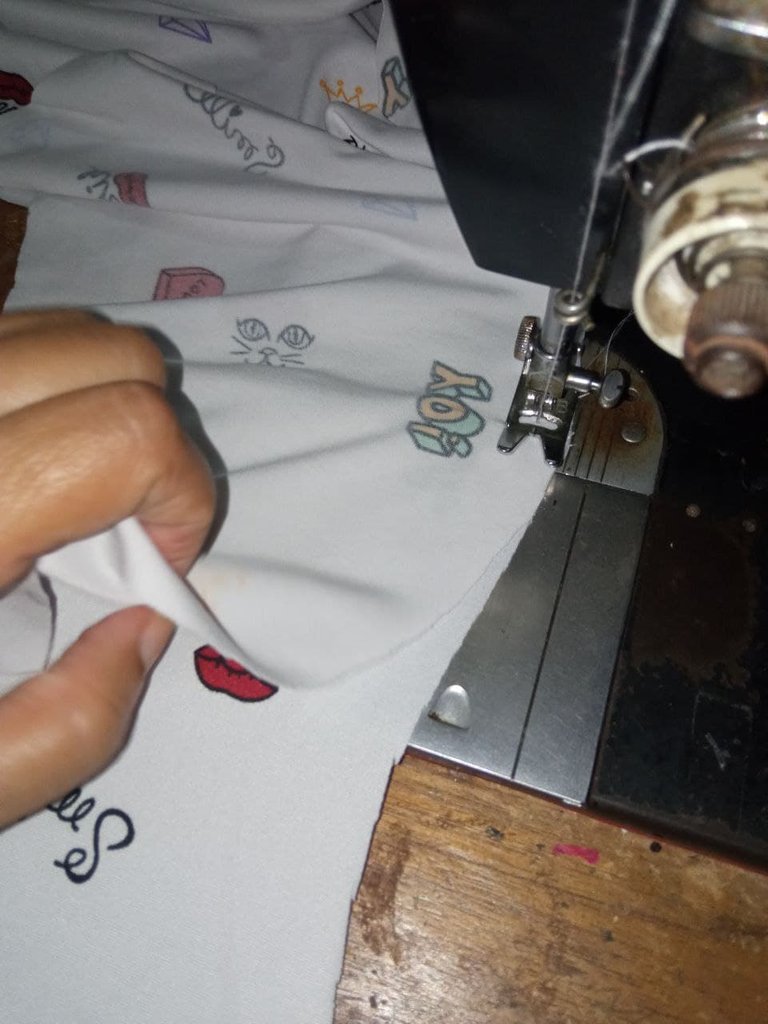
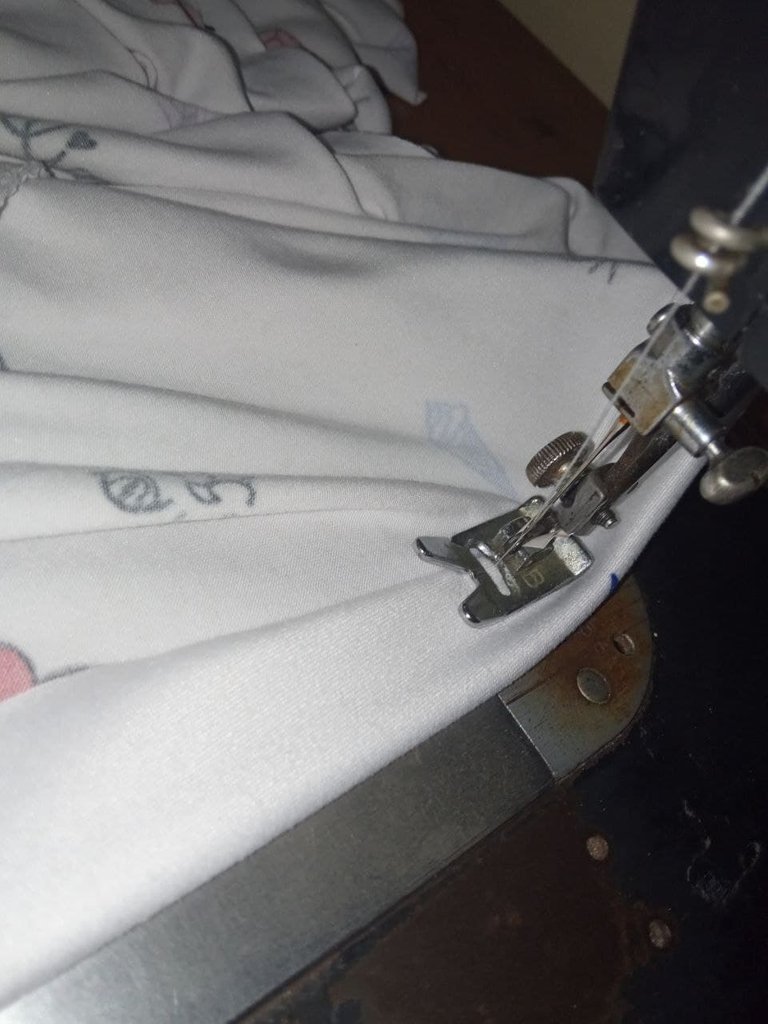
- Después cosemos los costados de la camisa, se hace una costura recta. Casi para finalizar se cose todo el borde de la camisa, haciendo el famoso ruedo, el cual cosemos doblando el borde de la camisa hacia adentro.
- Then we sew the sides of the shirt, making a straight seam. Almost to finish we sew the whole edge of the shirt, making the famous hem, which we sew by folding the edge of the shirt inwards.
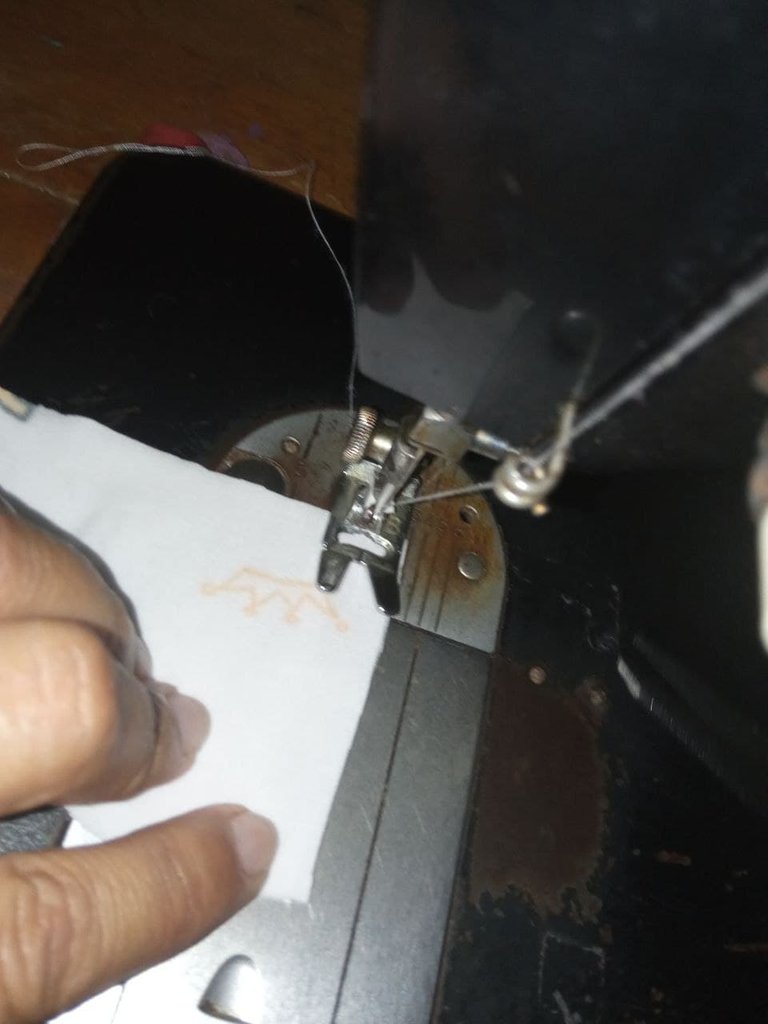
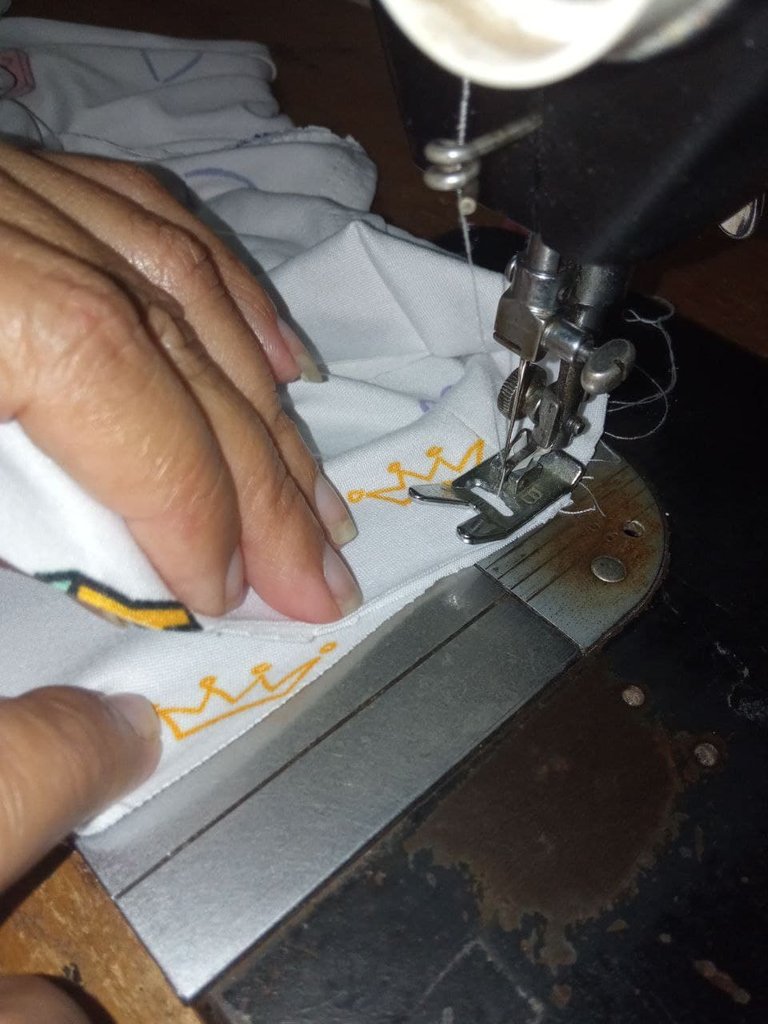
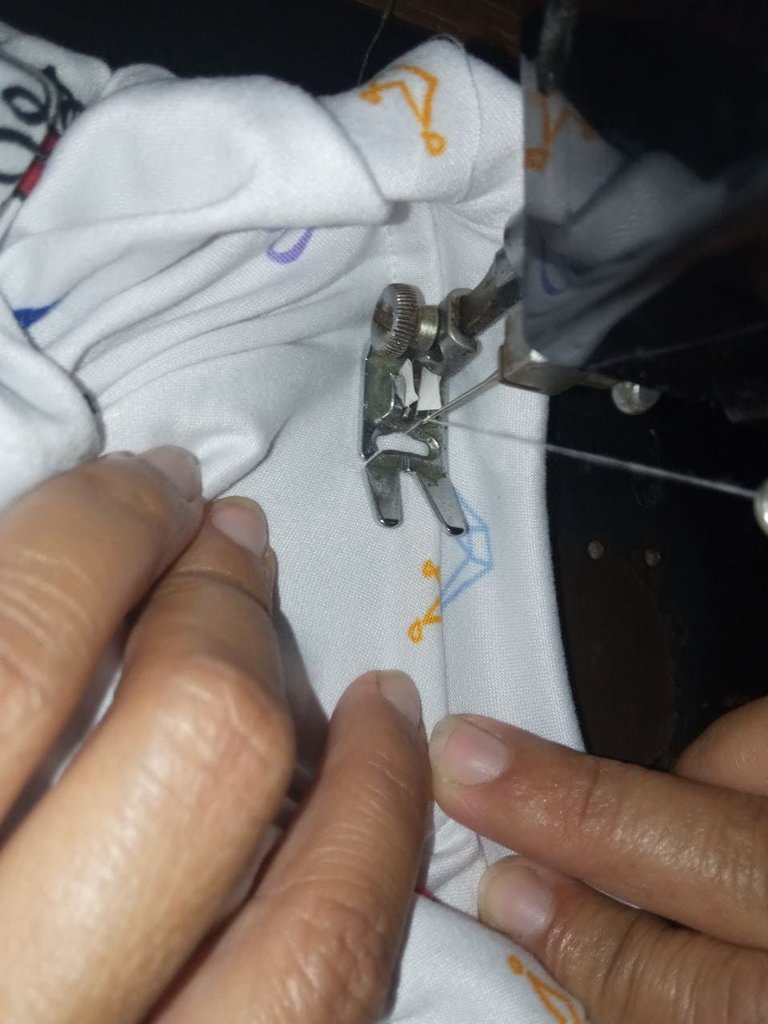
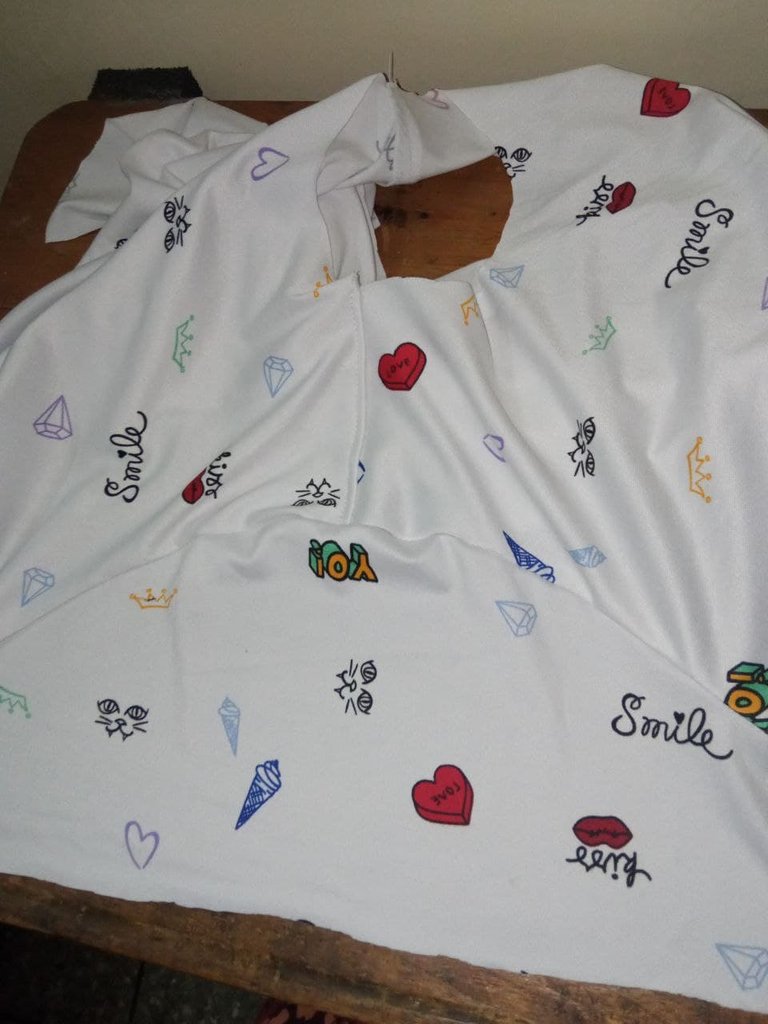
- Para finalizar colocando la tira del cuello. Debemos unir los extraños de la tira para cerrarla, luego la doblamos y la cosemos a la camisa. Al momento de coser la tira del cuello debemos estirar levemente la tira, esto en nuestro caso lo hacemos de último.
- To finish by placing the neck strap. We must join the strangers of the strip to close it, then we fold it and sew it to the shirt. At the moment of sewing the strip of the neck we must stretch slightly the strip, this in our case we do it last.
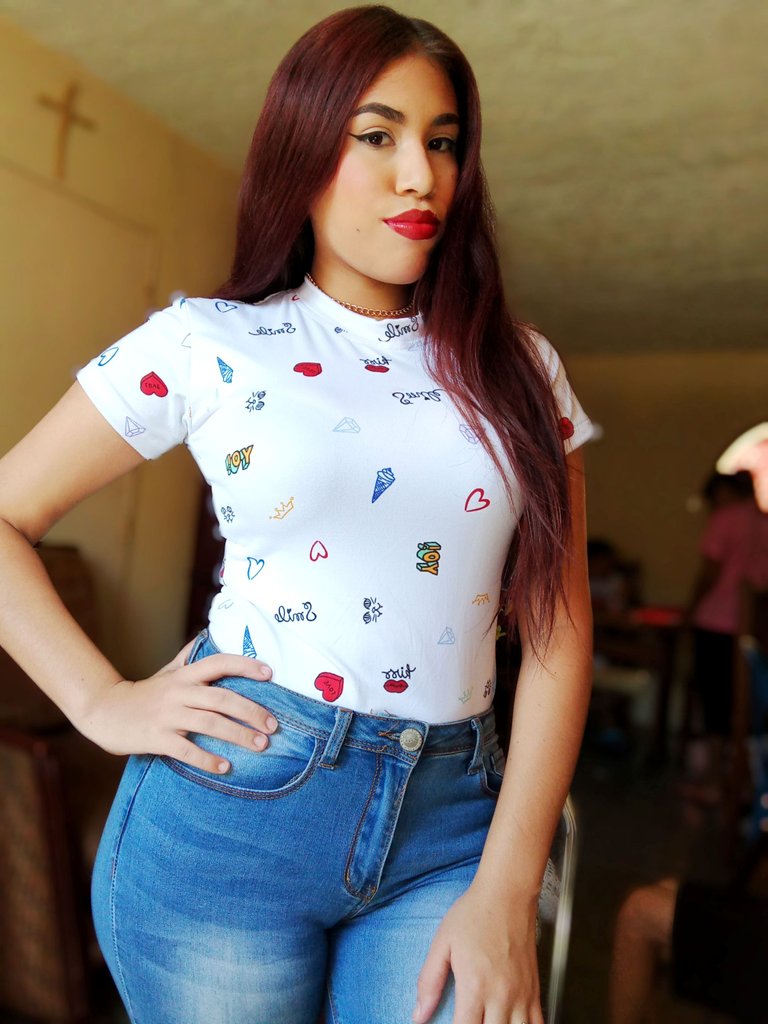
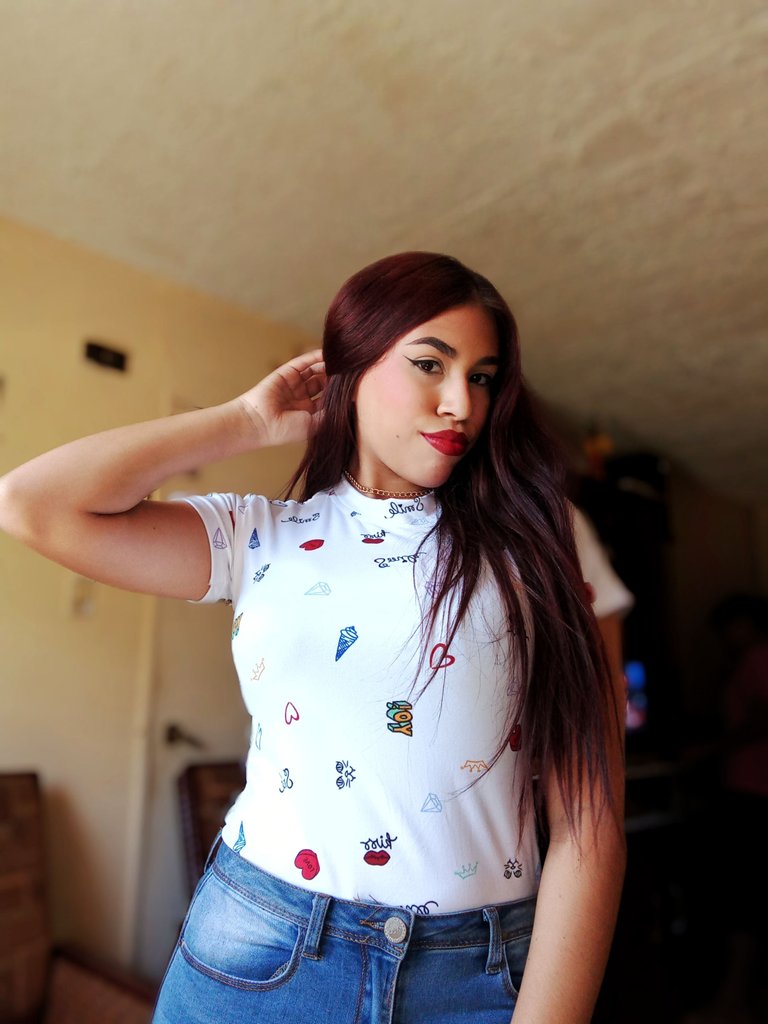
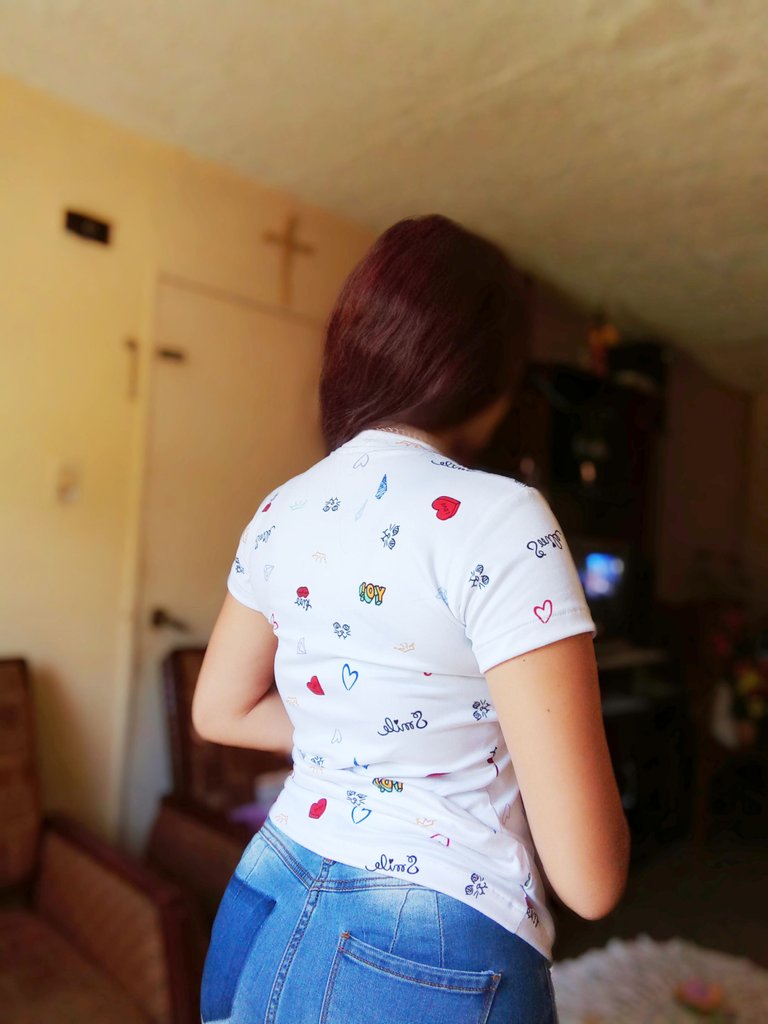
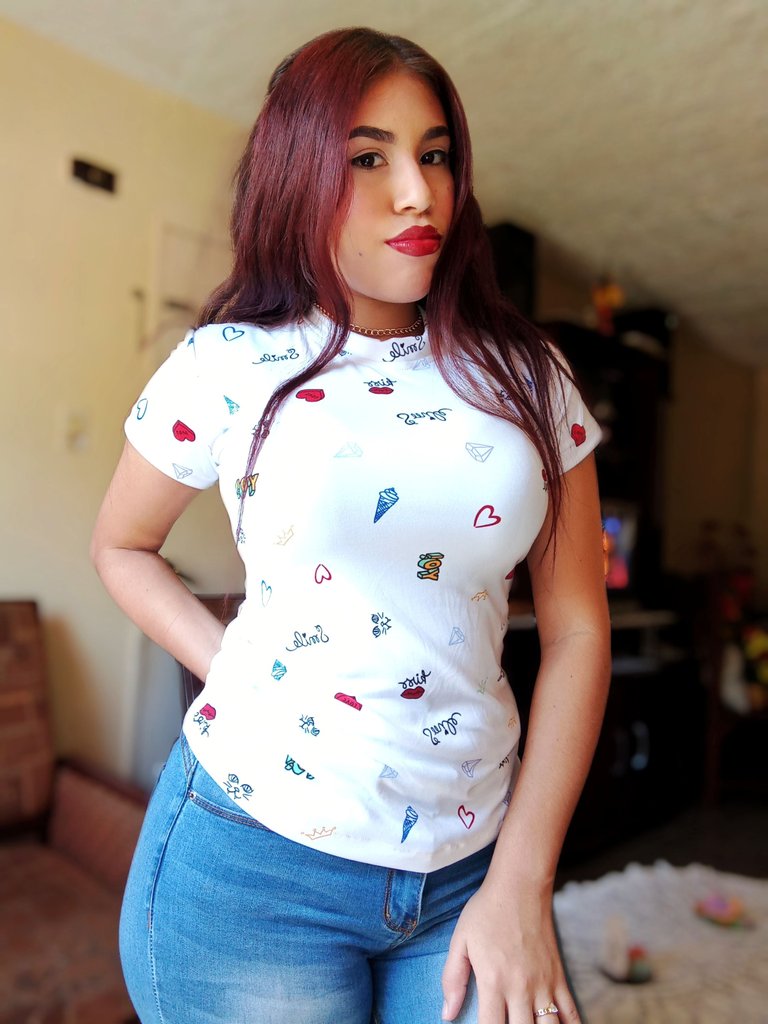
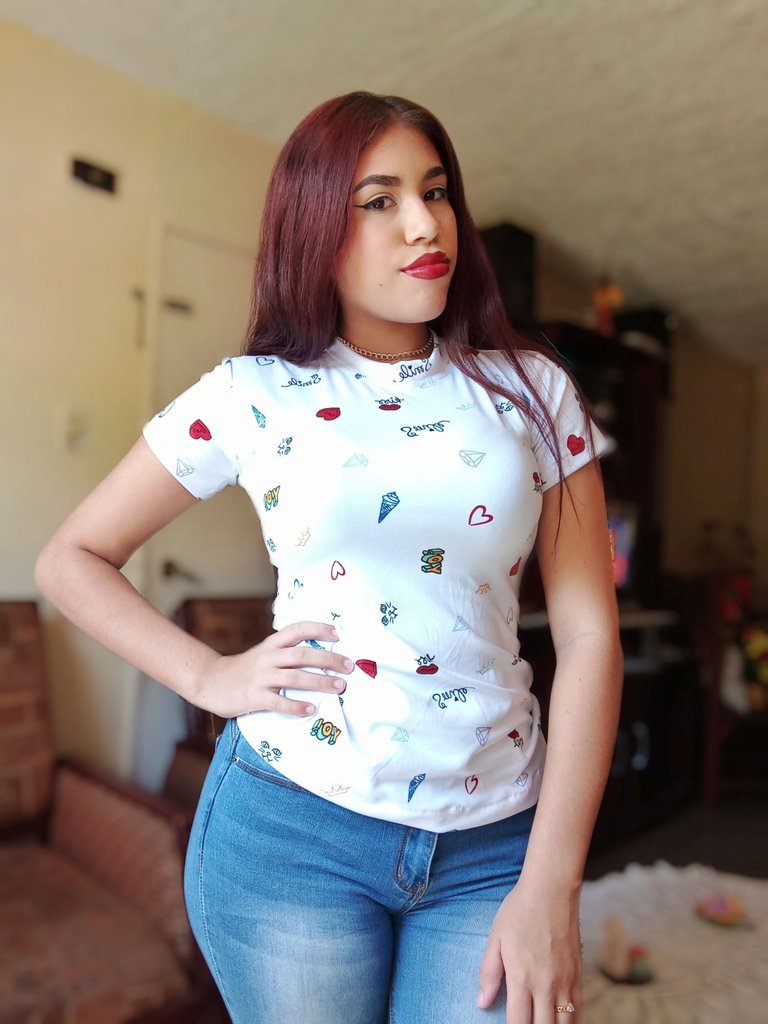
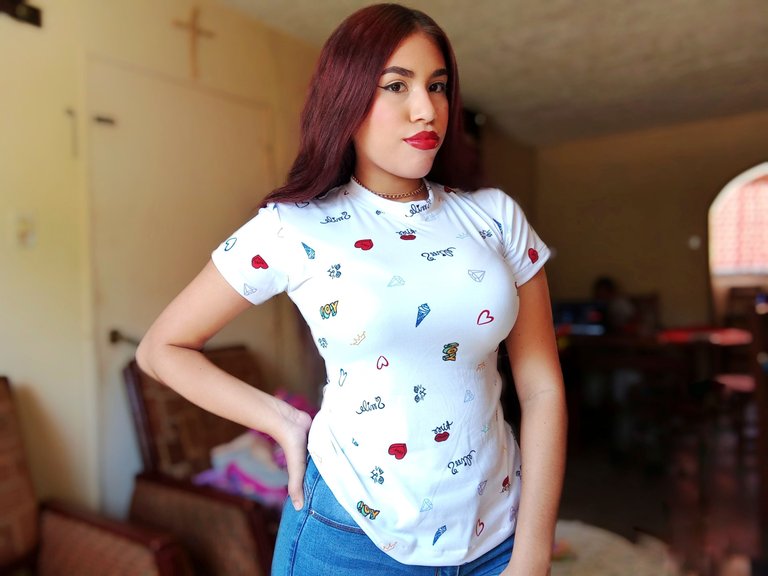
Finalmente esta lista nuestra camisa, la cual es muy bonita y fácil de hacer, podemos utilizarla por dentro o por fuera, igualmente se ve muy hermosa, ya tengo el mismo modelo en varios estampado, para hacerla más diferente podemos agregarle un bolsillo de otro color que combine con nuestro estampado, también podemos hacer el cuello o las mangas de otro color y así también tenemos más variedad, todo va a depender del estampado y de nuestros gustos. Espero que les haya gustado tanto como a mi, nos vemos próximamente!
Finally this ready our shirt, which is very nice and easy to do, we can use it inside or outside, also looks very beautiful, I already have the same model in various prints, to make it more different we can add a pocket of another color to match our print, we can also make the collar or sleeves of another color and so we also have more variety, everything will depend on the print and our tastes. I hope you liked it as much as I did, see you soon!
Pictures of my property. Camera: CellPhone Xiaomi Redmi 9. Si te gusta el maquillaje, el mundo de la belleza o hacer arte en tu piel te invito a la comunidad y al Telegram: If you like makeup, the world of beauty or making art on your skin I invite you to the community and the Telegram:

Makeup Power Telegram
Makeup Power

me parece interesante como la hizo, la verdad que me gusta la costura y se que solamente basta dedicar un poco de tiempo en hacer cualquier pieza sin mucho conocimiento, se nota lo creativa que eres asi es todo esta en querer hacer las cosas. te felicito
Así es! La costura necesita tiempo para que de verdad salgan bien las cosas, muchas gracias!
me encanta ese modelo y como le quedo muy lindo de verdad, tiene mucha destreza para el trabajo de costura, =D! me encanto
Muchísimas gracias! El modelo es bastante sencillo, pero aún así es lindo
Esa blusa te que quedó hermosa...se te ve espectacular...señida al cuerpo...te felicito
Muchas muchas muchas gracias! 😍
Me encantó
Gracias!❤️
No todo es maquillar, también cose la mujer.
Para que tu veas, hago muchas cosas jajajajaja
Multitasking
Te quedo muy linda, el patron tal como suelo hacer.... ina prenda que me gusta... es el patron perfecto!!
¡Gracias por compartir!!
El mejor patron jajajaja ¡Muchas garaciaaaaaas!
Congratulations @lucianav! You received a personal badge!
You can view your badges on your board and compare yourself to others in the Ranking
Check out the last post from @hivebuzz:
Chama reconocí de inmediato esa camisa vinotinto jajaja, te quedo espectacular! Me gusto mucho la camisa
JAJAJJAA Mi camisa vinotinto ❤️❤️ Gracias bella ❤️❤️
Congratulations @lucianav! Your post has been placed in the spotlight for this week's @NeedleWorkMonday Featured Posts #132!
Thank you for your quality post and for being a part of the needlework community!
Thank you so much for taking me into account! I love this community
Esta es una manera tan fácil de hacer una camisa y la tela es tan hermosa. También hiciste un gran trabajo con la costura. Buena esa
Oh si, es muy fácil! Muchas gracias, a mi me encantó la tela. Saludos!