[ENG - ESP] DIY: Beautiful Chinese dragon | Bricolaje: Hermoso dragón chino ✌
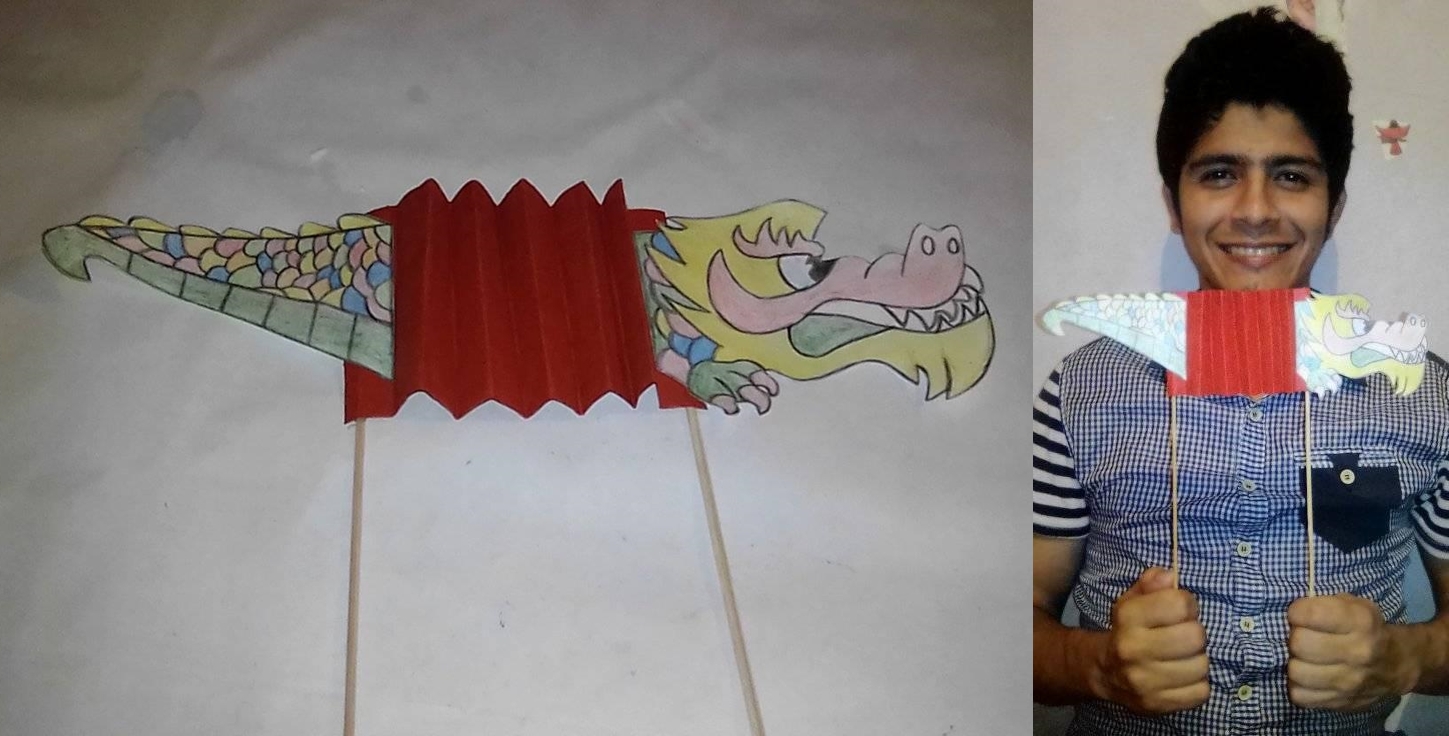
I am happy to present you this beautiful dragon that I made with very few materials, it is an ornament and you can put it wherever you want.
HEY! queridos amigos, ¿cómo están hoy?
yo estoy feliz de presentarles este hermoso dragón que hice con muy pocos materiales, es un adorno y lo puedes poner donde quieras.

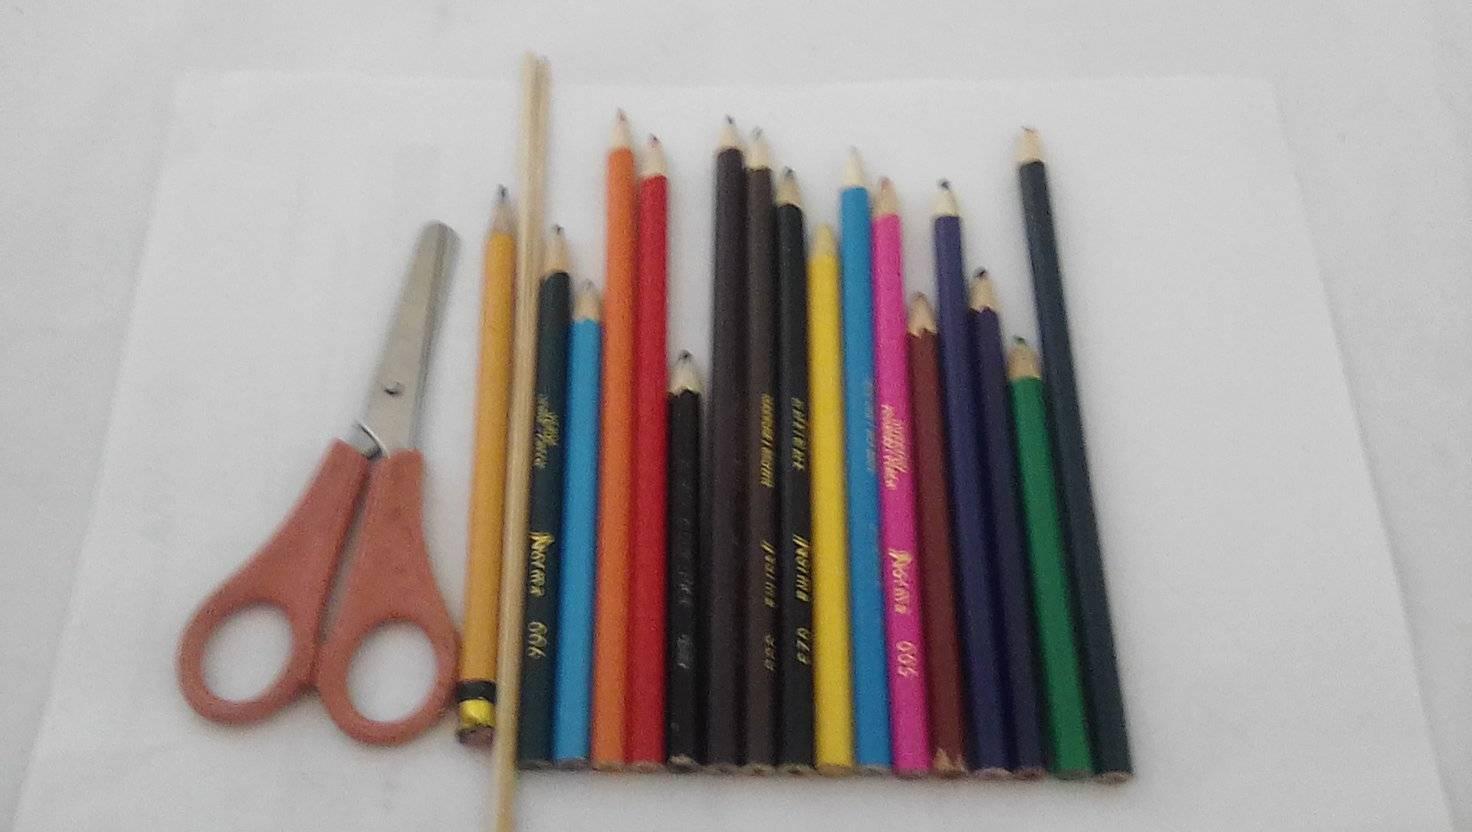
•Blank sheet (recyclable).
•Red cardboard.
•2 Chopsticks of height.
•Glue stick.
•Silicone.
•Scissors.
•Crayon colors.
•Hoja en blanco (reciclable).
•Cartulina color rojo.
•2 Palillos de altura.
•Pegamento en barra.
•Silicón.
•Tijeras.
•Colores de crayón.

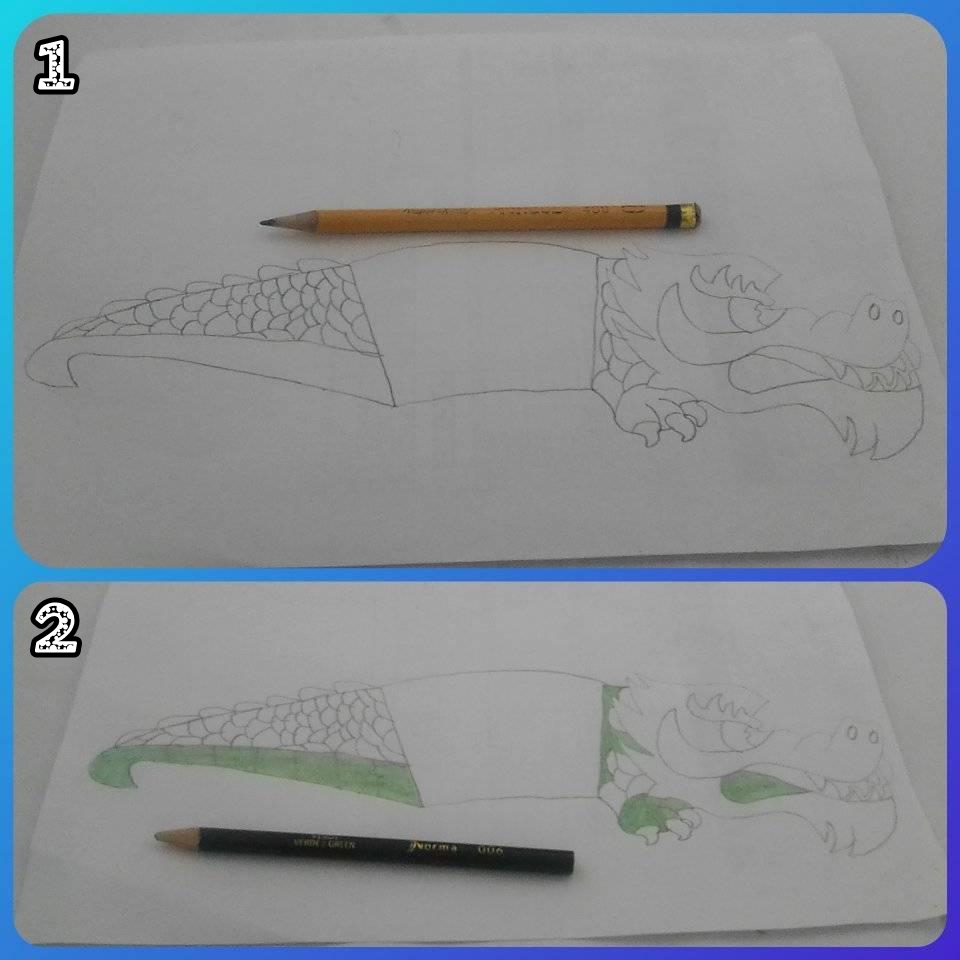
•STEP 1: Draw a Chinese dragon of your choice on the blank sheet of paper (use the crayon pencil).
•STEP 2: Color a small part of the face, the feet, and a small part of the body with green color.
•PASO 1: Dibujamos un dragón chino de nuestra preferencia en la hoja en blanco (usar el lápiz crayón).
•PASO 2: Colorea una pequeña parte de la cara, los pies, y una pequeña parte del cuerpo con color verde.
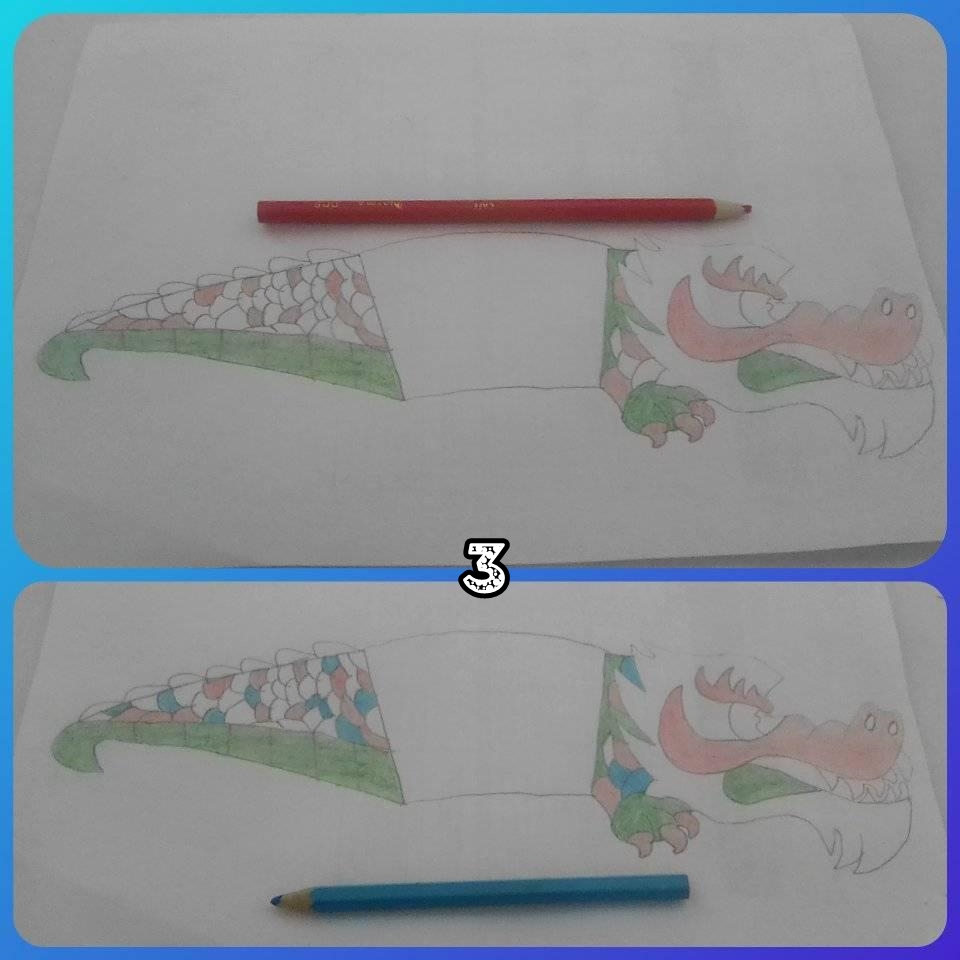
•STEP 3: Use red for part of the face, eyebrows, claws and tail scales, then use blue on some front and tail scales.
•PASO 3: Use el color rojo para una parte de la cara, las cejas, garras y escamas de la cola, luego use color azul en algunas escamas delanteras y las de la cola.

•STEP 4: use the yellow color to color the face, some scales on the tail and the front of the dragon, then cover the rest of the scales with the colors of your choice.
•PASO 4: use el color amarillo para colorear la cara, algunas escamas de la cola y de la parte delantera del dragón, luego cubrimos el resto de las escamas con los colores de nuestra preferencia.
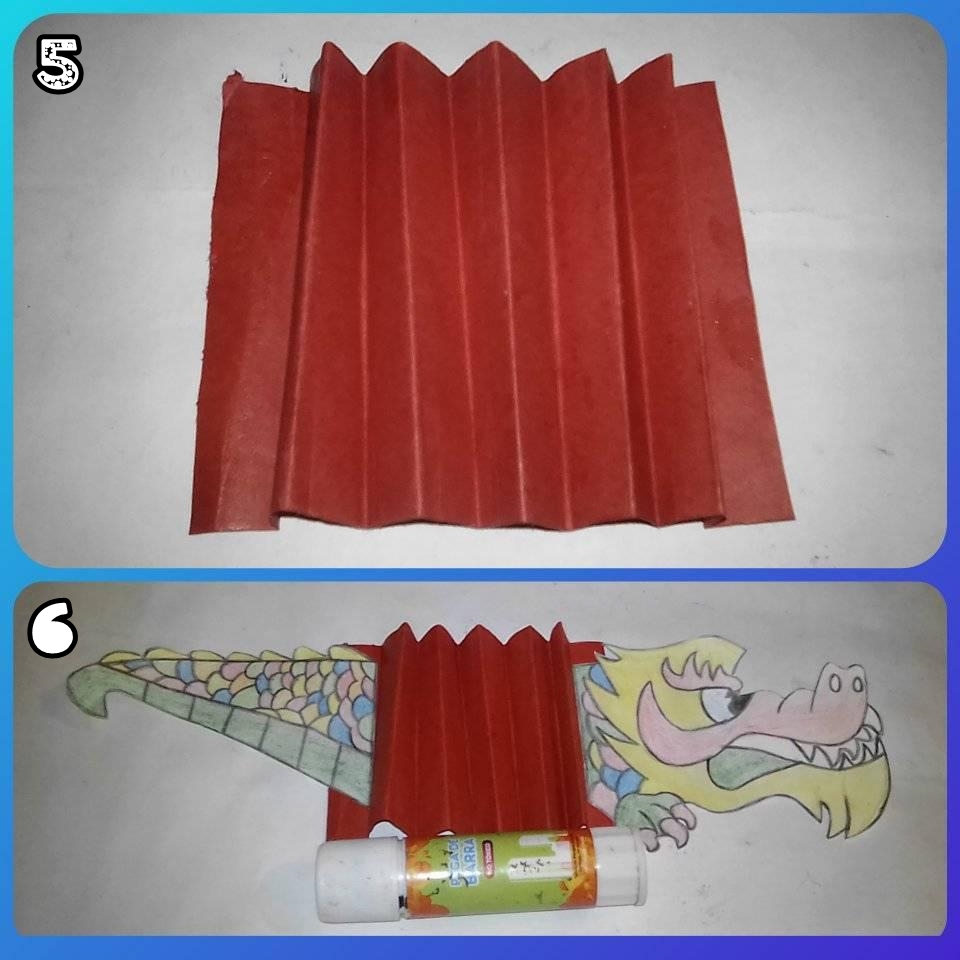
•STEP 5: Cut a strip into a rectangular shape, then fold it to simulate an accordion.
•STEP 6: Cut the dragon in half and attach each part to the cardboard in an accordion shape (use silicone or glue stick).
•PASO 5: Cortamos una tira en forma de rectangular, luego la doblamos simulando un acordeón.
•PASO 6: Cortamos el dragón a la mitad y unimos cada parte a la cartulina en forma de acordeón (usar silicón o pegamento en barra).
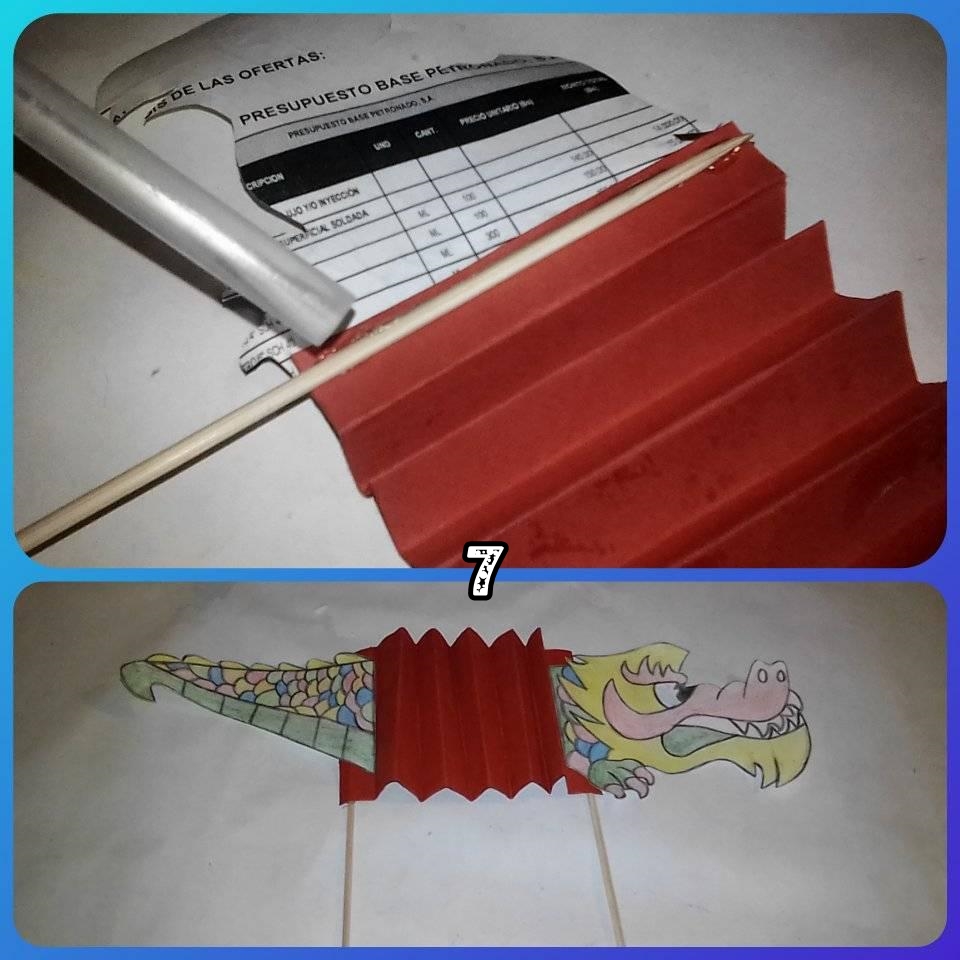
•STEP 7: Glue 2 tall toothpicks on the back of the cardboard in the shape of an accordion and thus we finish our decorative DIY.
•PASO 7: Pegar 2 palillos de altura por la parte trasera de la cartulina en forma de acordeón y así finalizamos nuestro bricolaje decorativo.

All photos are my own, edited in PhotoScape, translator used: DeepL.

0
0
0.000
Congratulations @deivisperez! You have completed the following achievement on the Hive blockchain and have been rewarded with new badge(s) :
Your next target is to reach 40 posts.
You can view your badges on your board and compare yourself to others in the Ranking
If you no longer want to receive notifications, reply to this comment with the word
STOPCheck out the last post from @hivebuzz:
Support the HiveBuzz project. Vote for our proposal!
Nice work. I was looking for a video/gif file to see how it flies when you waves it. @tipu curate 2
Upvoted 👌 (Mana: 28/112) Liquid rewards.
Hello @sharminmim , thank you for supporting my work again. I thought about doing the gif making the dragon fly, but then I forgot haha. I promise to do a better job next Friday. See you again on Friday.