[ESP-ENG] Mi Pelota Desestresante | My De-stressing Ball
.png)
A big greeting to my beautiful Hive family, I hope you all are well, I am very happy today, as I made a de-stress ball, we all at some point get stressed, and want to scream, fight, do everything, so, I wanted to make this amazing work of art, so I can calm down or relieve me in difficult moments, the steps are super simple, so let's start:
.png)
-Materiales:
-Tijera.
-Tela de cualquier color.
-Aguja.
-Hilo.
-Relleno para nuestra pelota. En este caso utilicé bolitas de anime super pequeñas, son especiales para rellenas almohadas, cojines.
-Lápiz.
-Hoja blanca.
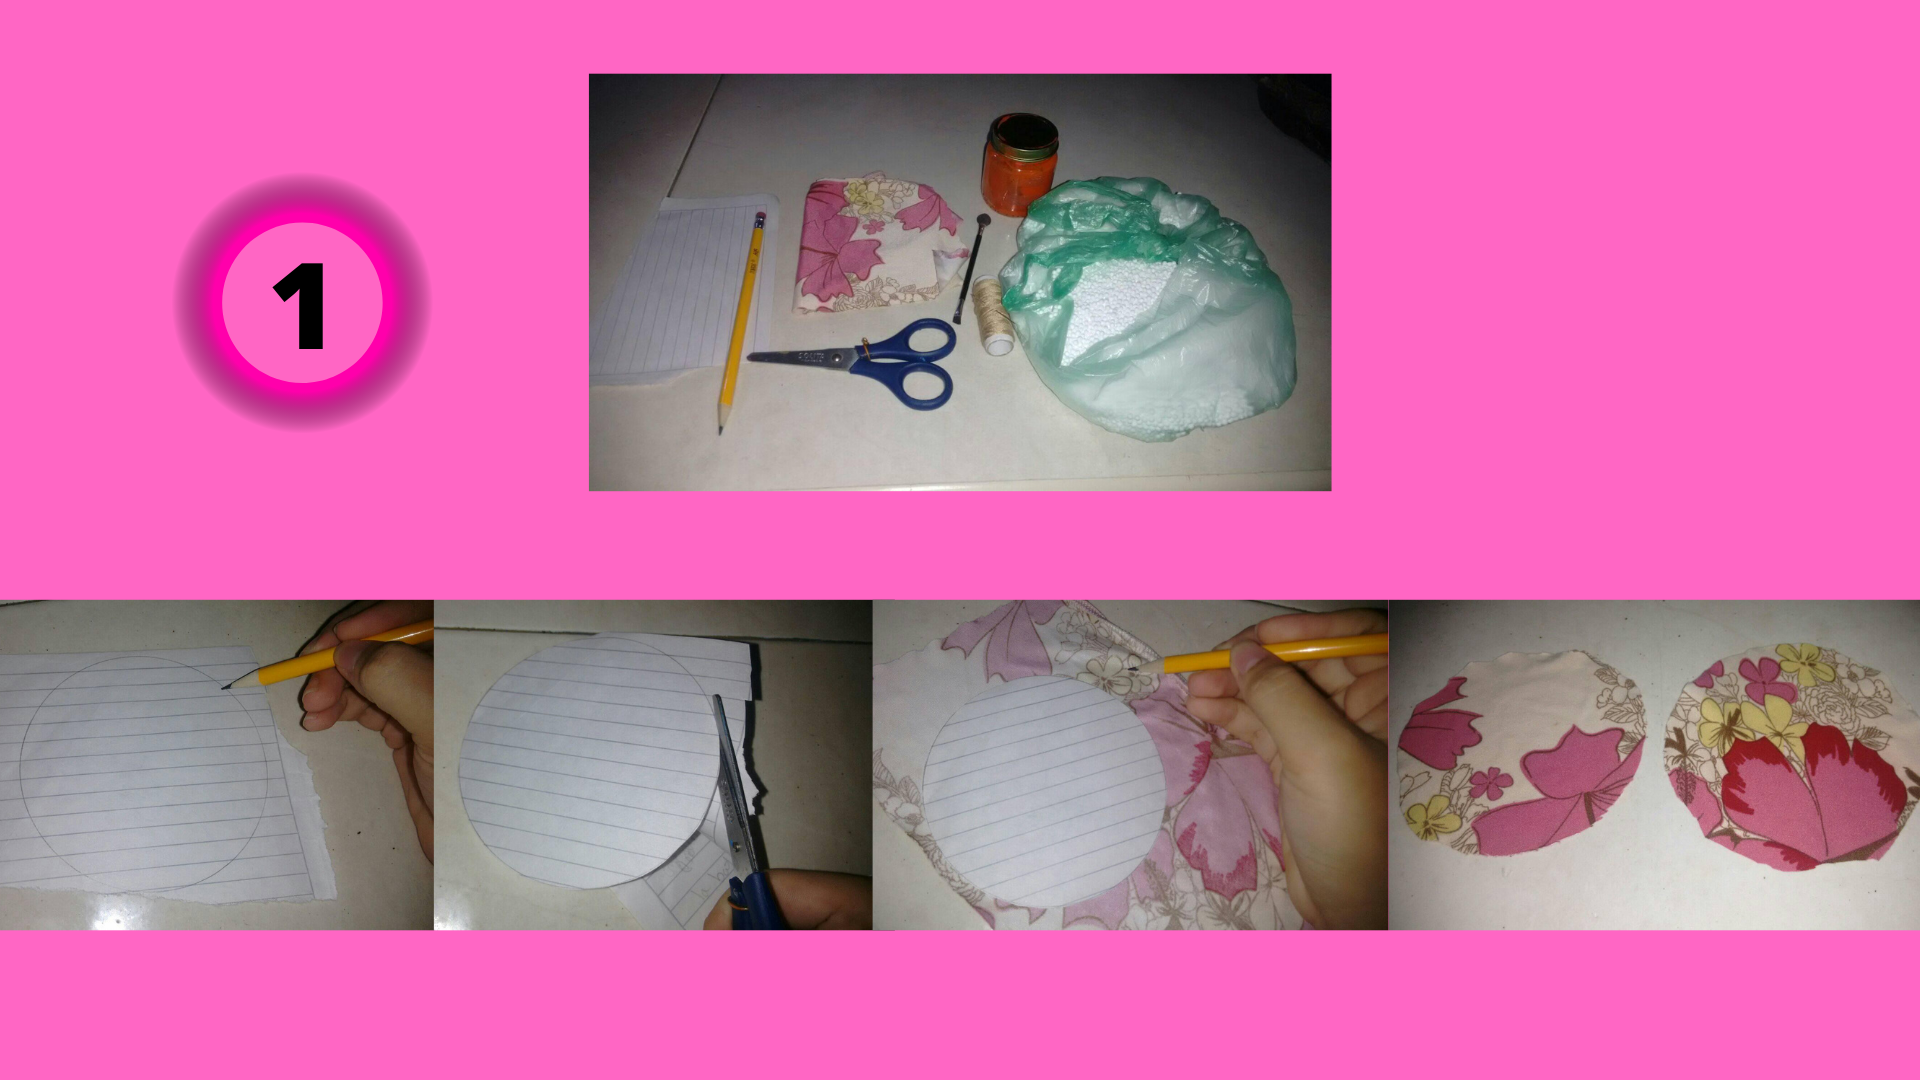
-Paso 1: Dibujamos en la hoja blanca el tamaño del círculo que queremos para nuestra pelota, recortamos, y luego lo plasmamos sobre la tela para así recortar su forma, serían 2 Círculos.
-Materials:
-Scissors.
-Fabric of any color.
-Needle.
-Thread.
-Filling for our ball. In this case I used super small anime balls, they are special for stuffing pillows, cushions.
-Pencil.
-White paper.
-Step 1: Draw on the white sheet the size of the circle we want for our ball, cut it out, and then we draw it on the fabric to cut out its shape, it would be 2 circles.
.png)
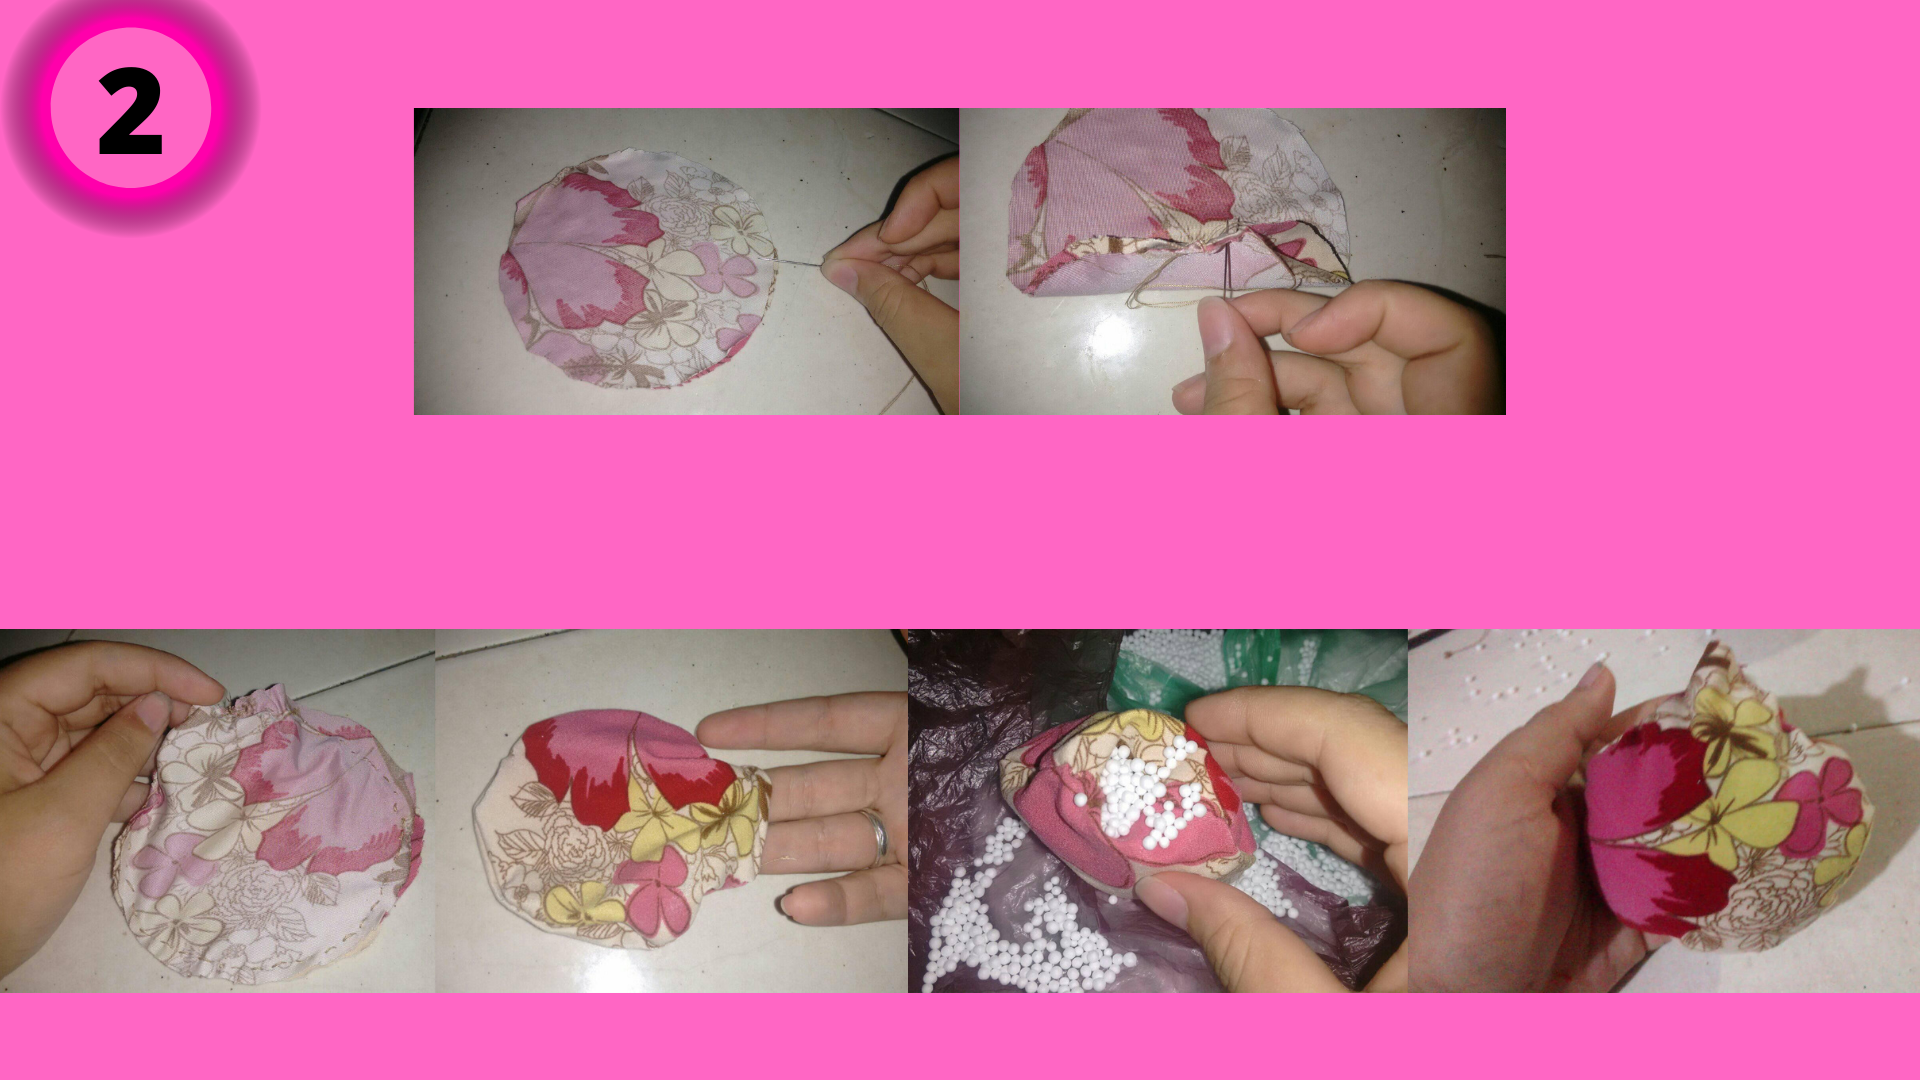
Paso 2: Colócalos Las piezas ya cortadas, derecho con derecho, y comenzamos a coser cuidadosamente, dejando un pequeño agujero por dónde introduciremos el relleno. Procedemos a voltear nuestra pelota, y con cautela comenzamos a rellenarla poco a poco, hasta quedar llena, luego cosemos el agujero que dejamos abierto, y así culminamos con nuestra pelota.
Step 2: Place the pieces already cut, right sides together, and start sewing carefully, leaving a small hole where we will introduce the filling. We proceed to flip our ball, and cautiously begin to fill it little by little, until it is full, then we sew the hole we left open, and so we finish with our ball.
This is my final result, I hope you liked it and useful for any situation that may arise, it helped me a lot, the truth feels great to have this simple but useful little ball, thank you all for reading my post, blessings to all, I love you very much.
All photos are my Authored, and edited from canva.

Hola, que linda creatividad. Ideal en momentos de estres, que sencillo.