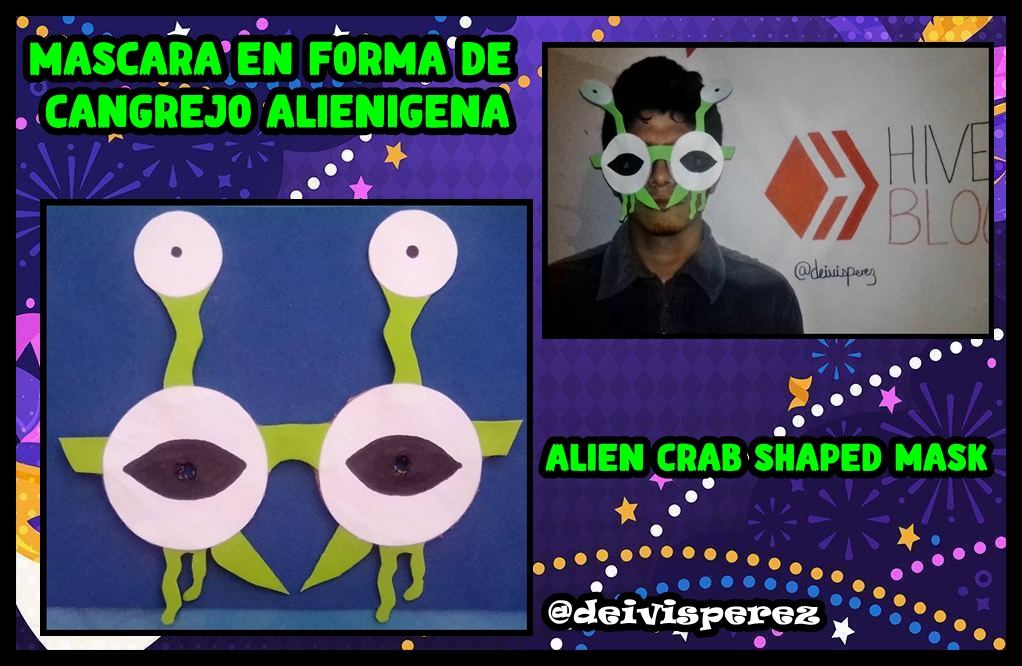
[ESP-ENG] Mascara en forma de cangrejo alienígena | Alien crab shaped mask
Hello my creative people, what do you think if on this day we make a mask that we can use for fun and also as a decorative object. This time I wanted to make a mask inspired by an alien crab, Let's get to work:
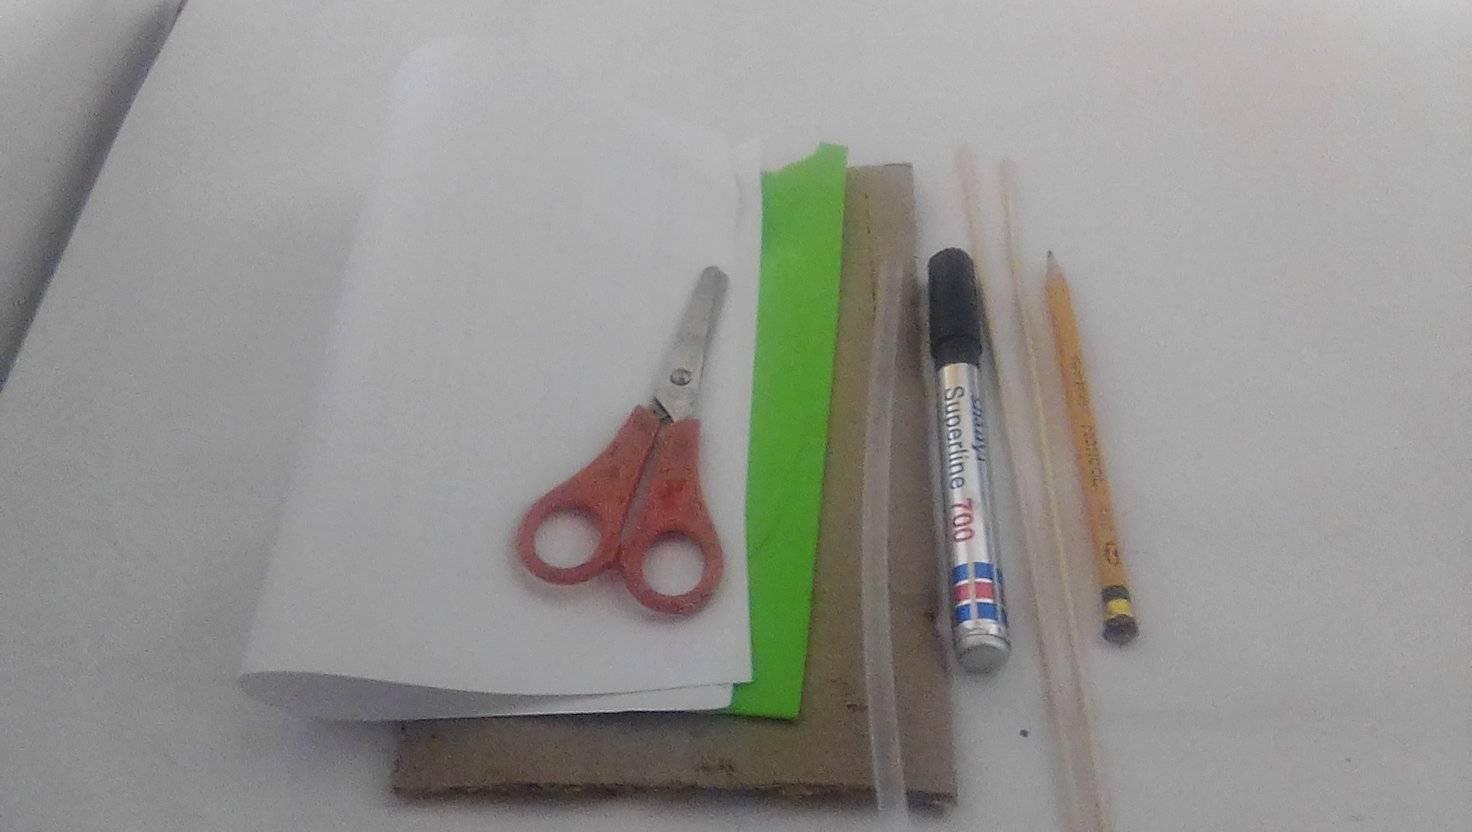
•1 Cartón pequeño.
•1 Foami color verde.
•1 Hoja en blanco (reciclable).
•Tijera.
•Silicón.
•Marcador negro.
•Lápiz crayón.
•Hilo o 2 palillos de altura.
•1 Small cardboard.
•1 Green Foami.
•1 Blank sheet of paper (recyclable).
•Scissors.
•Silicone.
•Black marker.
•Crayon pencil.
•Thread or 2 height sticks.
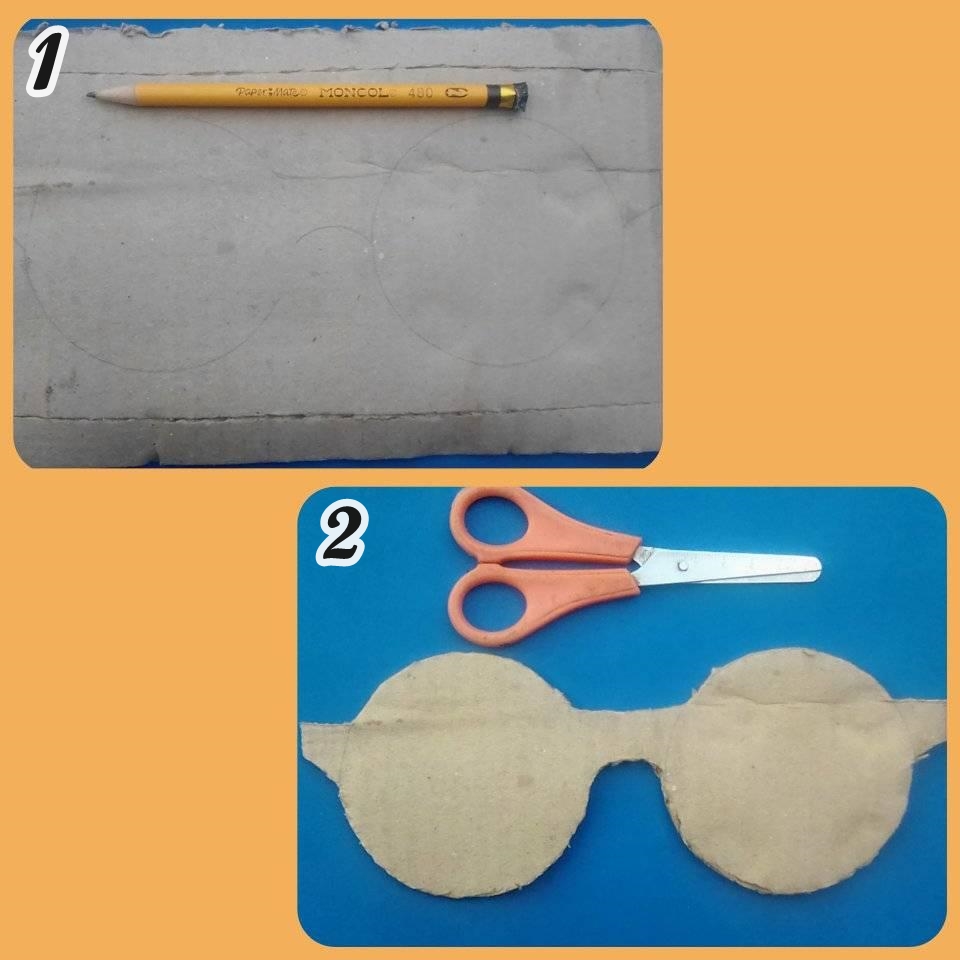
PASO 1: Dibujamos en el cartón la forma de unos lentes a la medida de nuestra preferencia (usar el lápiz crayón).
PASO 2: Recortamos con la ayuda de la tijera la forma que acabamos de dibujar.
STEP 1: Draw on the cardboard the shape of a pair of glasses to the size of your preference (use the crayon pencil).
STEP 2: Cut out with the help of the scissors the shape we just drew.
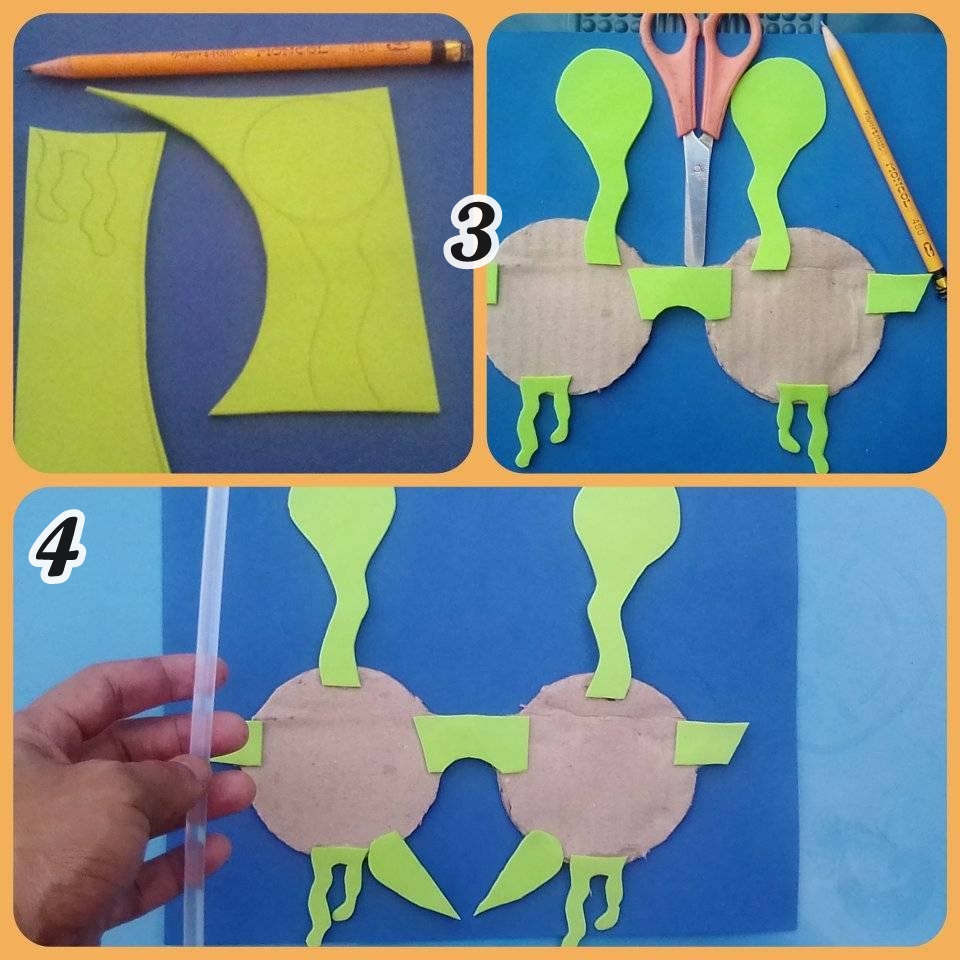
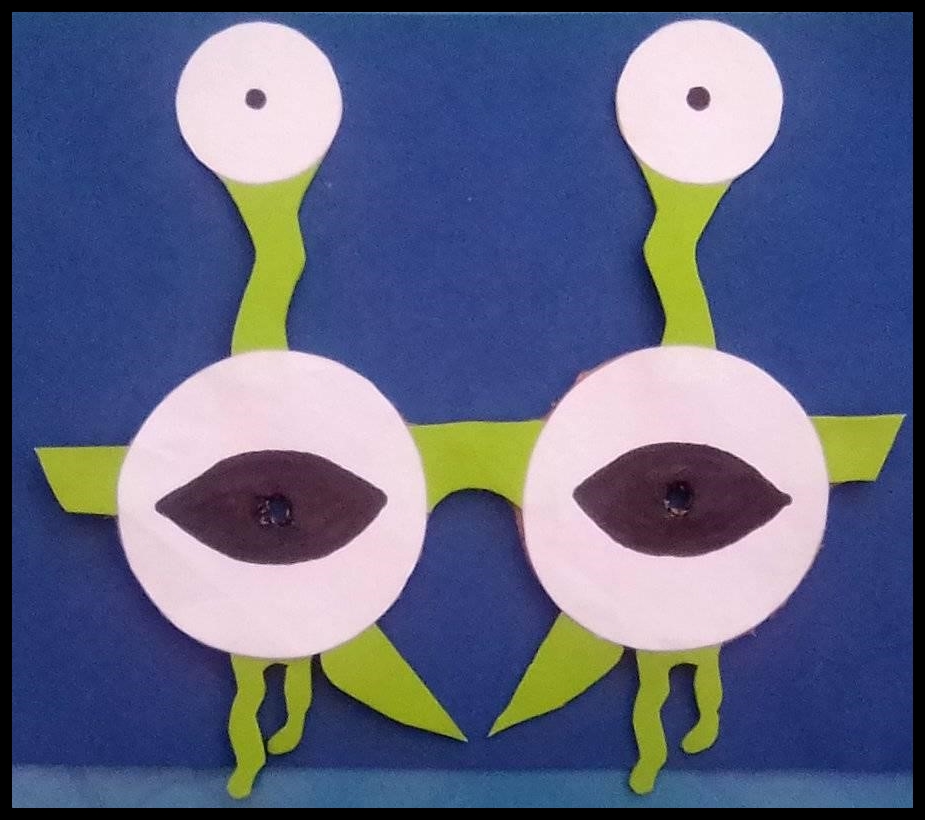
PASO 3: Dibujamos con el lápiz crayón en el foami 2 formas de antenas, 2 formas de algas, ahora cubrimos el cartón en forma de lentes dejando solo la parte de los círculos (estos serán nuestros ojos), luego recortamos.
PASO 4: Fijamos todas las piezas al cartón en forma de lentes (usar el silicón).
STEP 3: We draw with the crayon pencil on the foami 2 shapes of antennas, 2 shapes of algae, now we cover the cardboard in the shape of glasses leaving only the part of the circles (these will be our eyes), then we cut them out.
STEP 4: We fix all the pieces to the cardboard in the shape of lenses (use the silicone).
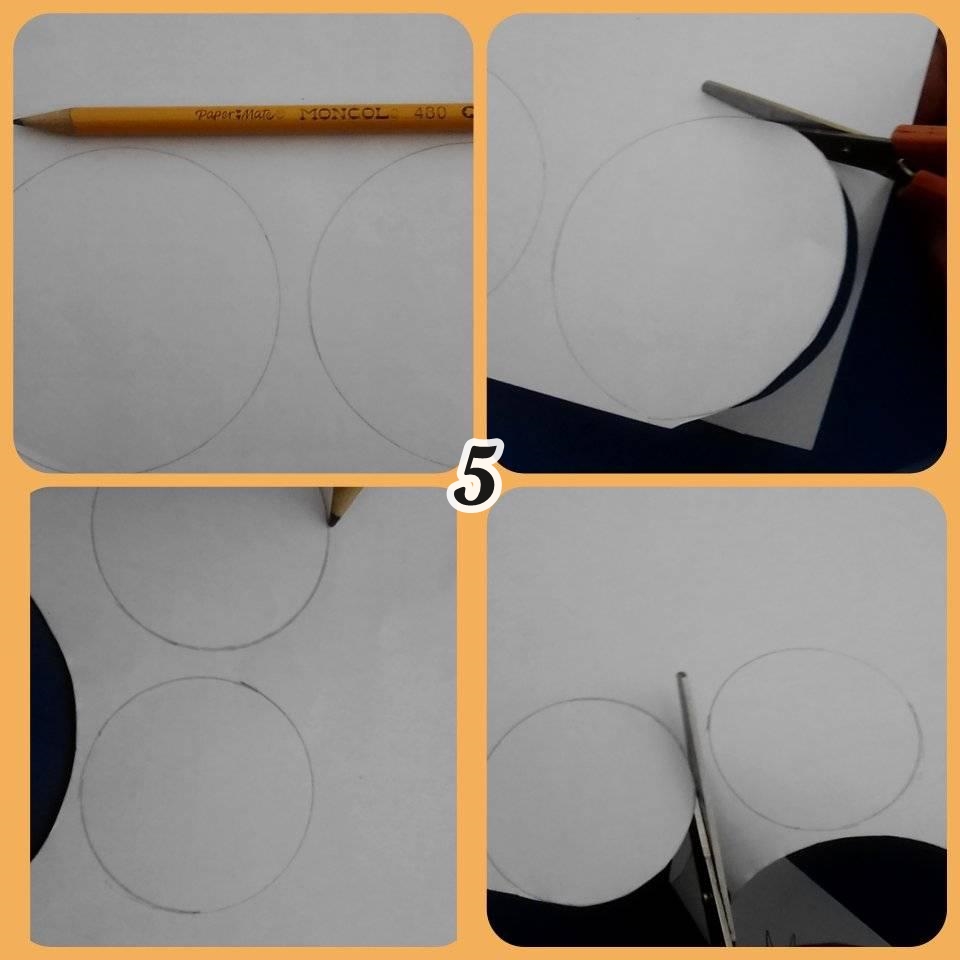
PASO 5: Ahora dibujamos en la hoja blanca usando el lápiz crayón 2 círculos medianos (estos serán para cubrir los círculos grandes del cartón), luego dibujar 2 círculos pequeños (estos serán para la parte superior de las antenas), recortamos usando la tijera.
STEP 5: Now we draw on the white sheet using the crayon pencil 2 medium circles (these will be to cover the large circles on the cardboard), then draw 2 small circles (these will be for the top of the antennae), cut them out using the scissors.
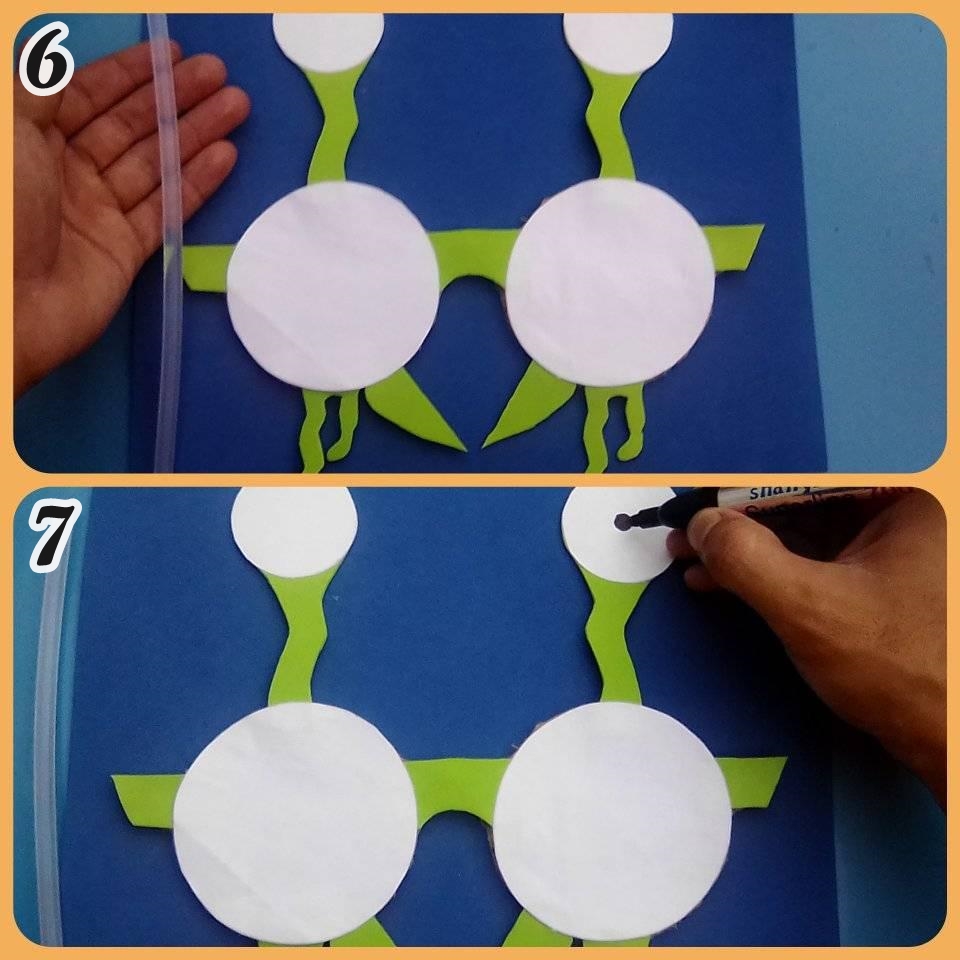
PASO 6: Pegar los 2 círculos medianos al centro del cartón cubriendo los círculos de su mismo tamaño (hacer el mismo proceso, pero con en las antenas).
PASO 7: Dibujar 1 punto negro en medio de cada circulo pequeño de las antenas (usar el marcador negro).
STEP 6: Glue the 2 medium circles to the center of the cardboard covering the circles of the same size (do the same process, but with the antennae).
STEP 7: Draw 1 black dot in the middle of each small circle of the antennae (use the black marker).
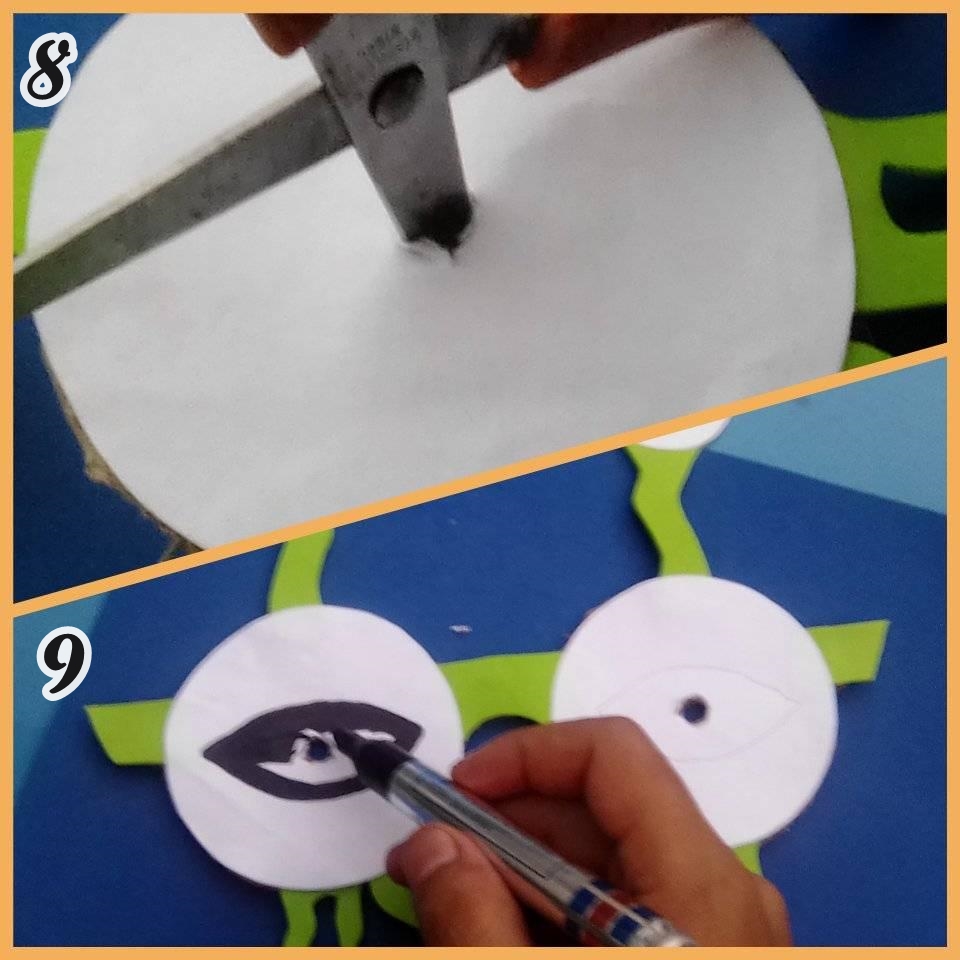
PASO 8: Insertamos una de las puntas de la tijera en medio de los círculos grandes y damos vuelta hasta formar un orificio por donde podamos ver (hacer esto con ambos círculos grandes).
PASO 9: Con el marcador negro dibujamos hasta cubrir completo una forma de ojo humano en medio de los círculos grandes (hacer esto en los 2 círculos grandes).
STEP 8: Insert one end of the scissors in the middle of the large circles and turn until we can see through it (do this with both large circles).
STEP 9: With the black marker we draw a human eye shape in the middle of the large circles (do this on the 2 large circles).
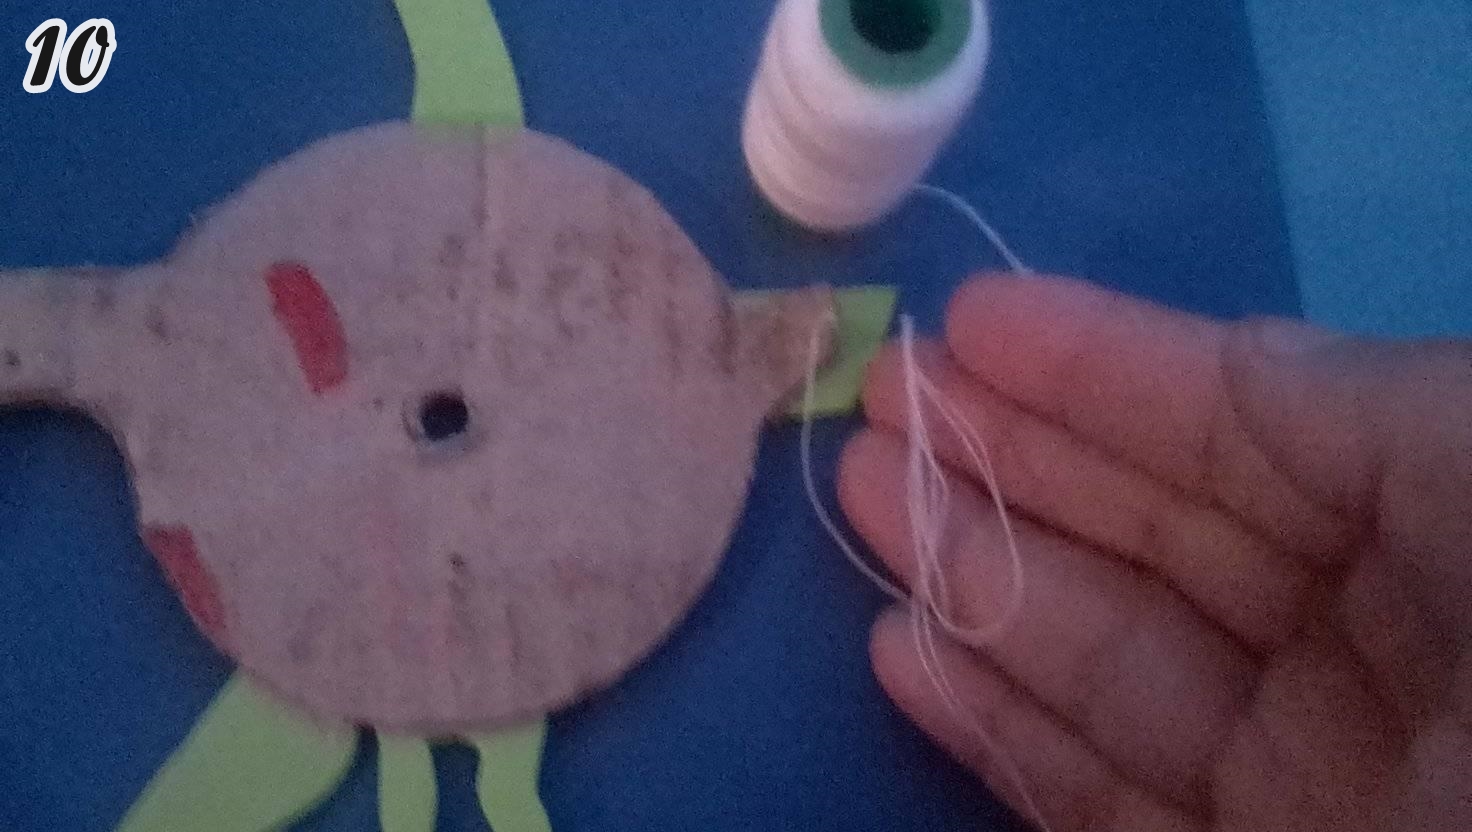
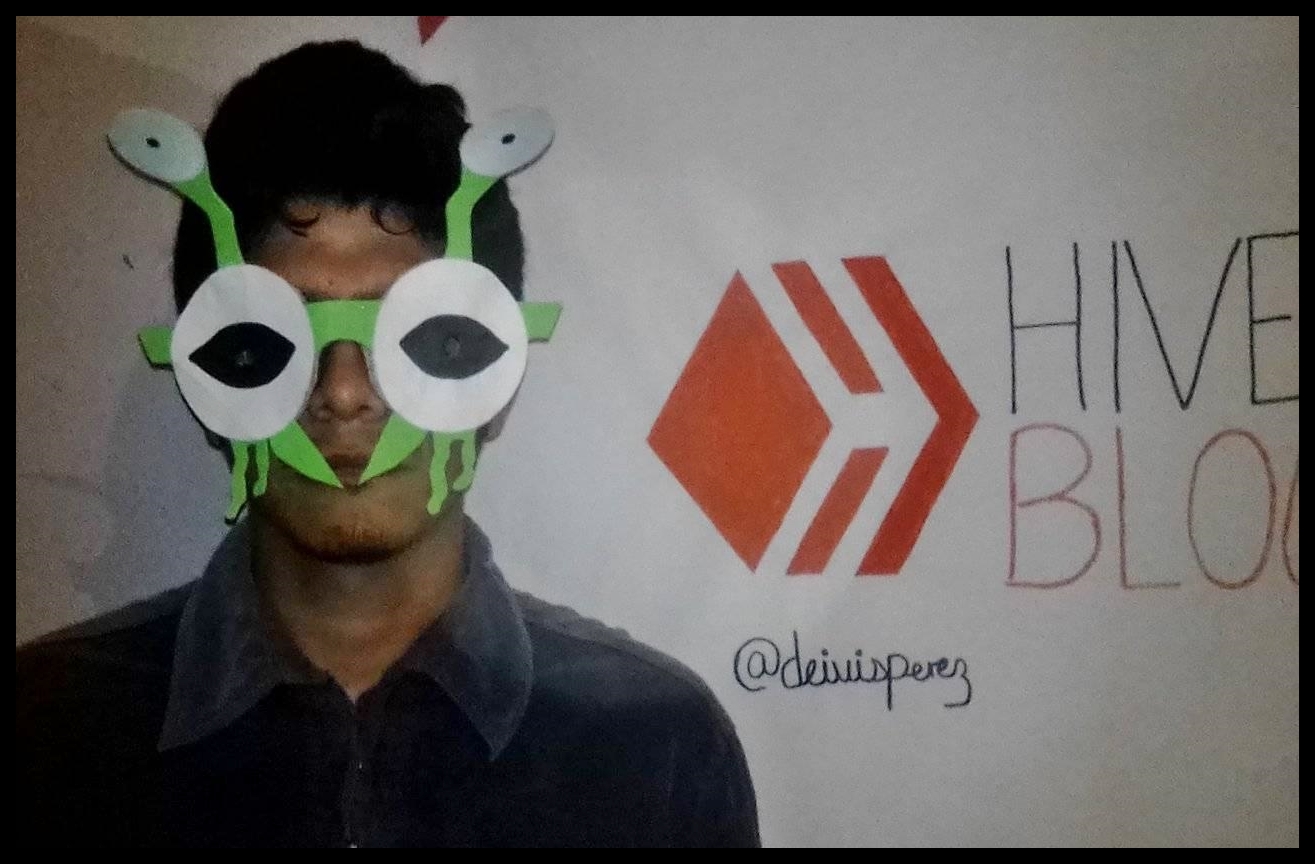
PASO 10: Insertamos el hilo o los palillos de altura “1 en cada extremo” de la máscara (estos serán nuestros sujetadores).
STEP 10: Insert the thread or sticks of height "1 at each end" of the mask (these will be our fasteners).
All photos are my own, edited in PhotoScape, translator used: DeepL.
Congratulations @deivisperez! You have completed the following achievement on the Hive blockchain and have been rewarded with new badge(s) :
Your next payout target is 100 HP.
The unit is Hive Power equivalent because your rewards can be split into HP and HBD
You can view your badges on your board and compare yourself to others in the Ranking
If you no longer want to receive notifications, reply to this comment with the word
STOPSupport the HiveBuzz project. Vote for our proposal!